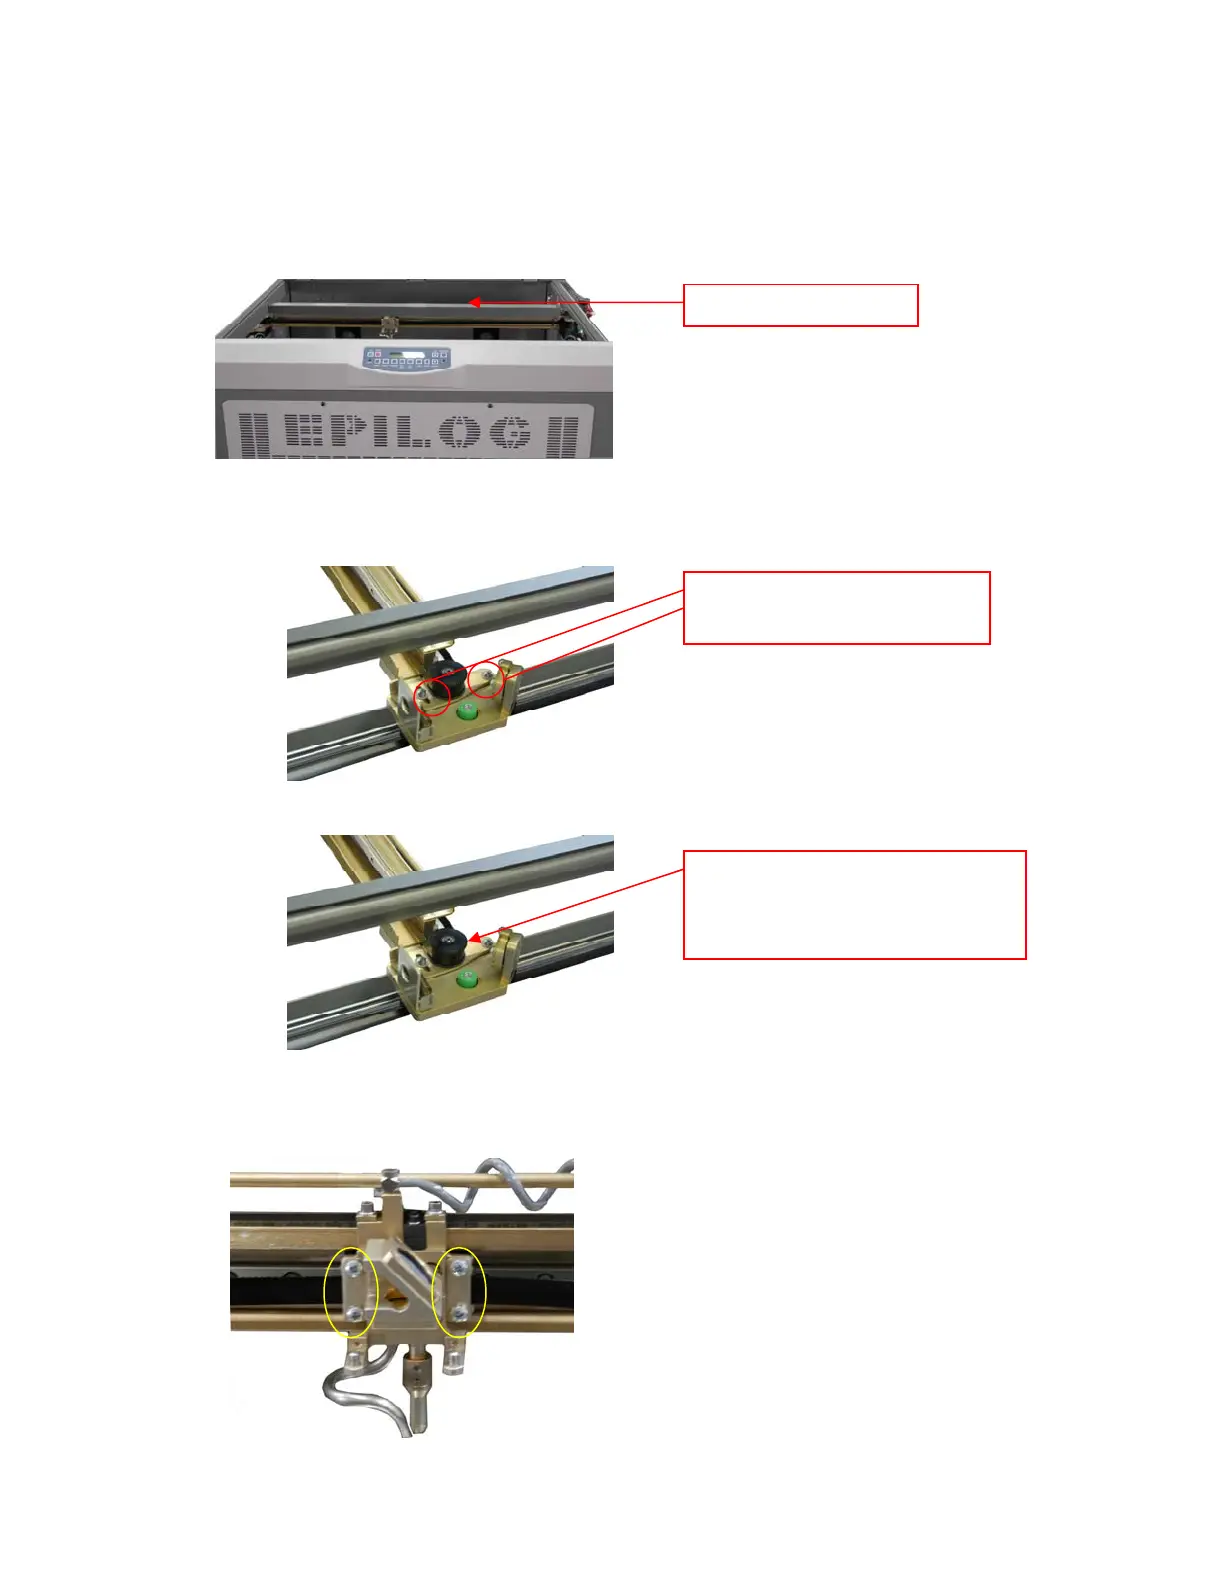
4. With a Philips head screw driver, remove the X-beam
cover. The X-beam cover contains two screws in the
front and five screws on the back, loosen these
screws, however, it is not necessary to remove them.
eam cover
5. Slacken the belt.
a. On the left side of the X-beam there is a pulley
system. Loosen the two screws on the pulley
tensioning system.
Loosen these two
screws.
b. Press the black pulley into the machine (to the
right).
Press on the black
spindle to slacken
the belt
c. Still pressing on the black pulley, tighten the
two screws on the pulley tensioning system.
6. Locate the lens assembly. Remove the four screws and
remove the plates to detach the ends of the belt.

 Loading...


