EasyManuals Logo
Home>Epilog Laser>Engraver>Helix

Epilog Laser Helix User Manual

Epilog Laser Helix
5 pages
To Next Page IconTo Next Page
To Previous Page IconTo Previous Page
Page #3 background imageLoading...
Page #3 background image
7. Slowly pull one end of the belt out of the lens
assembly.
Re-Installing the Belt
8. Replacing the belt on the Helix is tricky. On the
right side of the X-beam, the belt must go around two
pulleys.
a. Connect the left end of the belt, with the
grooves toward the inside of the machine to the
right side of the lens assembly. Screw in the
plate.
b. Pull the belt to the right side of the X-beam.
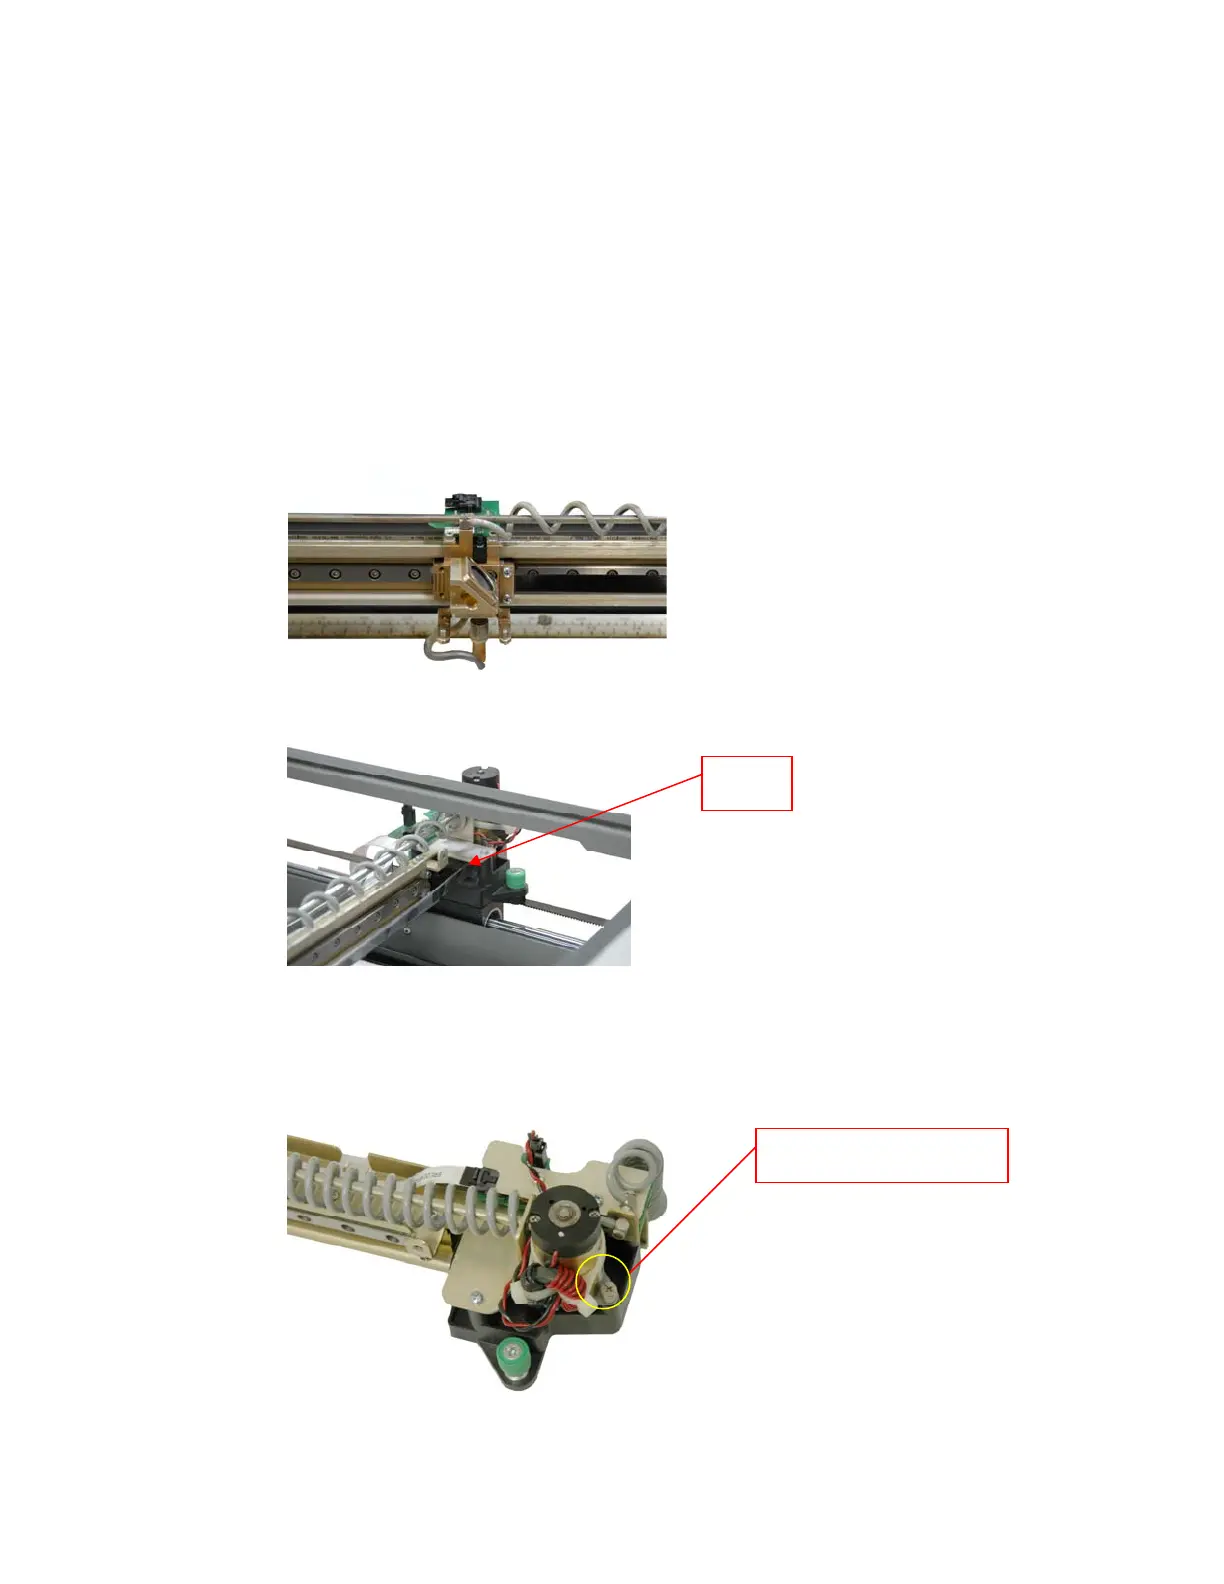
B
elt
c. Unscrew the three captive screws around the
motor.
C
aptive Screw
d. Lift the motor out of the bracket

Other manuals for Epilog Laser Helix

Questions and Answers:

Question and Answer IconNeed help?

Do you have a question about the Epilog Laser Helix and is the answer not in the manual?

Epilog Laser Helix Specifications

General IconGeneral
BrandEpilog Laser
ModelHelix
CategoryEngraver
LanguageEnglish

Related product manuals