9 For Professional Technical Support call 1-844-241-5521
Shallow Well Installation (continued)
9
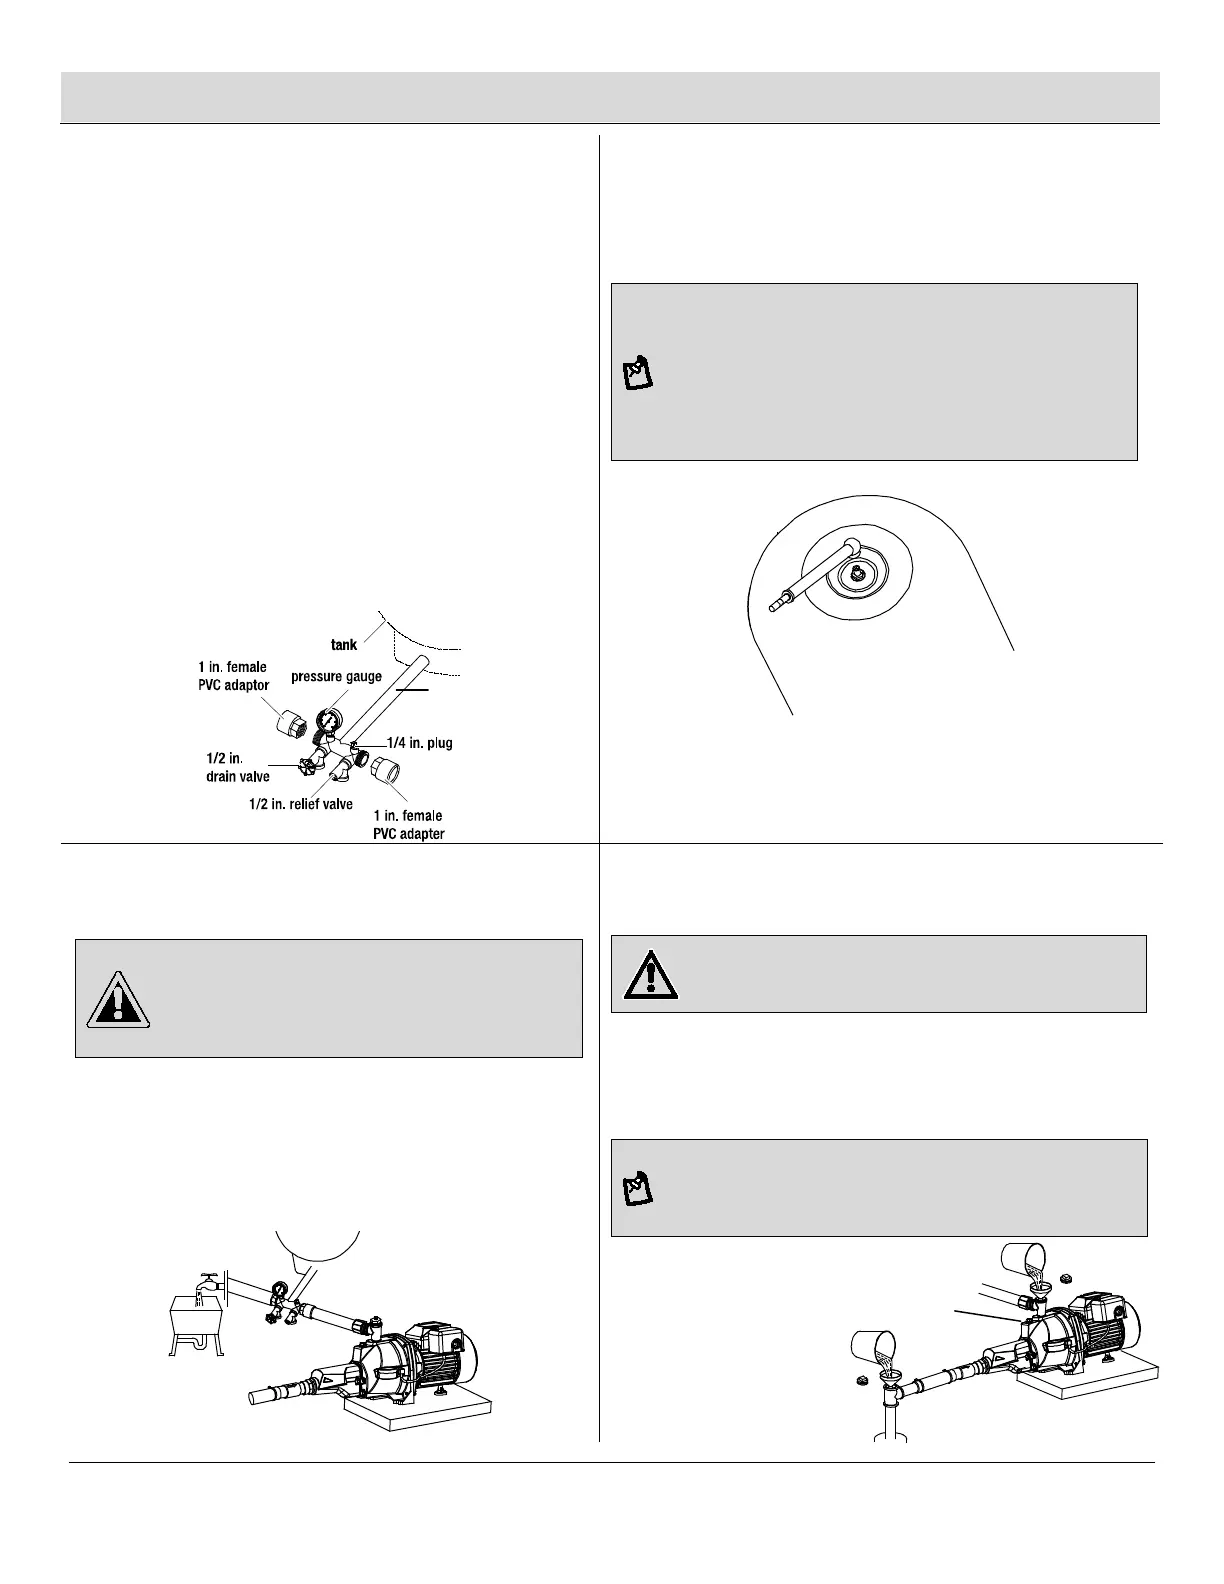
Connecting a (M) 10 in. tank tee to
the pressure tank (tank tee size may
vary based on tank size)
10
Checking the pressure in the tank
Wrap all threads on tank tee with thread tape.
In order for the pump and the pressure tank (sold separately) to
operate properly, the pressure tank must be drained of all
water BEFORE INSTALLING TO THE PUMP.
Thread a (M) 10 in. tank tee (sold separately) or recommended
size based on pressure tank size.
On the top of the tank tee that faces the pump system, plug the
outlet with a (N) 1/4 in. plug (sold separately).
On the oposite end of the tank tee install a (O) pressure gauge
(sold separately) onto the outlet of the tank tee.
On each side inlet of the tank tee, thread a (C) 1 in. female PVC
adaptor.
On the front of the tank tee that has the 1/4 in. plug, thread a
(D) 1/2 in. relief valve (sold separately).
On the front of the tank tee that has the pressure guage, thread
a (G) 1/2 in. drain valve (sold separately).
Air pressure in the tank must be 2 psi lower than the "cut-in" of
the pressure switch.
NOTE: The pump has a 30/50 PSI pressure switch,
which means the "cut-in" is 30 PSI; therefore, the tank
needs to be set to 28 PSI. To check the pressure in the
tank, use a tire pressure gauge (not included). If the tank
pre-charged less than 28 PSI, re-charge air to the tank to
28 PSI with a tire pump or air compressor. If the tank pre-
charged over 28 PSI, bleed out some air to 28 PSI.
11
Connecting the piping from the pump
to the tank system
12
Priming the pump and rigid pipe
CAUTION: Never install a shut-off valve between the
pump and the tank, as this can cause excessive friction
loss and can damage the pressure switch and/or pump.
If necessary, only install a fully open gate valve (sold
separately).
Using PVC purple primer and PVC cement, attach a section of 1
in. PVC pipe (sold separately) as needed to connect the 1 in.
male PVC adapter on the discharge tee to the 1 in. female PVC
adapter on the tank tee.
Attach another section of 1 in. PVC pipe (sold separately) as
needed to connect the other 1 in. female PVC adapter on the
tank tee to the water system from the house.
WARNING: If the pump’s level is lower than the suction
pipe, the air may trap in the pipe. The pump may not work
properly.
To prime, remove both: a. The two plugs from the top of the two
discharge tees (water will be filled in here), and; b. The air plug in
front of the discharge tee (this is to allow air to vent out while
priming). Fill the two discharge tees with water until water
overflows.
NOTE: It may take some time to fully fill the pipes and the
pump completely. Keep watching the discharge tee water level
and make sure the water level is stable and no air bubbles come
out from the discharge tee.
Wrap the two discharge
tee plugs and air plug
threads with thread tape
and re-attach to the
pump. Tighten with a
wrench.
(O)
(C)
(G)
(D)
(C)
(N)
(M) 10 in. tank tee
air plug
 Loading...