5 421502es Ver. 1.7 6/00
4.9 Real-Time/Elapsed Timer Clock
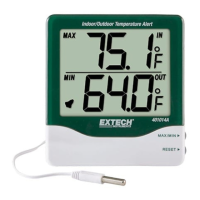
The Timer (third display on bottom right of LCD) displays Clock or Elapsed Time and is a
convenient way to see when Min and Max temperatures occurred. Each time new Min or
Max temperature values are stored, the timer/clock value for the that Max or Min
temperature is also stored for later recall. Real time can be entered by setting the meter's
clock to the current time (set Hours:Mins display using the MIN/SEC key). To use the
clock as an elapsed timer, first reset the clock to zero in Set Mode (see next section). The
timer will begin counting as soon as it is set in SET mode.
4.10 SET Mode (for Relative Mode, HI/LO Alarm setpoints, and Clock/Timer settings)
4.10.1 Manually setting the Relative Values in SET Mode
Press the "SET" key once and the display will go to all dashes "======". Enter the
relative value using the meter's keys which double as numeric keys. USE LEADING
ZEROS SINCE DISPLAY IS 5-DIGITS. Once the Relative value is entered, press the
ENTER key FOUR times to return to normal operation. Meter will now display Actual
Temperature minus Relative Temperature
4.10.2 Setting the Timer/Clock in SET Mode
Press the "SET" key and then the "ENTER" key. Next key in the Hours, Minutes, and
Seconds (HH:MM:SS) via the overlay numeric keys. When editing is complete, the clock
will begin counting. Pr ess the "ENTER" key three times to return to normal meter
operation. Now use the SEC/MIN key to toggle between Hours/Minutes and
Minutes/Seconds display.
4.10.3 Alarm HI/LO Limit Programming in SET Mode
Press the "SET" key once and then the "ENTER" key tw ice. Key in the desired HI Alarm
value (high temperature at which the meter will audibly alert the user) via the overlay
numeric keys. Now press the "ENTER" key once. Next, key in the LO Alarm Limit value
(low temperature at which the meter audibly alerts the user). Press the ENTER key once
to return to normal operation. After exiting the SET mode, press the "HI/LO Limits" key
to activate the Alarm, the audio icon on the LCD tells you that the Alarm is now armed
and will alert you if HI/LO limits are encountered.
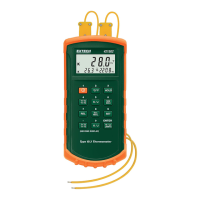
4.11 Second Display Input Selection "T1, T2 or T1-T2"
Pressing the "T1 T2 / T1 - T2" key (the key with the minus sign printed over it) permits the
user to select the thermocouple input configuration which will be reflected on the meter's
Second Display (lower left LCD). Choose "T1 or T2" to show either thermocouple input 1
or 2 respectively. Select "T1 - T2" to display the difference between the two
thermocouple input temperatures. In T1 - T2 mode, a reading of zero indicates that both
thermocouples are reading the same temperature.
4.12 "K/J" Key (Selecting theThermocouple Type for the T2 Main Display)
For the type of thermocouple that is plugged into the T2 terminal on the meter, select K or
J (to match input) by toggling the "K/J" key. The meter remembers this selection upon
power OFF.
4.13 HI/LO Alarm Limits Mode
Press the "HI/LO Limits" key to arm the HI/LO Alarms (the audio speaker icon will appear
on the right side of the LCD). When the actual temperature meets or exceeds the user
programmed temperature limits a continuous alert tone will be heard. To disarm or silence
a tripped Alarm press the HI/LO Limit key again (the audio display icon will disappear).
 Loading...