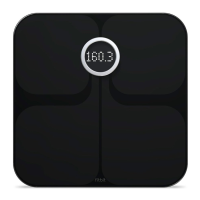
Setting up your Fitbit Aria
Set up Fitbit Aria using a phone or tablet over Wi-Fi or with a Wi-Fi-enabled
computer.
Networking Requirements
The Fitbit Aria connects directly to your home’s wireless network and supports the
following network configurations:
Wireless 802.11b standard
WEP / WPA / WPA2 personal security
Automatic (DHCP) IP setup (static IP configuration not supported)
Aria requires an 802.11b-compatible network to connect and sync your scale data to
your Fitbit dashboard.
Setting up your Aria
Follow the steps below to set up your Fitbit Aria. If you prefer to watch a video, visit
https://www.youtube.com/watch?v=D7Q5FvHHPJo.
1. On your mobile device, go to http://www.fitbit.com/scale/setup/start.
2. Tap Get Started.
3. Log in to your existing Fitbit.com account or create a new one
4. Name your scale and insert your initials, then tap Continue.
5. Follow the onscreen instructions to put your scale into setup mode, then tap
Continue.
6. Follow the onscreen instructions to connect your mobile device to the wireless
network that is broadcasting from your Aria. To do this, you will need to leave
the browser window and go to your smartphone's Wi-Fi settings. In your list of
available wireless networks, look for the word “Aria” followed by a series of six
letters and numbers, and connect to this option.
7. When you’ve connected to your Aria’s network, return to your browser and
click I’m connected. The setup software will show all visible networks in range.
8. Select your network from the list.
9. If your network is password-protected, enter your password in the box to the
right and click Connect.
10. Enter the wireless network password and tap Submit. When you’ve submitted
the correct password, your scale will save the network credentials, join your
Wi-Fi network, link to your Fitbit.com dashboard, and show a checkmark once
linking is successful.
11. Ensure that your mobile device has switched back to your home network and
tap I’m Connected!

 Loading...