EN-US English
QUICK STEPS
1. Register K1 to activate the 2–10 Year Warranty extension.
2. Long press the Power button (center) to switch ON or OFF.
3. Scan a test area and view the camera image on the display.
4. Use the ‘center spot’ to target an area. View the spot tempera-
ture on the display (lower right).
5. Short press the Flashlight button to control the Flashlight.
6. Short press the MENU button to open the menu system.
7. Use the trigger to capture images.
8. To transfer images, connect to a PC via USB.
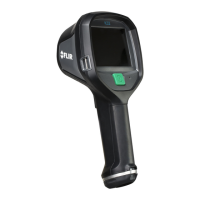
CAMERA PARTS
See Figure 1, Camera Parts, page 1.
1. Display area
2. Return button (back up in menu)
3. Flashlight button (short presses)
4. Up/Down & Power (long press)/Menu (short press) buttons
5. Lanyard post
6. Accessory mount
7. 160 x 120 pixel Lepton® IR camera
8. USB-C jack
9. Flashlight (low/high intensity)
10. 2M pixel visible spectrum digital camera
11. Image capture trigger (also used to exit the menu system)
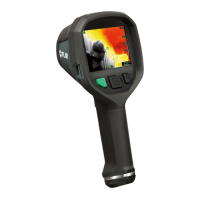
DISPLAY DESCRIPTION
See Figure 2, Display, page 1.
1. Thermal MSX® camera image
2. Low Sensitivity range indicator
3. Center spot
4. Temperature range bar graph
5. Temperature of targeted spot
6. Date and time
7. Battery status indicators
8. USB icon (when connected)
9. Main menu
RECHARGEABLE BATTERY
To charge, connect to an AC wall charger (5V/1A) via USB-C cable.
A full charge requires 6 hours. If the K1 is to be stored > 3 months,
#NAS100022; r. AB/58581/58581; mul
2
 Loading...