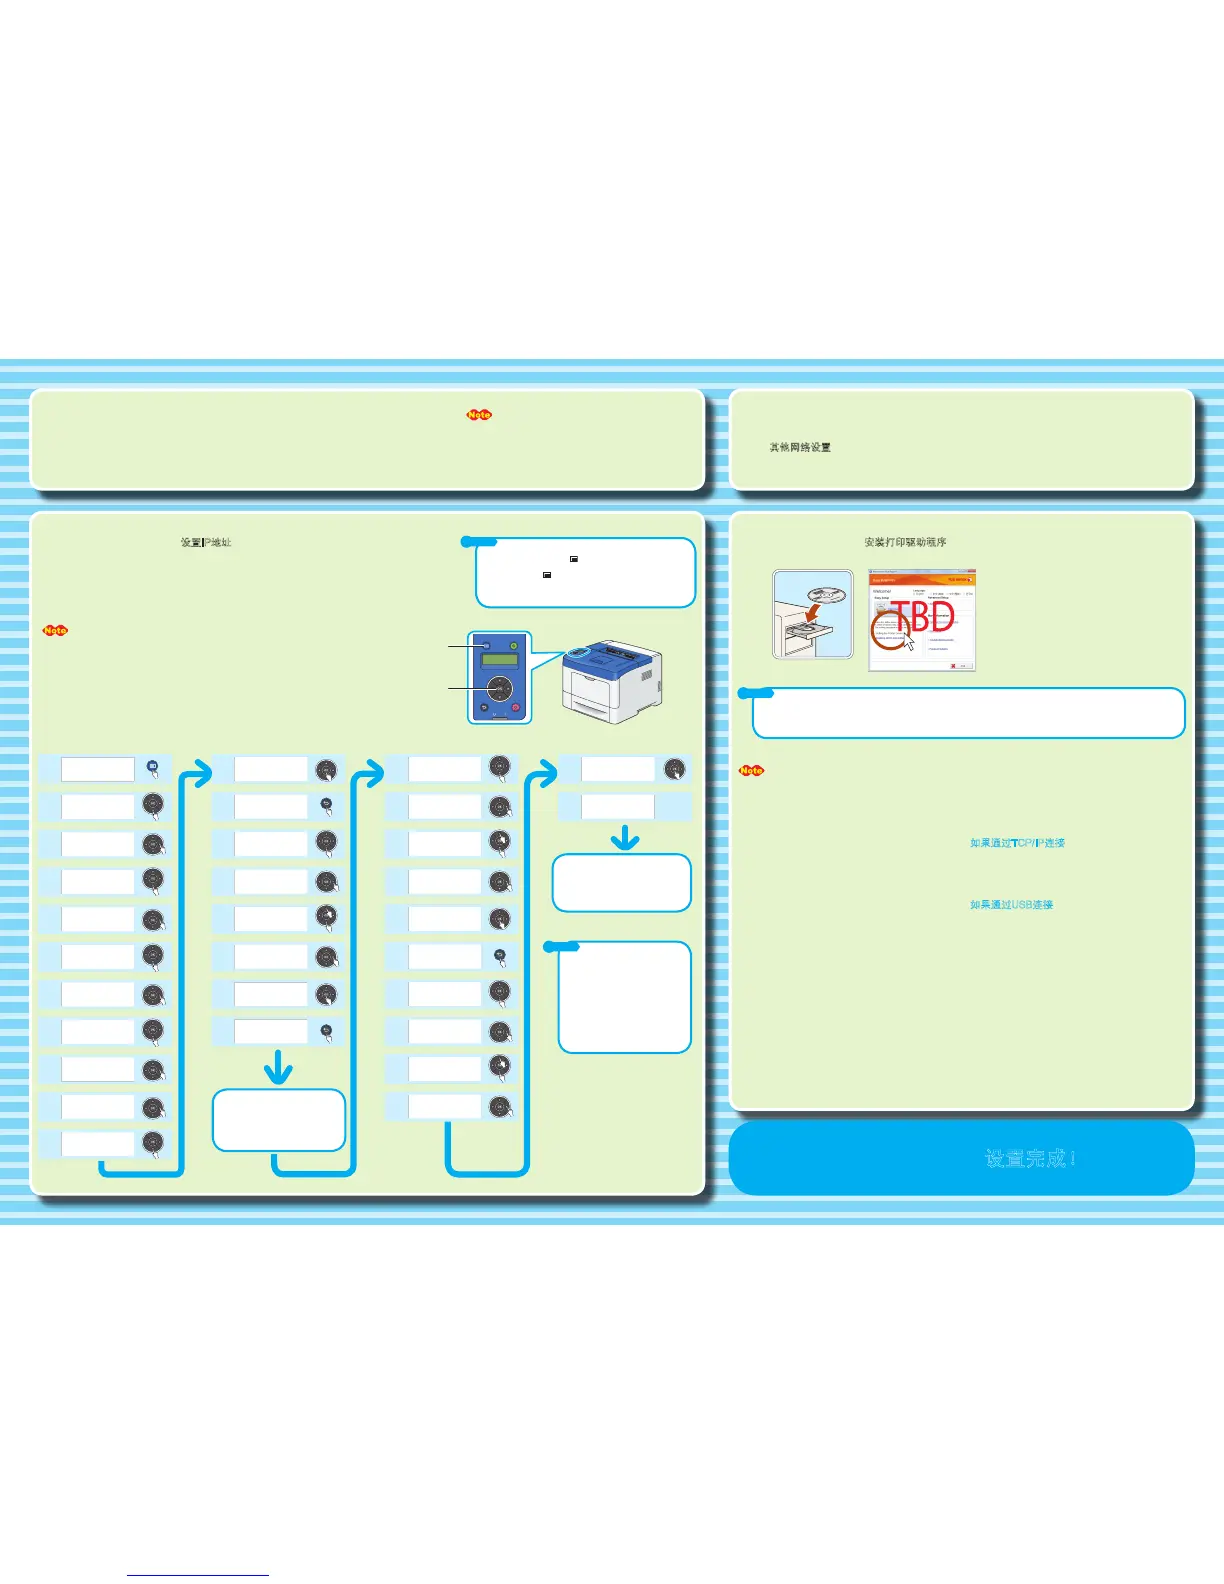
地址,可打印一份设置列
表。有关如何打印设置列表,请参
阅《使用说明书》。
设置完成。关闭打印机并重新打开。
菜单
When connecting via a wired network, go to step 7. When connecting via a USB cable, go to step 9.
When connecting via wireless, refer to User Guide to setup wireless settings, and then go to step 9.
• For wireless connection, wireless printer adapter (sold separately) is required.
• The wireless printer adapter is not supplied in some regions.
Set the IP Address
This step explains how to set an IPv4 address on the operator panel. For information on how to set an IPv6
address, refer to the User Guide included on the Driver CD Kit.
The IP address and gateway address used here are examples.
To get your IP address, talk to your network administrator.
To return to 1, press the
(Menu) button.
For information on other network settings, refer to the CD-ROM Documentation
(HTML) included on the Driver CD Kit:
Driver CD Kit top menu > [Documentation] tab > [CD-ROM Documentation (HTML)]
Install Print Drivers
If the above screen does not appear automatically, double-click eznavi.exe in the SetupVideo folder included on the Driver CD Kit.
When connecting via USB
1. Click [Installing Driver and Software].
2. Select the [Documentation] tab.
3. Select [CD-ROM Documentation (HTML)].
4. Select [DocuPrint P455 d] > [Driver Installation] >
[Installing a Printer Connected via USB], and follow the
instructions.
For information on how to install PostScript driver on a Macintosh computer, see the PostScript User Guide.
Setup is Complete !
When connecting via TCP/IP
1. Click [Installing Driver and Software].
2. Follow the instructions displayed on the installer screen.
Do not select anything in New Hardware Found
Wizard that appears when the printer and your
computer are connected via a USB cable.
Set the subnet mask and gateway
address.
Set up is complete. Turn the printer
off and on.
To verify the IP address, print a list
of your setting.
Refer to the User Guide on how to
print it.
Menu
OK