FULBAT - www.fulbat.com 3
Charge current 0,75A
Battery Capacity: charging 2-20Ah
Battery Capacity: maintaining 2-30Ah
ELECTRICAL PARTS
Delivered with:
• Input: 50cm
• Output: 150cm
• Short cable with alligator: 30cm
• Short cable with ring terminal: 30cm
ENVIRONMENTAL CHARACTERISTICS
• Operating Temperature: 0 to 45°C
• Storage Temperature: -25 to 85°C
• Operating Humidity Range: 0 to 70% RH
• Cooling: Passive/Natural
TECHNICAL SPECIFICATIONS
Part number FULLOAD 750
Type Automatic
Approvals CE
Input voltage range 100-240V
Input frequency 50/60Hz
Output 0.75A @ 6/12V
Size (LxWxH) in mm 80x50x28
Weight 0.2Kg
CHARGING INSTRUCTIONS
STEP 1 - Pre charge check & electrolyte level check
•
Check the battery electrolyte level (not required on sealed & main-
tenance free batteries).
•
If necessary, remove the vent caps and add distilled water so the
levels are halfway between the upper and lower ll lines.
•
Check the voltage output switch on the charger and make sure it’s
on the correct voltage.
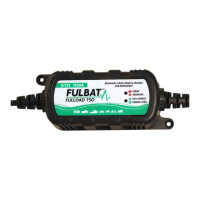
STEP 2 - Connecting the battery charger to your battery
• If the battery is out of the vehicle:
•
Connect the red lead from the charger to the positive (+) battery
terminal.
• Connect the black lead from the charger to the negative (-) battery
terminal.
BLAC
•
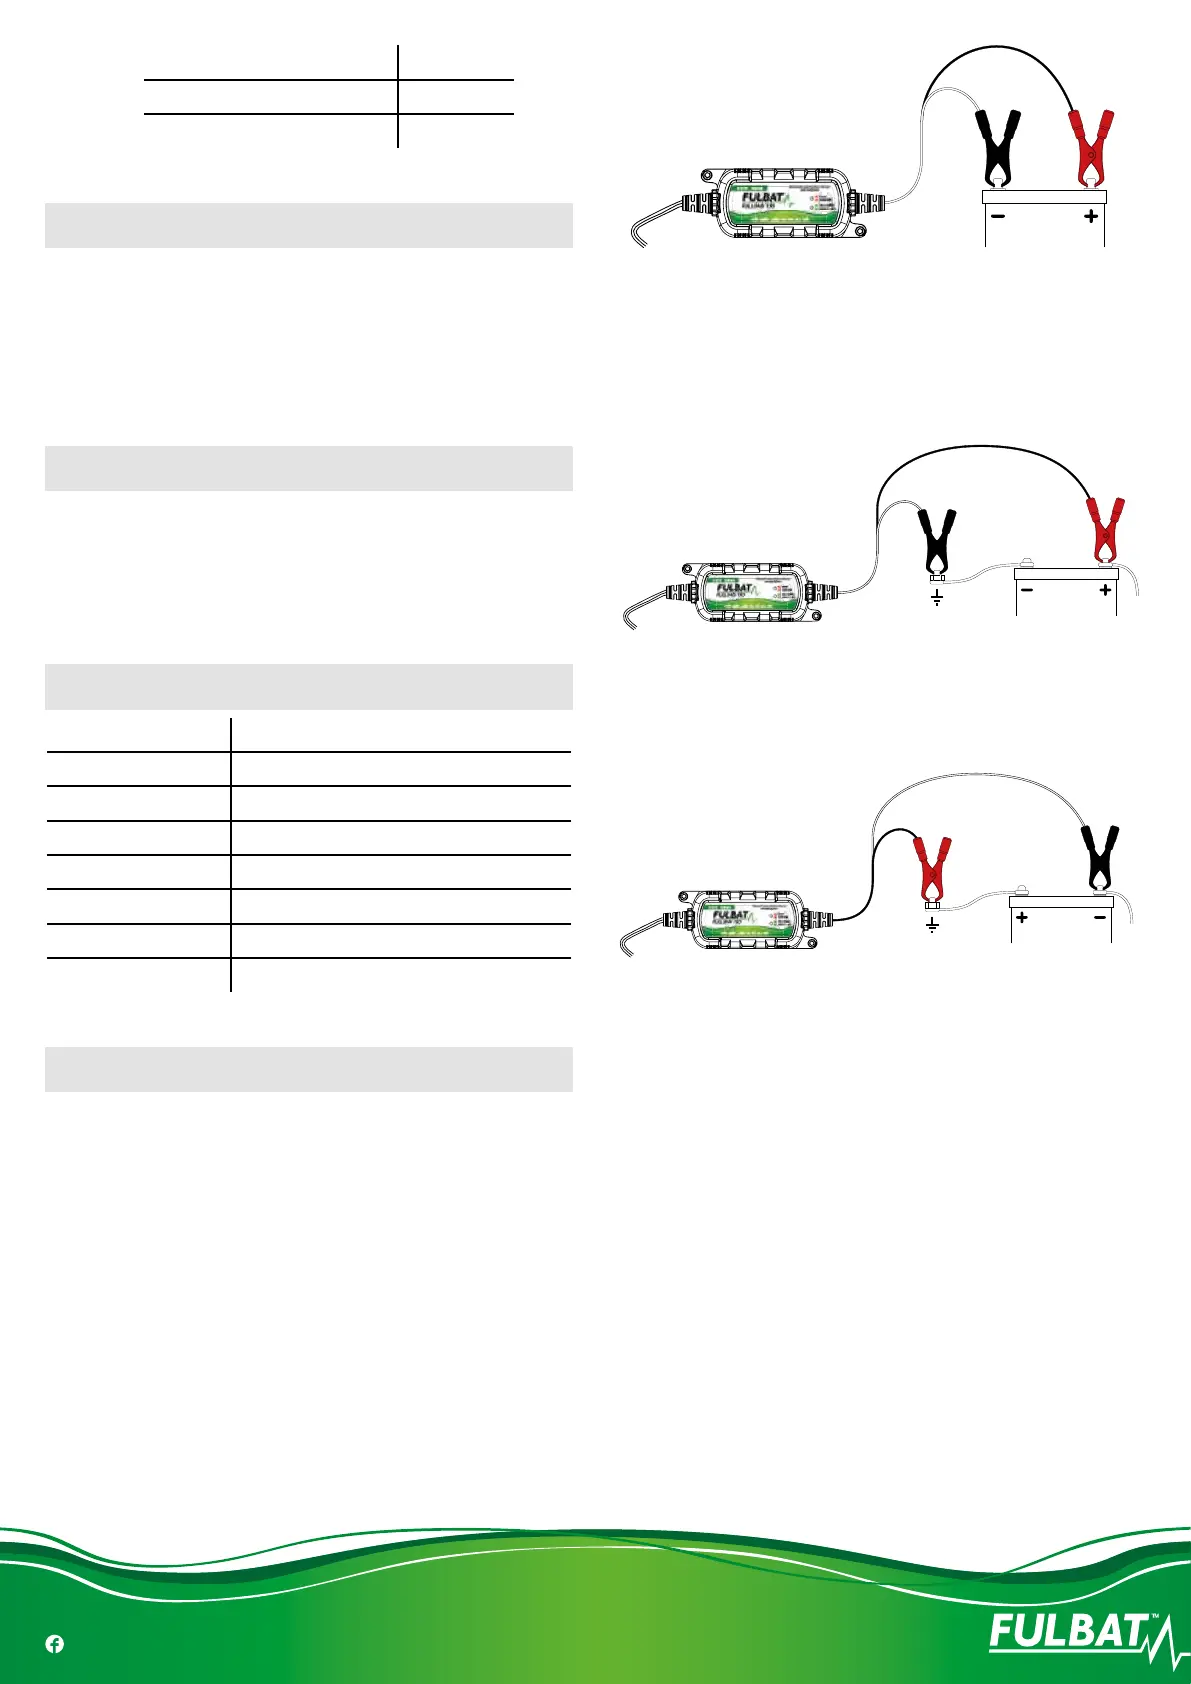
If the battery is still in the vehicle, determine if the vehicle is positively
(+) or negatively (-) earthed.
•
If negatively earthed (most common) – rst connect the red (+)
battery charger lead to the positive (+) battery post and then connect
the black (-) battery charger lead to the vehicle’s chassis and away
from the fuel line.
BLAC
ED
•
If positively earthed – First connect the black (-) battery charger lead
to the negative (-) battery post and then connect the red (+) battery
charger lead to the vehicle’s chassis and far away from the fuel line.
RE
STEP 3 - Connect the battery charger to mains power (240Vac)
• Connect the battery charger to a 240VAC mains powered socket.
• Turn on the 240VAC mains power.
•
The charger will automatically start when AC power is connected
and switched on. (note: If the fault indicator LED illuminates red,
please check your connections as it’s likely that the positive and
negative Leads are reversed. Refer to trouble shooting page for
further information).
STEP 4 - Disconnecting the battery charger from battery
• If the battery is out of the vehicle.
- Switch OFF and remove the AC power socket from the outlet.
- Remove the black lead and then the red lead.
- Check electrolyte levels if possible.
(As they may need topping up with distilled water after charging).
• If the battery is in the vehicle.
- Switch OFF and remove the AC power socket from the outlet.
- Remove the lead from the vehicle chassis.
- Remove the lead from the battery.
 Loading...