4. See figure step 1, unroll the wire towards the next plastic post (B) and place the wire in the
wire holder, at the same height, repeat this until the end of the fence.
At the end, insert the wire through the ring insulator eye on the end post (B2) and insert the
wire to the upper ring insulator for the next wire height. Follow the method and direction
according to the arrows in the image.
If you use the plastic post as the end post, hook the wire into the wire holder and bring the
wire to the upper wire holder (B3) and then to the adjacent post again.
Do not cut the wire but guide the wire through the ring insulator or wire holder to the next wire
height and then, via the plastic posts, back to the starting post, continue this process for each
post and next wire height.
Hook the wire through a loop attached with a Vidoflex wire connector in the last insulator or
wire holder, do not tighten the wire too much here, hand tight is sufficient.
Your fence is now ready to be connected to the electric fence device.
Step 4 – Installation of the electric fence device
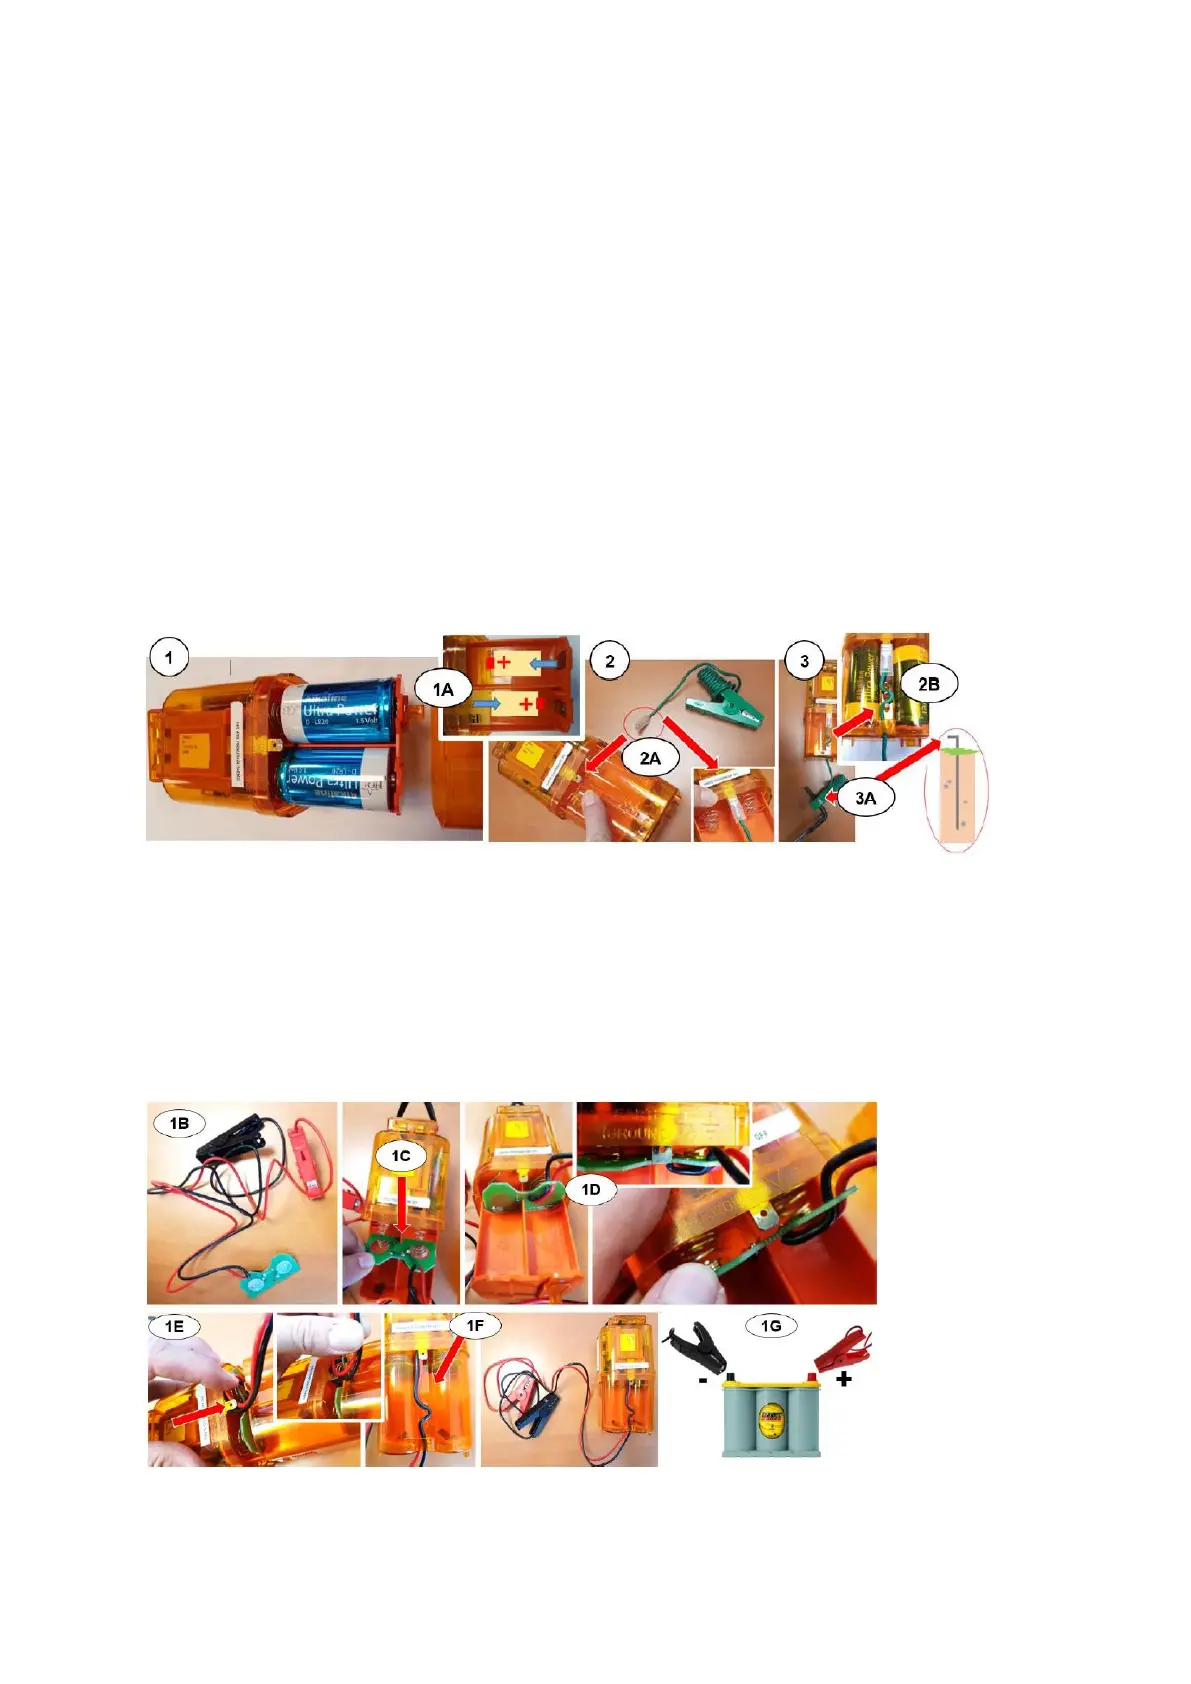
1. Inserting the batteries
Open the battery housing of the electric fence device and place 6 1.5 V type D Alkaline batteries (not
supplied) according to the instructions (1A) in the housing.
Put the battery housing back.
It is also possible to connect the B10 to a 12Volt battery, for which a separately ordered 12 V Battery
adapter kit (1B) is required (item no. 004747).
Connecting a 12Volt battery (optional)
Follow steps 1C to 1G to install the 12Volt battery adapter kit, remove any existing batteries from the
B10 and place the adapter kit in the designated slot (1C) of the battery housing.

 Loading...