11
GB
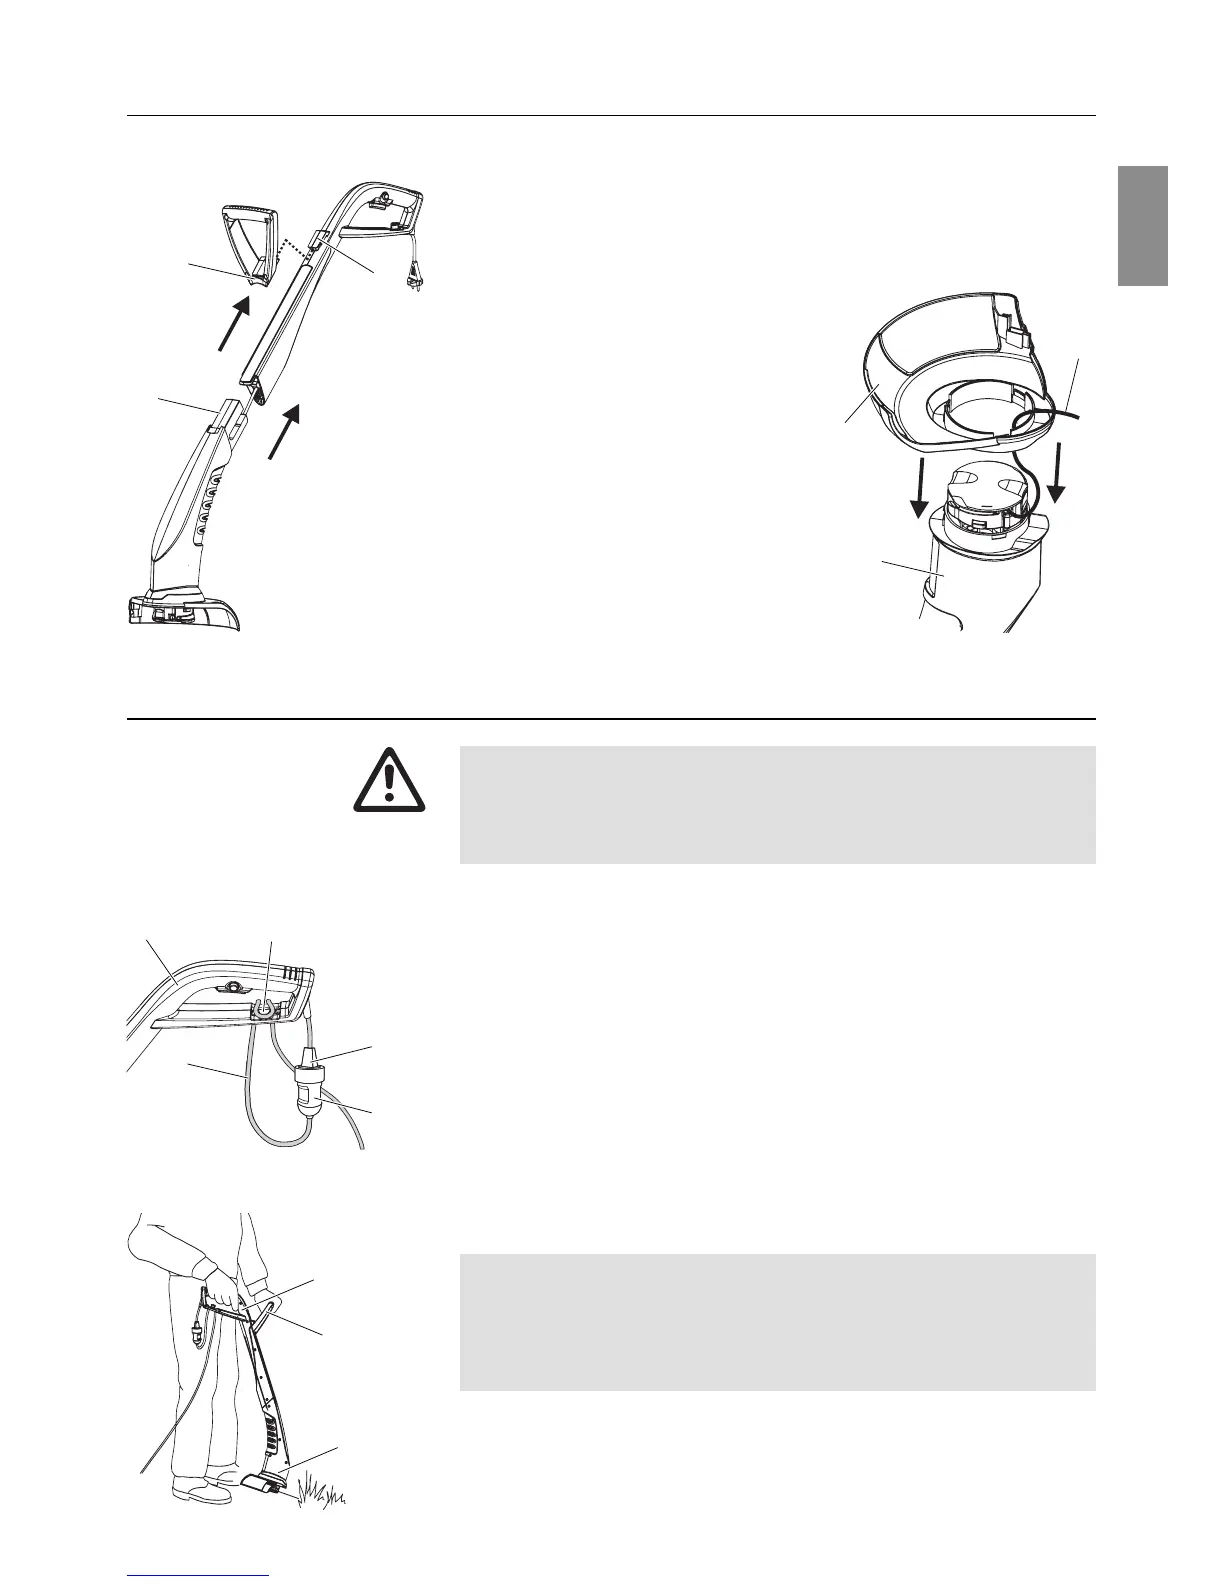
3. Assembly
1. Fit the upper part of the handle
1
and the lower part of the
trimmer
2
together until they click into place.
The cable must
not be stretched or trapped when doing this.
2. Put the additional handle
3
onto the upper part of the
handle
1
until it clicks into place.
3. Put the cover
4
onto the lower
part of the trimmer
2
while
feeding the cutting filament
5
through the opening in the
cover
4
.
4. Put the cover
4
onto the lower
part of the trimmer
2
until the
connection (3 snap fittings)
clicks into place.
4. Operation
Risk of injury if the Turbotrimmer does not switch off when
you release the start button.
V Never bypass the safety devices or switches (e.g. by
tying the safety lock to the handle).
1. Insert the extension cable
6
into the cable lock
7
on the upper
part of the handle
1
.
2. Plug the plug
8
of the trimmer into the socket
9
of the
extension cable.
3. Plug the extension cable into a 230 V mains power supply.
v Hold the trimmer by the top of the handle
1
and the additional
handle so that the cutting head
2
is tilted slightly forward.
The cutting filament extends completely automatically each
time the trimmer is switched on. The filament cassette must
be replaced when the filament has been used up. In order to
avoid unnecessary filament use, we recommend that you do
not turn the unit on and off excessively.
Avoid the filament coming into contact with hard objects (walls,
stones, fences etc.) to prevent the filament welding together or
snapping off.
Assembling the Turbotrimmer:
3
2
1
5
2
4
71
6
8
9
Risk of injury!
1
2
3
Connecting the Turbotrimmer:
Working position:

 Loading...