w
.
.
..
.
..
.
..
..:>;.
,.,
,,
.,
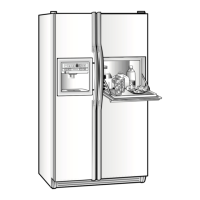
Drawer Removal
CAW
Am
CLEAN~G
(continued)
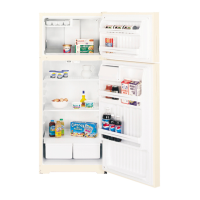
Drawers will stop before coming all the way out of the refrigerator to
help prevent contents from spilling onto the floor. Drawers can easily
be removed by tilting up slightly and pulling past the “stop” location.
To remove drawers
when the refrigerator door cannot be opened
all the way:
1. Remove food from the drawer and its cover. If your refrigerator has
adjustable shelves, remove food from the bottom shelf and
temporarily relocate it higher up in cabinet.
2. Remove the flexible gasket at the
rear of the top drawer. Lift each
end straight up until the
slots
on
the gasket are free of the drawer
support tabs.
*
b
:’
--——=.
-
.-
“$”H-
/2,,,,
////1///1’11
-.,
=
-m
-----
3.
Pull
the drawer partway out. Reach
in, push the rear of the glass up; at
the same time, push it back until it
clears front-corner retainers.
4. Tilt and remove the cover.
5. Pull the drawer forward,
lift the
front to clear stops, and remove the
drawer. If the refrigerator door
doesn’t open completely,
pull
the
drawer out until it hits the door.
Then lift the drawer up until it is
higher than the drawer supports, tilt
it and take it out.
6. [f tape holds the Convertible Meat
Pan (on some models) cover to the
drawer supports, remove the tape.
Pull drawer partway out. Reach in,
push the rear of the
glass
up and, at
the same time, back,
until
it clears
front-corner retainers.
7. Tilt and remove the cover. Avoid
cleaning the cold glass cover with
hot water because the extreme
temperature difference may cause
i!
to break.
8. Tilt and remove the drawer,
After cleaning, replace in
reverse order. When replacing
the drawer make sure you slide
it through both drawer guides
on the left side.
When drawers and covers are back in
place, reinstall gasket at the rear of the
top drawer. Fit the end of the plastic
drawer support into the slot on the
gasket, with the rubber gasket flap
facing you. Make sure the gasket
snaps into place.
e
_
;..
--
-.
><=<,,,,,
—~
////1//
,1
-—
... -
.
Light Bulb Replacement
Fresh Food Compartment-Upper Light
1.
Unplug refrigerator.
2. To align the control knob
properly, note position of
numbered control for
propel
reassembly, turn control to
OFF and
pull
off knob.
3. Pull bottom of light panel
down about
1/4
inch (6 mm)
just enough to disengage lip at
rear from grooves in retainers
on rear
wall.
4. Lift panel to disengage top from pins on side walls and
remove
panel.
After replacing with same size bulb, reinstall
panel
(hang top on pins;
pull
bottom down, push it back and release it to
let
lip engage grooves
in retainers). Replace temperature control knob in OFF position, turn
it to previous setting and plug refrigerator back in.
12
Fresh Food Compartment-Lower Light (on some models)
This light is located behind a shield at the rear of the fresh food
compartment.
1.
Unplug the refrigerator.
2. Grasp the top edge of the shield and lift it up and forward to free its
top edge.
3. After replacing with the same size bulb, hook the top of the shield
back in
place.
Freezer Compartment
1. Unplug the refrigerator.
2. Remove the shelf just
below
light
shield. (The shelf will be easier
to remove if it is emptied first.)
3. Pull the
light
shield toward you to reach the bulb.
After replacing with same size bulb, reinstall shelf and plug the
refrigerator back in.
 Loading...