Care and Cleaning
Wall Oven
23
Oven lights
Each oven is equipped with two lights located
on the back wall of the oven. The lights come
on when the door is opened or when the oven
is in a cooking cycle. The oven lights do not
come on during self-cleaning.
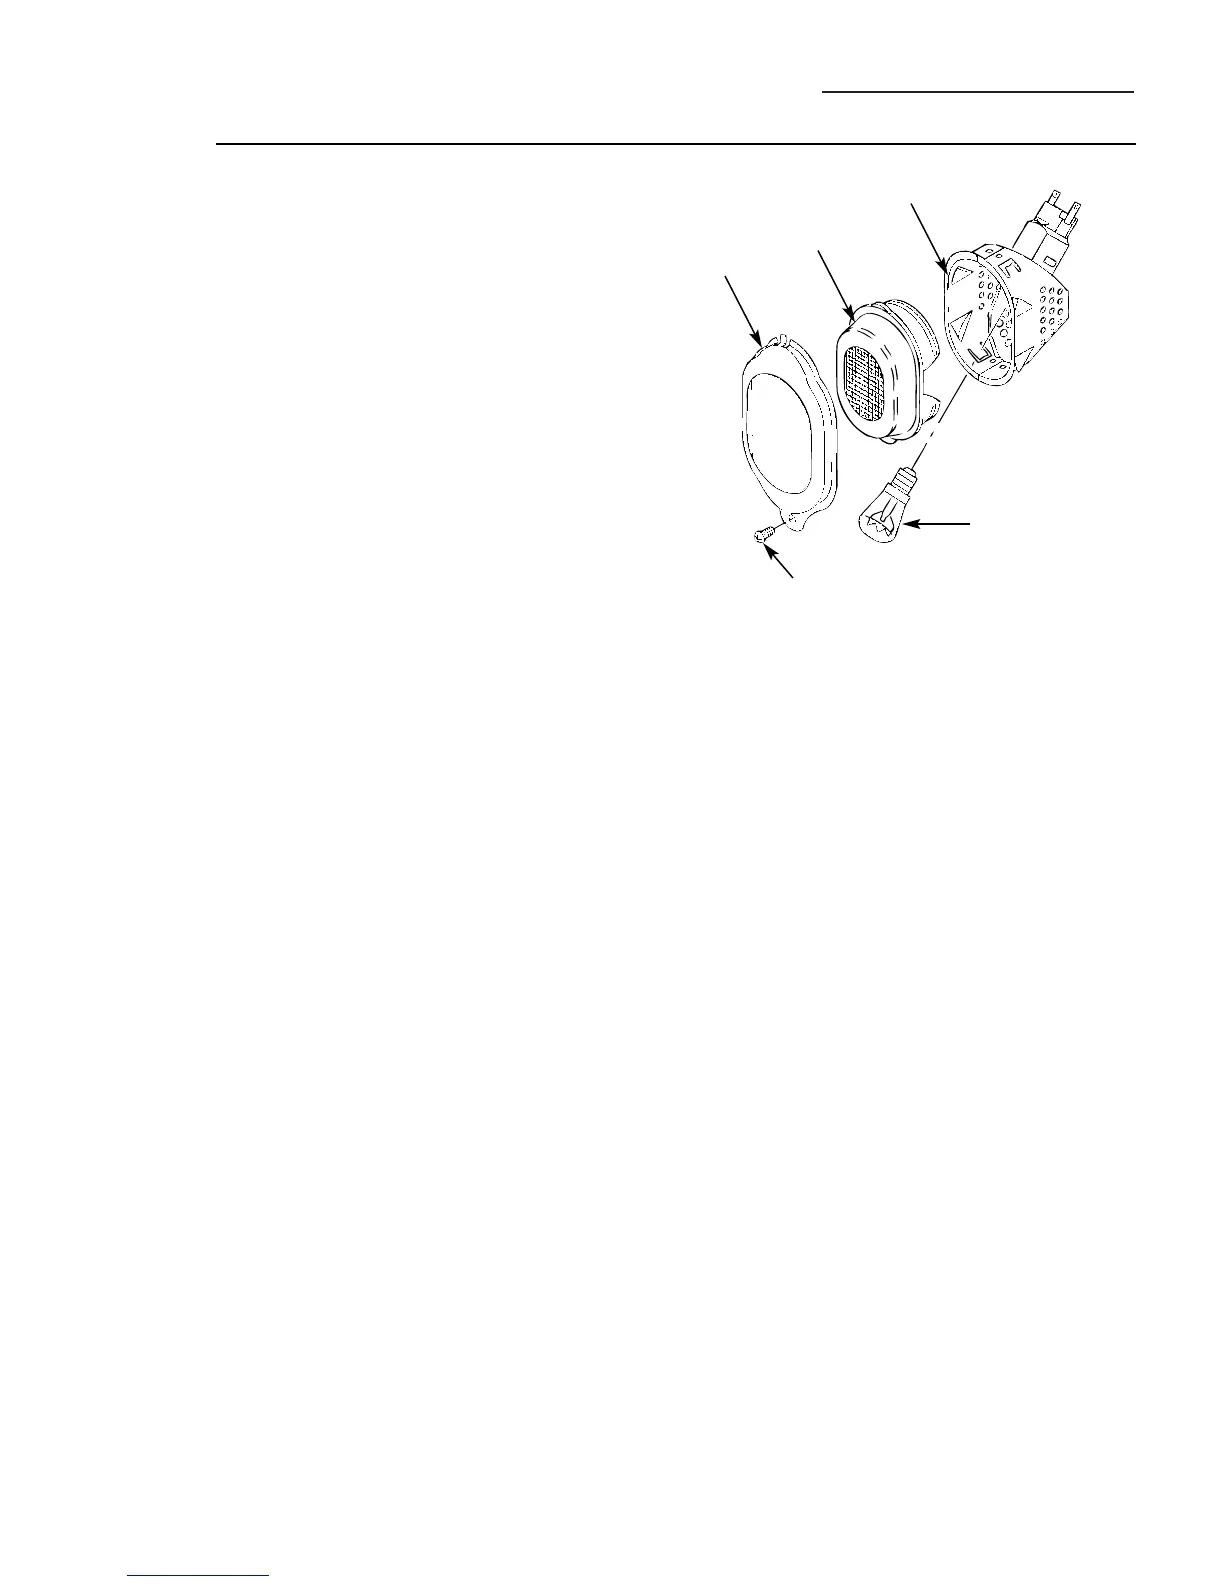
Each light assembly consists of a removable lens
frame, a removable lens, a light bulb and a bulb
socket that is fixed in place.
Make sure the oven and lights are cool and
power to the oven has been turned off at the
main power supply before replacing a light
bulb. Failure to do so could result in electrical
shock or burns.
To replace a light bulb:
1 Remove the lens frame by unscrewing
the screw.
2 Remove the lens.
3 Remove the bulb from its socket.
4 Replace the bulb with a new bulb. Be sure to
screw the bulb completely into the socket.
5 Replace the lens, making sure that it is firmly
pressed in place.
6 Replace the lens frame and fasten in place
with the screw. The lens and lens frame must
be in place when using the oven.
7 Reconnect electrical power to the oven.
Replacement bulbs may be purchased by calling
800-626-2002.
Bulb
Lens frame
Screw
Lens
Bulb socket
 Loading...