I
I
II
m
I
I
II
u-
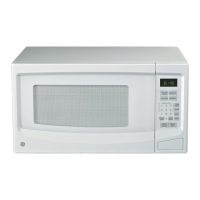
1.
Door
htches.
6. Glass Cooking Tray.
Tray must be in place when
2.
Door Screen.
Metal screen permits viewing of
using the oven. Cooking performance will be
foods and keeps microwaves confined inside oven.
unsatisfactory without the tray in plain. The tray
3.
Mode Stirrer Cover.
Protects the microwave
may be removed for cleaning.
energy distributing system. Do not remove this
7.
Door Open Button.
Press to open door. Door
cover. You will
damage
the oven.
must be securely latched for oven to operate.
4.
Touch Control Panel and Display. See
Your
Touch Control Panel section for instructions.
5.
Automatic Cooking Guide.
Quick reference codes
for many frequently prepared foods.
NO~:
Rating plate, oven vent(s) and oven light are
lo~ted
on the inside walls of the microwave oven.
tigmm
CooMng
Use your Touch Control Panel to Time Defrost or
Create your own programs to suit your
individud
Micro Cook with choice of power levels from
cooking style. For
emple:
use the
Mtchen
Timer to
1 (lowest) to 10 (highest); to Reheat using a preset
delay the start of Micro Cook or program a hold time
time and power level; to cook popcorn using a preset
between Time Defrost and Micro Cook. Set Micro
time and power level; to time kitchen tasks with the
Cook for a two-stage program using different times
~tchen
Timer; and to set the clock.
and power levels.
Cooting Complete Reminder
@or
all cooking and reheating features)
To remind you that you have food in the oven, the oven will beep
on=
a
minute until you either open the oven door or touch the
CLE~OFF
pad.
7
 Loading...