?
71
0
II
I
3//
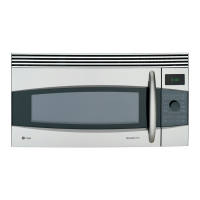
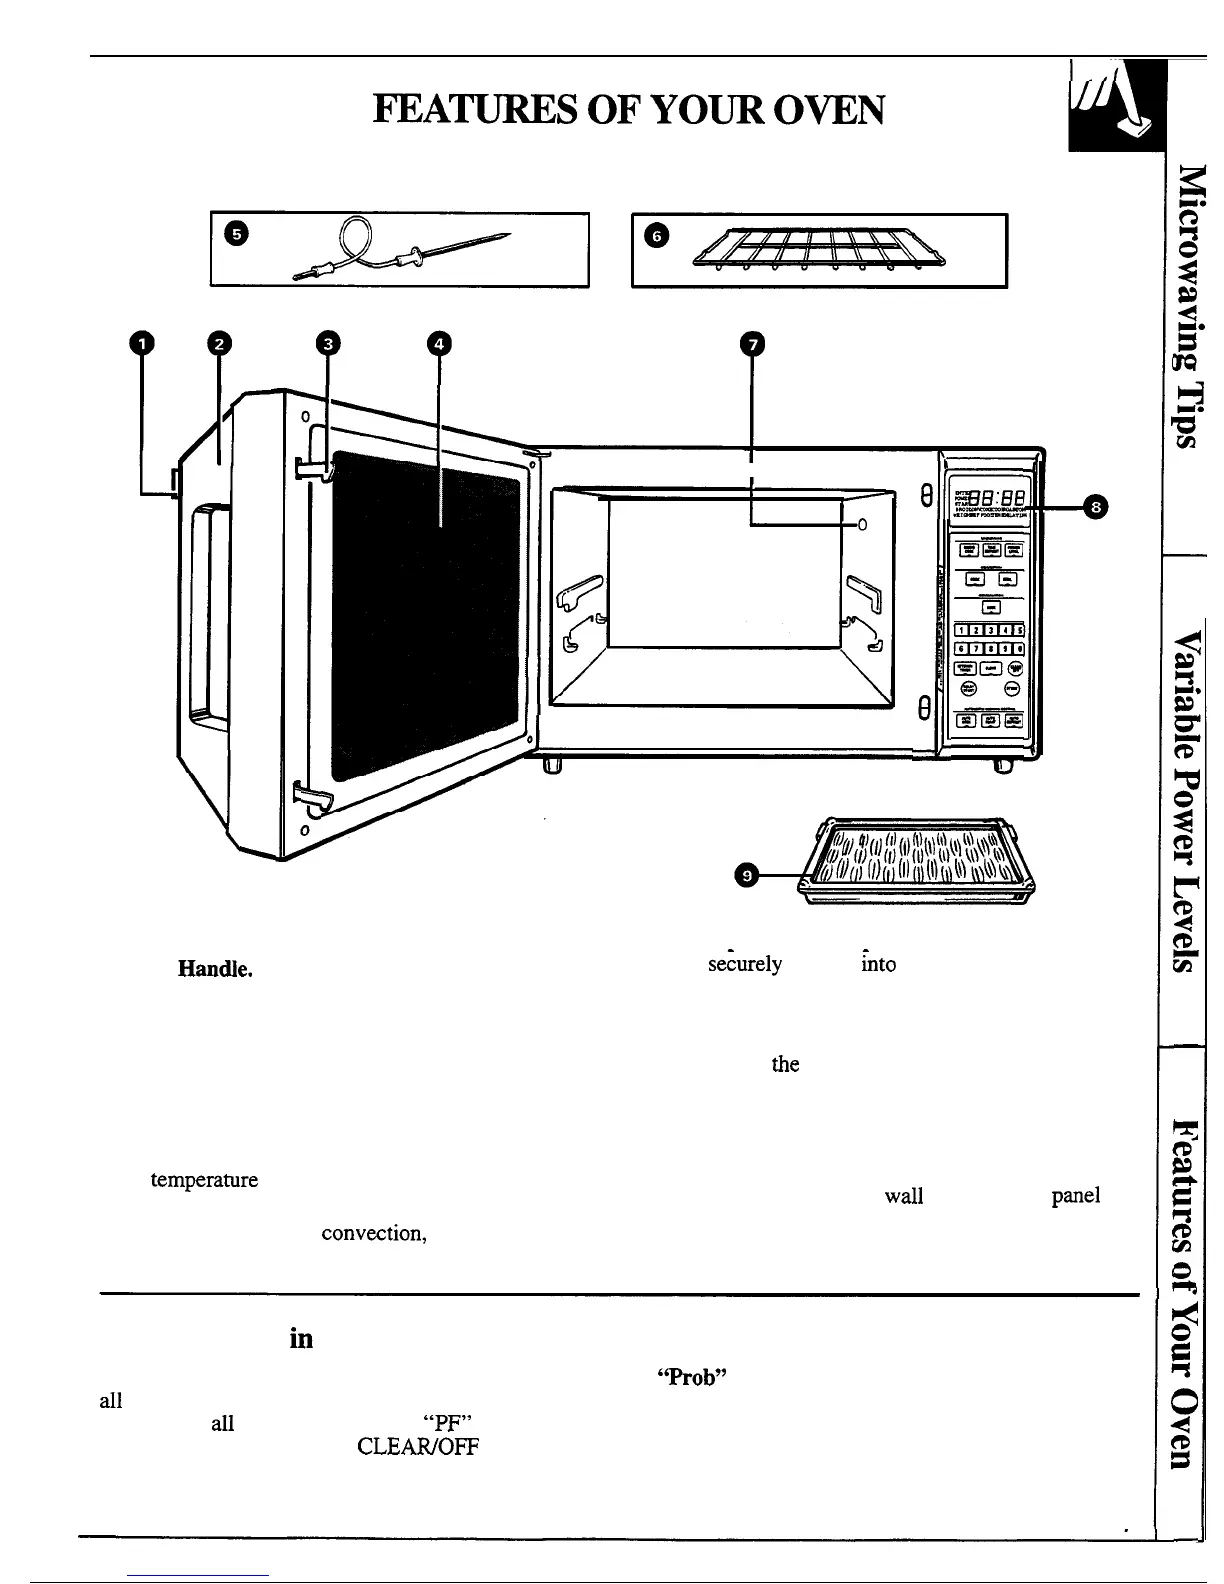
1. Door Latch. Push in to open door.
7. Receptacle for Temperature Probe. Probe must
2. Door
HanWe.
Door must be securely latched for
be
se~urely
inserted
into
receptacle before oven
oven to operate.
will start any temperature cooking.
3. Door Safety Lock System.
8. Touch Control Panel. Use touch controls to set
4. Window with Metal Shield. Screen allows
all oven functions. Further detailed explanation is
shown on the following page.
cooking to be viewed while keeping microwaves
confined in oven.
9. Broiler Pan and Spatter Shield. See Convection
5. Temperature Probe. Probe measures internal
Broiling section for instructions.
food temperature. Must be used when cooking
NOTE: Oven light and oven vent(s) are located on
by
temperamre in microwave, convection or
the inside walls of the microwave oven. Rating plate
combination modes and with Auto Roast function.
is located on the left side
wrdl
of the control pmel
6. Oven Shelf. Use with
convwtion, combination and
seen when the door is open.
some microwave recipes.
When You Plug
k
the Oven
Temperature Probe
The panel displays “8888” on the upper portion and
‘mob”
Appears in the Display when:
all
of the oven functions on the lower portion. After
15 seconds,
all
lights disappear and “PF” appears in
● Probe has been forgotten when Auto Roast is
being used.
the upper portion. Touch the CLEAWOFF pad, set the
clock and oven is ready for use.
● Probe is not securely seated in oven wall receptacle.
This will happen any time there is a power outage.
7
—
$
d
u
—
 Loading...