NX-1348E-ICON - 15 -
g
GE Interlogix
Set system date
Step 1 Press [r]-[9]-[6]. Enter Code icon will display.
Step 2 Enter a [“Master Code”]. The service icon will appear flashing.
Step 3 Enter the “Day of Week “
1=Sunday 3=Tuesday 5=Thursday 7=Saturday
2=Monday 4=Wednesday 6=Friday
Step 4 Enter the “Month Code”. Must always be two (2) digits.
01 = January 05 = May 09 = September
02 = February 06 = June 10 = October
03 = March 07 = July 11 = November
04 = April 08 = August 12 = December
Step 5 Enter the “Day Code”. Must always be two (2) digits.
Example: The 5
th
would be entered as [
0
]–[
5
].
Step 6 Enter the last two digits of the “Year Code”.
Example: For 1997 enter [9]–[7].
The ready icon will appear.
Setting the system clock
Step 1 Press [r]-[9]-[7]. Enter Code icon will appear.
Step 2 Enter a [“Master Code”]. Then the service icon will begin to flash.
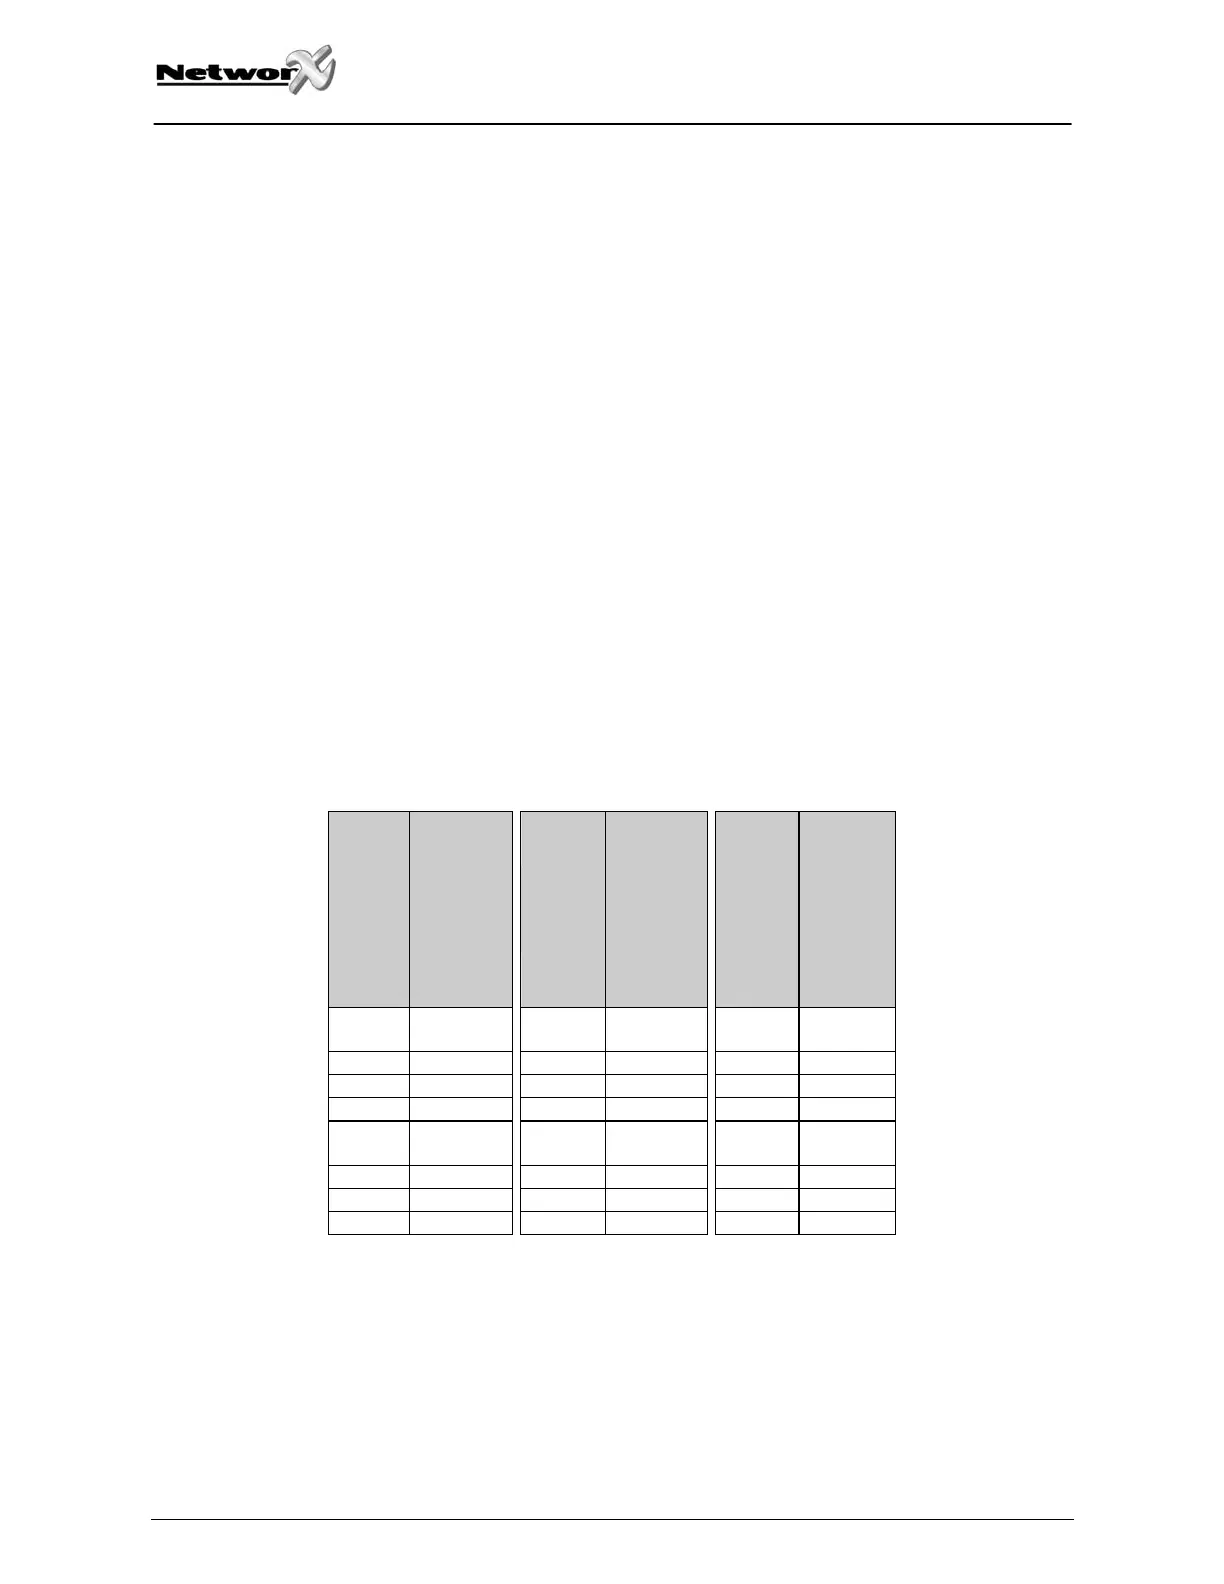
Step 3 Enter the “hour code” which must be two (2) digits. Note: The clock is a 24-hour clock. Refer to the
following table.
Step 4 Enter the “minutes code” which must be two (2) digits. Then the ready icon will come on constant.
Example: 7 minutes after would be entered [0]–[7].
12:00
Midnight
00 8:00 AM 08 4:00 PM 16
1:00 AM 01 9:00 AM 09 5:00 PM 17
2:00 AM 02 10:00 AM 10 6:00 PM 18
3:00 AM 03 11:00 AM 11 7:00 PM 19
4:00 AM 04
12:00
Noon
12 8:00 PM 20
5:00 AM 05 1:00 PM 13 9:00 PM 21
6:00 AM 06 2:00 PM 14 10:00 PM 22
7:00 AM 07 3:00 PM 15 11:00 PM 23
Setting the keypad brightness
Step 1 Press [r]-[9]-[1].
Step 2 Press the [•] and [–] scroll keys to leden or darken the illumination behind the buttons and the ICON
display. It is usually easier to set this adjustment in a darkened room.
 Loading...