Error Codes What Is Wrong What To Do
Error code: E1 • Hot water tank exceeds •Confirm that water bottle installed is supplying water
Alarm will sound and • temperature limits. to the system. Dispense hot water to release any trapped air.
display E1 for 10 seconds. • No/low water level in system. Allow the unit to cool for several hours with the power off.
The unit will then shut After the unit cools, resume operation by pressing the
down and display “OFF”. power button.
Error code: E2 • Cold water tank too cold. •The system will automatically reduce cooling operation
• Operating environment too cold. to restore a correct temperature condition. Confirm that
• Compartment door may be open. the compartment door is closed. The control/display will
reset automatically when a normal temperature has been
restored. Unplug the unit and allow it to warm up if the
problem persists. Relocate the dispenser to a warmer
operating environment if the error repeats. If a warmer
operating environment is not available, increase the hot
water temperature and operation time (with the Energy
Saver cycle set-up) to help offset this issue.
Error code: E3 • Compartment temperature •The system will automatically reduce cooling operation
• too cold. to restore the correct temperature condition. Confirm that
• Operating environment too cold. the compartment door is closed. The control/display will
• Extremely high cold water usage. reset automatically when normal temperature has been
• Bottled water temperature high restored. Allow the bottle temperature to stabilize to room
• when installed. temperature before installation on the dispenser. Unplug
the unit and allow it to warm up if the problem persists.
Relocate the dispenser to a warmer operating environment
if the error repeats.
Error code: E4, E5 and E6 • Dispenser has experienced •Unplug the unit for 24 hours and allow the control to reset.
• a sensor failure. Plug the unit in and repeat start up and operation
adjustments. Repeat if required; however, some failures
may be permanent.
Care and cleaning of the dispenser.
IMPORTANT: Unplug the water dispenser
before cleaning.
1. Remove the water bottle and drain the
dispenser (see Draining the Dispenser).
2.
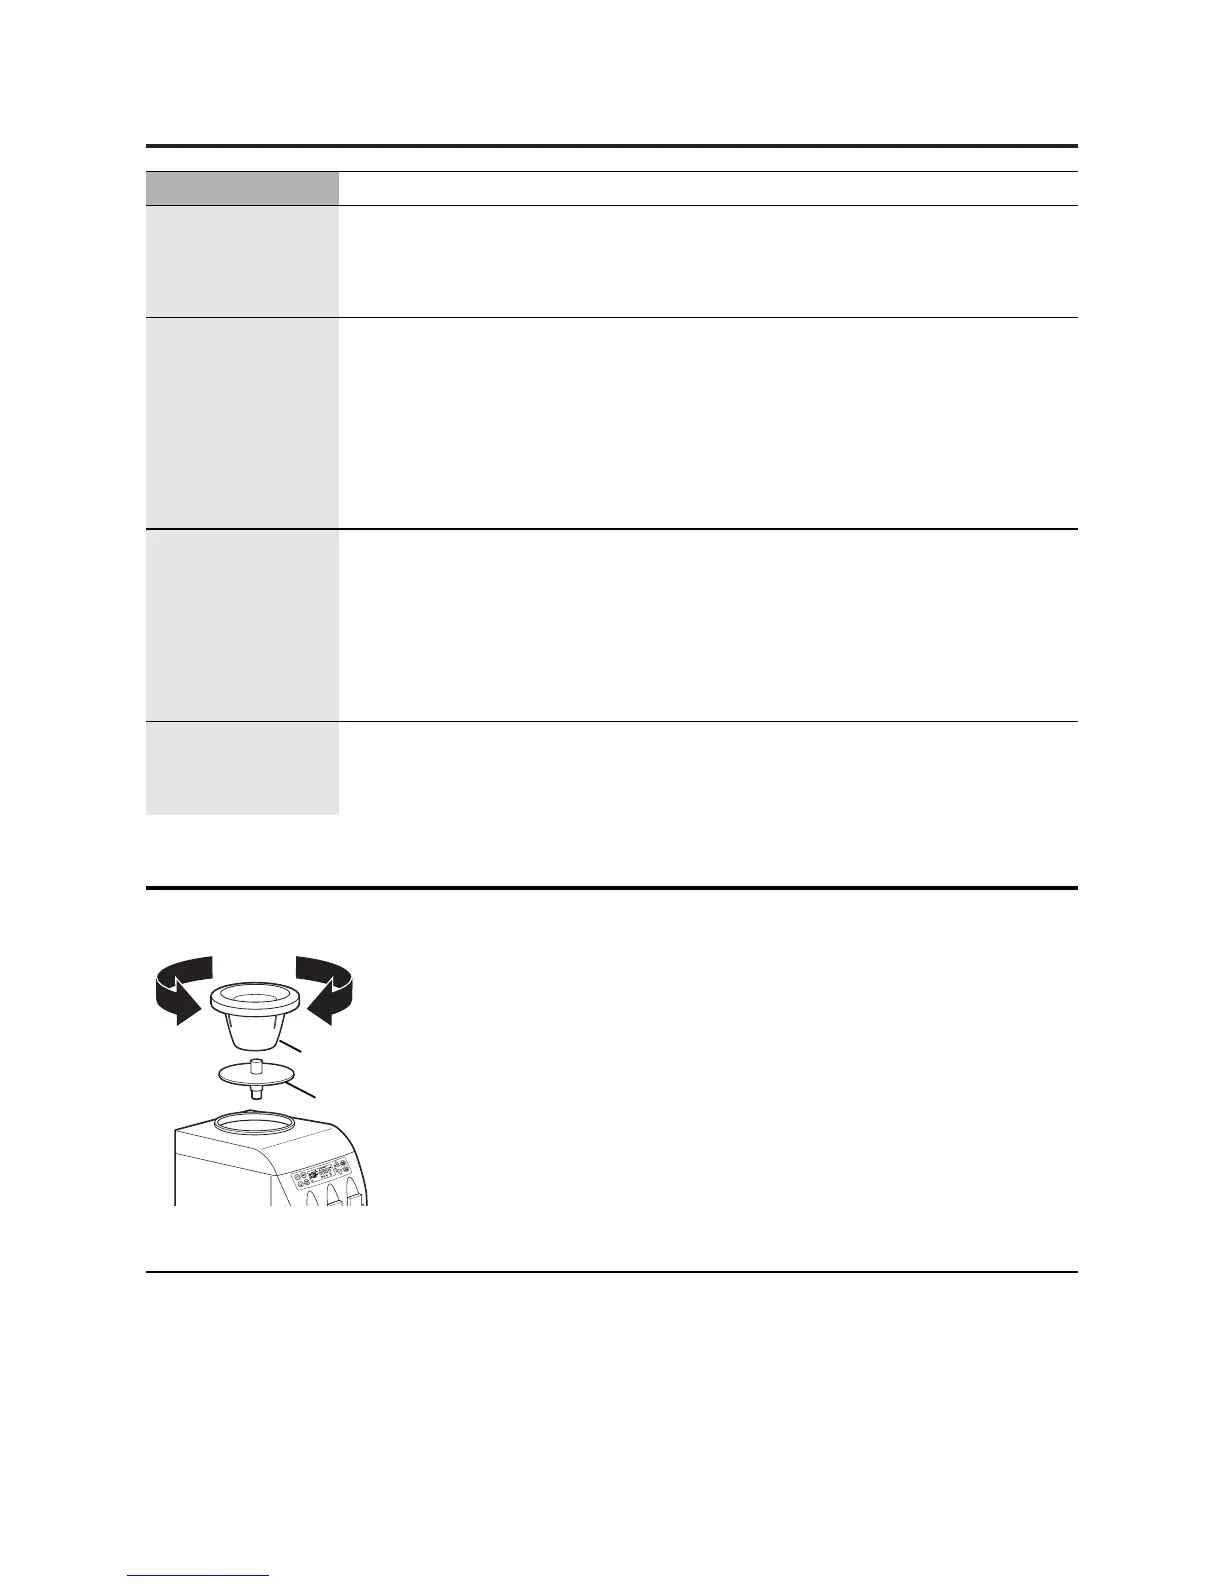
Remove the support collar by turning
counterclockwise and pulling straight off.
3. Remove the plastic separator by
pulling straight out (you may need
to twist slightly to loosen).
4. Clean the separator with dish soap
and water or in the top rack of
the dishwasher.
5. Dry the separator thoroughly on
both sides.
6. Using a clean cloth or paper towel,
thoroughly dry the cold water
reservoir.
7. Place the separator back in the
dispenser. Make sure the long, tapered
end of the separator is positioned
firmly on the metal plug on the
bottom of the reservoir.
8. Replace the support collar and turn
clockwise until it is firmly in place.
9. Install a full water bottle on the
dispenser (see Loading the Dispenser).
Cleaning the Separator
Separator
Support collar
To remove
To replace
IMPORTANT: Unplug the water dispenser before
cleaning.
The cabinet and compartment of the
dispenser can be washed with mild soap and
water. Rinse thoroughly with clear water. Never
use commercial cleaners or abrasive scouring
powders.
Sweep away or vacuum any dust from the
condenser coils on the back of the unit. For
best results, use a brush specially designed for
this purpose. It is available at most appliance
stores.
Cleaning the Outside Cabinet and Storage/Chiller Compartment
9
 Loading...