OPERATION INSTRUCTIONS:
Turn on the power supply of receiver and transmitter respectively, the device will connect
automatically, RF indicator LED will be lit White.
Changing the Frequency
Turn on the transmitter, then short press the “SET” button to change frequency, the Receiver will
automatically be matched.
Method of Re-Pairing
1.First, power on the receivers you plan to transmit to
2.On the Transmitter, Press and hold the SET button and POWER button at the same time until
batter y LED begins to flash.
3.RF indicator LED will light up on the receivers to show a successful connection.
4. Now the transmitter is connected to the instrument, and the receiver is connected to the speaker.
5. After successfully pairing once, it will be automatically matched on future startups.
Our Wireless System Can Support:
6 pairs of devices working without inter ference.
Transmitting one signal to several receivers at the same time.
1.First, power on all the receivers you plan to transmit to
2.On the Transmitter, Press and hold the SET button and POWER button at the same time until
batter y LED begins to flash.
3.RF indicator LED will light up on the receivers to show a successful connection.
TROUBLESHOOTING
On the single channel systems, transmitters will transmit to “CH A=A Frequency group” by
default. If you are having trouble connecting to your Receiver, the Transmitter’s assignment may
have been changed to “CH B=B Frequency group”.
To change back to “CH A”:
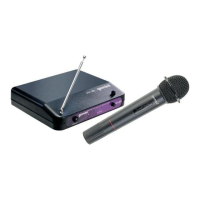
1.GMU-G100 GMU-M100
first be sure all Receivers are off. With transmitter powered off, hold down the power button for
9 seconds or when the LED display the Group are conversion , unit will turn on and change group
assignments. Now power on the Receiver you intend to use and connection should happen
automatically. If not, try “Method of Re-Pairing” one time.
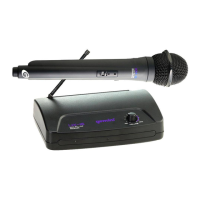
2.GMU-HSL-100
First be sure all Receivers are off. Then tur n on the Transmitter power, hold down the “SET”
button for 9 seconds and the LED display will change from “CHA” to “CHB”, to show successful
change of group assignments. Now power on the Receiver you intend to use and connection
should happen automatically. If not, try “Method of Re-Pairing” one time.
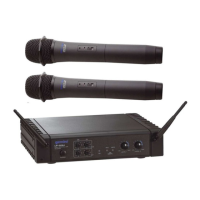
The Dual channel system GMU-M200, Transmitters will transmit one to “CH A” and one to
“CH B” by default , when you turn on transmit of the Handheld , the LED of handheld will
display which group is it . If both Transmitters are assigned to the same group, you’ll need
to change one to other Group: First make sure all Receivers are off. With Transmitter
powered off, hold down the power button for 9 seconds, unit will turn on and change group
assignments.
Power Supply
The USB to USB-C cable is for charging. Please use this to connect to a USB charging
port or a qualified power adapter. While charging, please make sure that device is shut
down to avoid the loss of electricity during charging. This can lead to longer charging
time and shorter batter y life.
 Loading...