PAGE 13
A A
1 1/8”[29] 1 1/8”[29]
A A
ø1/4”
6mm
ø1/4”
6mm
#1
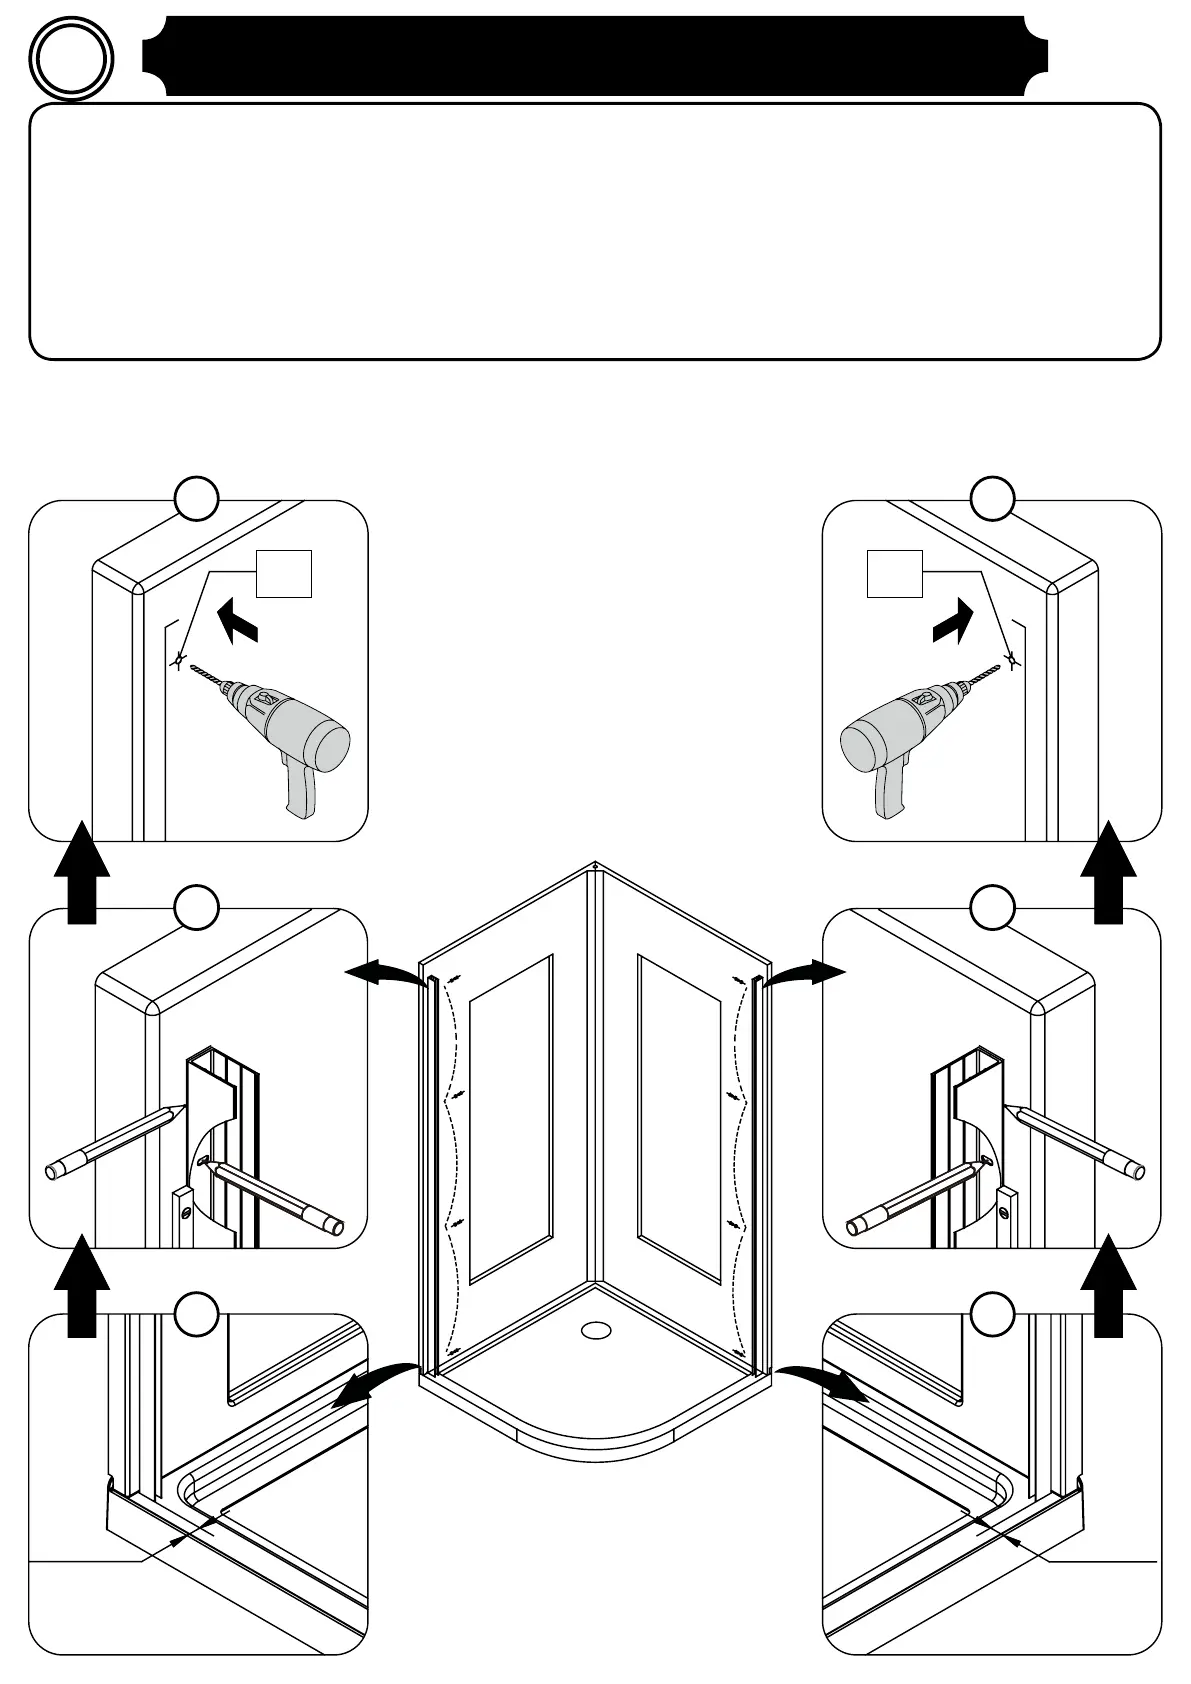
A. Position the wall tracks (A) onto the base and wall panels. The outer edge of the wall tracks (A) should be located at 1 1/8” (29mm) from the base edge,
and the wall tracks (A) should be leveled.
B. Mark the location of the 4 holes inside the wall tracks (A). Mark the top contour of the wall tracks (A). Remove the wall tracks and drill guide holes.
A. Positionnez les glissières murales (A) sur la base et les panneaux muraux. Le bord extérieur des glissières (A) doit être situé à 1 1/8” (29mm) du bord de la
base et les glissières (A) doivent être nivelés.
B. Marquez l’emplacement des 4 trous à l’intérieur des glissières (A). Marquez le contour supérieur des glissières (A). Retirez les glissières et percez les trous
de guidage.
A. Coloque las pistas de la pared (A) a la plato de ducha y paneles de pared. El borde exterior de las vías de la pared (A) debe ubicarse a 1 1/8” (29mm) del
borde de la base, y las vías de la pared (A) deben estar niveladas.
%6HxDOyODXELFDFLyQGHORVRUL¿FLRVGHQWURGHODVYtDVGHODSDUHG$0DUTXHHOFRQWRUQRVXSHULRUGHODVYtDVGHODSDUHG$5HWLUHODVSLVWDVGHODSDUHG
\ORVRUL¿FLRVGHJXtDGHOWDODGUR
WALL TRACKS INSTALLATION
INSTALLATION DES GLISSIERES
INSTALACIÓN DE LOS RIELES
A
B
C
A
B
C
 Loading...