CONTROLLER FEATURES & SETTINGS PAGE 5
ENGLISH
Emergency Operation:
• Usethisoperationonlywhentheremotecontrolisdefec-
tive or lost.
• Whentheemergencyoperationswitchispressed,theunit
beepsonce,whichindicatesthestartofthisoperation.
• Whenthepowerswitchisturnedonforthersttimeand
emergencyoperationstarts,theunitwillrunautomatically
inthefollowingmodes:
• Duringemergencyoperation,itisnotpossibletochange
the settings of temperature and fan speed. It is also not
possible to operate in timer or dry modes.
Beep
emergency
operation switch
Room
temperature
Designated
temperature
Timer
mode
Fan
speed
Operation
mode
Above 73
o
F
Below 73
o
F 73
o
F
79
o
F
No
AUTO
AUTO
COOL
HEAT
No
1. Remove the battery cover
2. Insert 2 AAA batteries as
illustrated noting battery polarity
3. Reinstall the battery cover
NOTE:
• The distance from the remote
control to the receiver should
belessthan23feetwithno
obstructions.
• Iftheremotecontroldisplayisweakortheoperating
distancehasdiminished,thebatteriesmayneedtobe
replaced.
• Remote control malfunctions can sometimes be corrected
byremovingthebatteriesfromtheremoteforafewmin-
utes and then reinstalling them.
• Remove the batteries from the remote control if the unit
willnotbeinuseforanextendedperiodoftime.Ifanyseg-
mentsofthedisplayremainactiveafterbatteryremoval,
press the reset button.
17
RESET Button
Iftheremotecontrolisnotfunctioningproperly,useapen
pointorsimilarobjecttodepressthisbuttontoresetthe
remote.
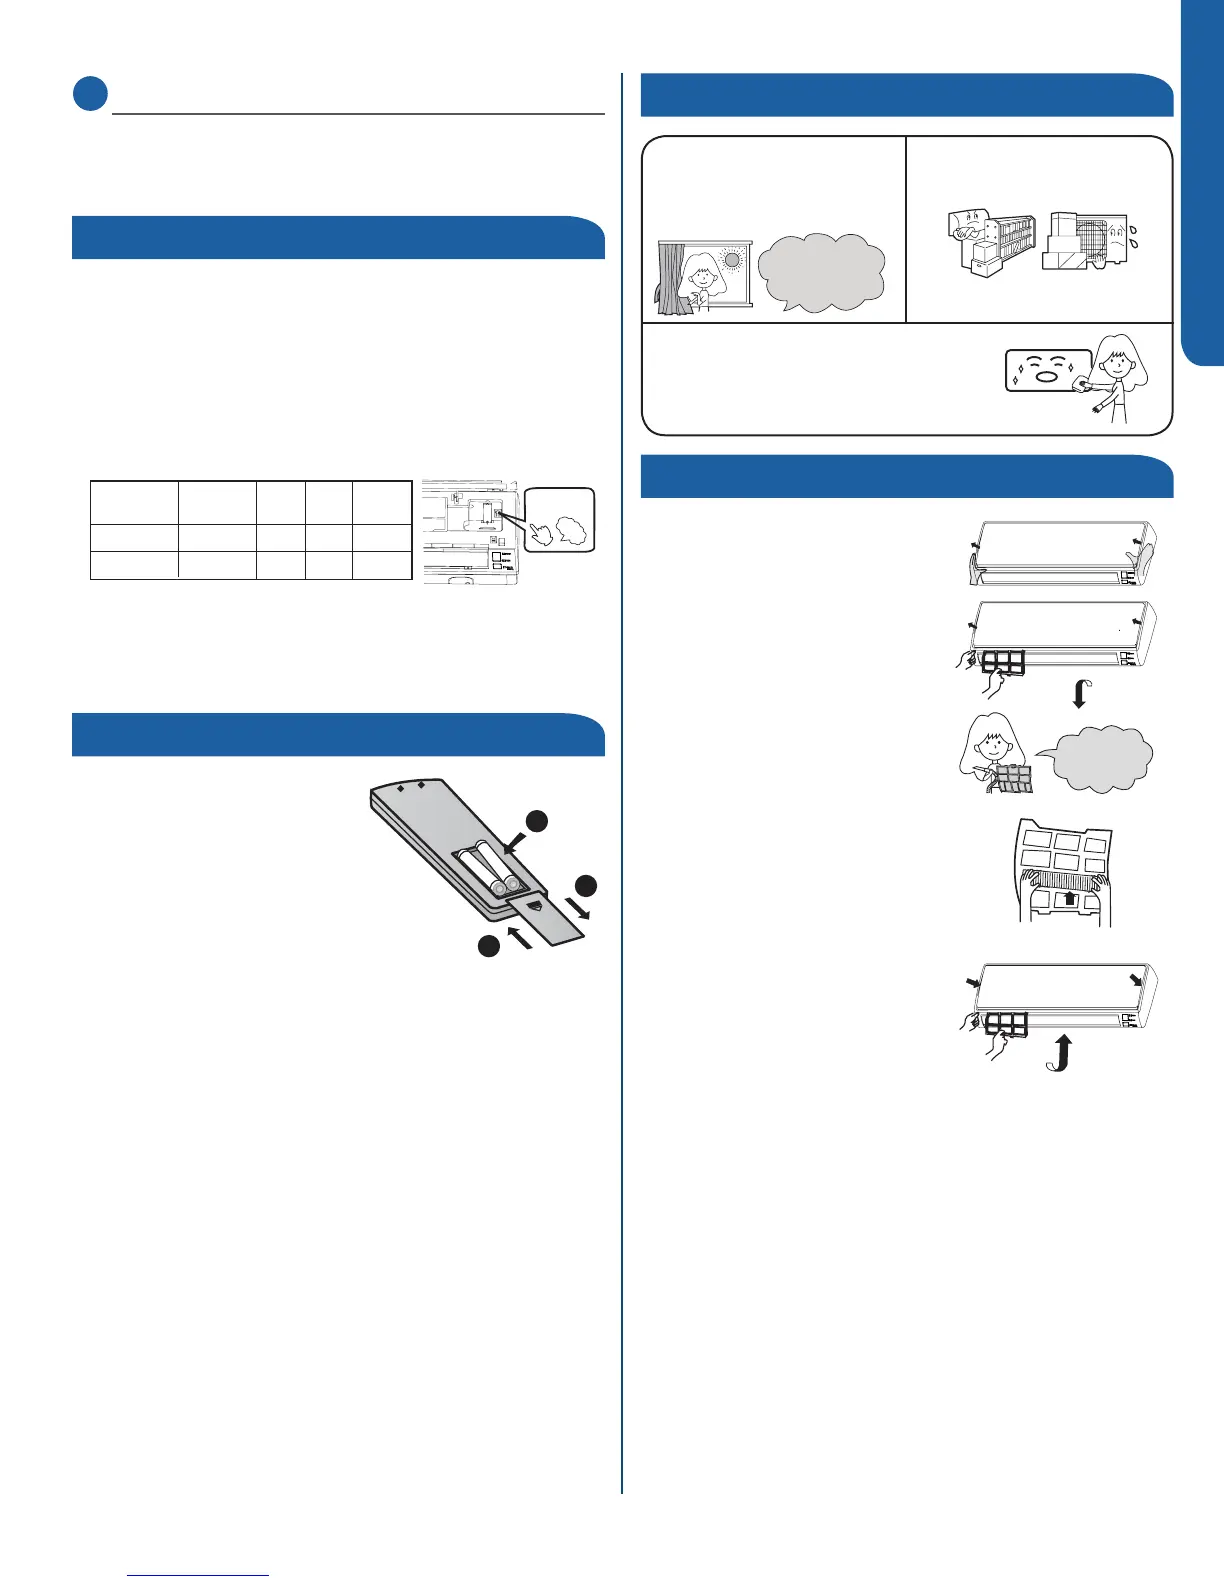
Do not block the air inlet
or outlet
Closedoorsandwindows
during operation
Wipe the air conditioner using a soft and
dry
cloth.Forseriousstains,useaneutral
detergent
dilutedwithwater
.
Wringthewater
outoftheclothbeforewipingdowntheunit.
Thenwipeothedetergentcompletely
.
During cooling operation
prevent direct sunlight
with curtains or blinds
1. Open the inlet grille by pulling
itupward
2. Removethelter.
Gently push up on the lter’s center
tab until it is released from the
stopper, and remove the lter
downward.
3. Cleanthelter.
Use a vacuum cleaner to remove
dust, or wash the lter with water.
After washing, dry the lter
completely.
4. Attachthelter
Attach the lter so that the “FRONT”
label is facing the front. Make sure
that the lter is securely attached
behind the holding tabs. If the lter is
not attached correctly the unit may
not achieve maximum eciency.
5. Close the inlet grille.
Once every
two months
EMERGENCY OPERATION & MAINTENANCE
Inserting the Batteries
Emergency Operation
Optimizing Performance
Cleaning the Air Filter
 Loading...