EasyManua.ls Logo

Haier HVW18 User Manual

Haier HVW18
36 pages
To Next Page IconTo Next Page
To Previous Page IconTo Previous Page
Page #17 background imageLoading...
Page #17 background image
15
Français
Installation du Refrigérateur á Vin
Désemballage du Réfrigérateur á Vin
1. Retirer l’ensemble du matériel d’emballage. Ceci comprend la base en mousse
ainsi que l’ensemble du matériel adhésif qui maintient les accessoires du
réfrigérateur à vin l'intérieur tout comme à l’extérieur. Faire glisser et retirer la
protection plastique ou en mousse servant à préserver le compresseur de tout
dommage causé par les vibrations
2. Inspecter et enlever tout restant d’emballage, de scotch ou de
matériaux imprimés avant de brancher le réfrigérateur à vin.
Réglage du Réfrigérateur á Vin
• Votre refroidisseur de vin a quatre jambes de mise à niveau qui sont
plac dans les coins avant et arrière de votre refroidisseur de vin.
• Pour régler les pieds de mise à niveau, les tourner dans le sens des aiguilles d’une
montre afin de surélever le réfrigérateur á vin et dans le sens inverse des aiguilles
d’une montre pour l’abaisser.
• Installer les jambes en vissant dans les jambes dans le règle à l'avance les trous
de vis. (S'il vous plaît la note que la jambe qui se tient sur le gond est la jambe
plus courte.)
Circulation d’Air Adéquate
• Pour être sûr que le réfrigérateur á vin fonctionne à son maximum d'efficacité,
l'installer dans un environnement favorable à une bonne circulation d'air et possé-
dant des connexions de plomberie et d’électricité saines.
• Les indications suivantes concernent l’espace recommandé autour du réfrigérateur
á vin:
Latéralement ..................2 "(50mm)
Partie supérieure ..........4" (100mm)
Arrière...........................2" (50mm)
• Ne remplissez pas au-dessus du niveau votre refroidisseur de vin pour
le circulaton interne approprié d'air.
NOTE: Permet à assez d'espace dans le devant de l'unité pour ouvrir la porte à
120?

Table of Contents

Other manuals for Haier HVW18

Question and Answer IconNeed help?

Do you have a question about the Haier HVW18 and is the answer not in the manual?

Haier HVW18 Specifications

General IconGeneral
BrandHaier
ModelHVW18
CategoryWine Cooler
Capacity18 bottles
Cooling SystemThermoelectric
InstallationFreestanding
Temperature ZonesSingle Zone
Temperature Range5-18°C (41-64°F)
DoorGlass door
Dimensions345 x 480 x 515 mm
FinishStainless steel

Summary

Important Safeguards

Wine Cellar Parts and Features

Component Identification

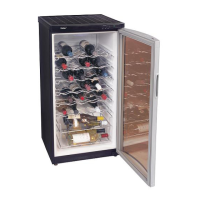
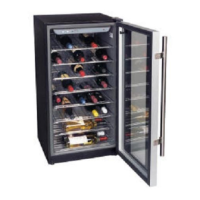
Identifies and describes the main components of the wine cellar, including shelves, legs, and door.

Installing Your Wine Cellar

Unpacking and Inspection

Instructions for removing all packaging materials and inspecting the wine cellar.

Leveling and Stability

Guidance on how to adjust the leveling legs to ensure the wine cellar is stable.

Air Circulation Requirements

Details recommended clearances around the unit for optimal ventilation and performance.

Electrical Connection Needs

Specifies the necessary power outlet type and voltage for safe operation.

Extension Cord Usage

Safety guidelines and recommendations for using extension cords with the appliance.

Installation Location Limits

Information on suitable locations and environmental conditions for installing the wine cellar.

Door Adjustment Procedure

Step-by-step instructions for adjusting the wine cellar door for proper fit and seal.

Ventilation Spacer Installation

Instructions to install the ventilation spacer for ensuring good ventilation at the rear of the unit.

Wine Cellar Operation and Use

Temperature Control Settings

Explains how to set the temperature control knob for red and white wines.

Wine Cellar Maintenance and Care

Cleaning Procedures

Provides instructions and warnings for cleaning the wine cellar and its components safely.

Handling Power Outages

Advice on how to handle power outages and restore operation correctly.

Moving and Storage Tips

Guidance on preparing the wine cellar for long absences or when moving the unit.

Troubleshooting Common Issues

Product Limited Warranty Details

Warranty Coverage Period

Details the duration and scope of the warranty, including labor and parts coverage.

Covered Components

Specifies the mechanical and electrical parts that are included under the warranty terms.

Service and Repair Process

Outlines the process for repair or replacement of defective parts during the warranty period.

Related product manuals