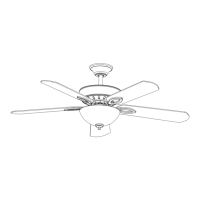
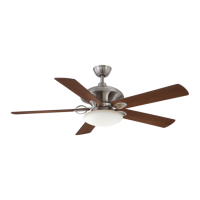
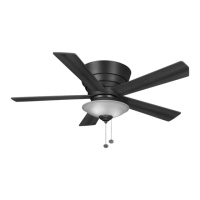
Hanging the Fan
REMEMBER to turn off the
power. Follow the steps below
to hang your fan properly:
1. Attach the mounting bracket
to the outlet box with two
screws and washers provided
with the outlet box. Make sure
the bracket is tight and secured.
(Figure 4)
2. Lift fan into position by
hanging the motor assembly
onto the hook from the
c e i l i n g m o u n t i n g b r a c k e t
allowing it to hang freely.
(Figure 5)
3. W hen the motor assembly
is hanged freely, please follow
t h e e l e c t r i c a l c o n n e c t i o n
procedure to connect the fan
wire.
"J"
Electrical Connections
WARNING: To avoid possible electrical shock, be sure
electricity is turned off at the circuit b reaker or main fuse
bo x befo re wiring.
Follow the steps below to connect the fan to your house
supply wires. Secure the wire nuts supplied with your fan
by wrapping the connections with electrical tape.
1. Connect the Black (hot) wire from the ceiling to the
black and blue wires from the fan. Connect the white
(neutral) wire from the ceiling to the white wire from the
fan. 6)
(Figure
2. your outlet box has a ground wire (green or bare
copper) connect the fan ground wire to it. If your outlet
box does not have a ground wire, the connect the fans and
mounting bracket wire together. Secure wire connection
with the plastic wire nuts provided.
3. Figures 7 and 8 illustrate the wiring connections for
optional wall control (available at your Hampton Bay
,
Retailer, the wire color out of wall control s installation
manual for correct wire connections).
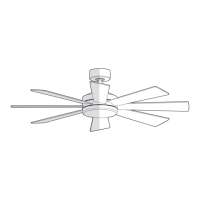
If
Outlet box
Figure 4
Figure 5
4
Mounting bracket
Washer
Screw
 Loading...