6
www.hardlifeutility.com
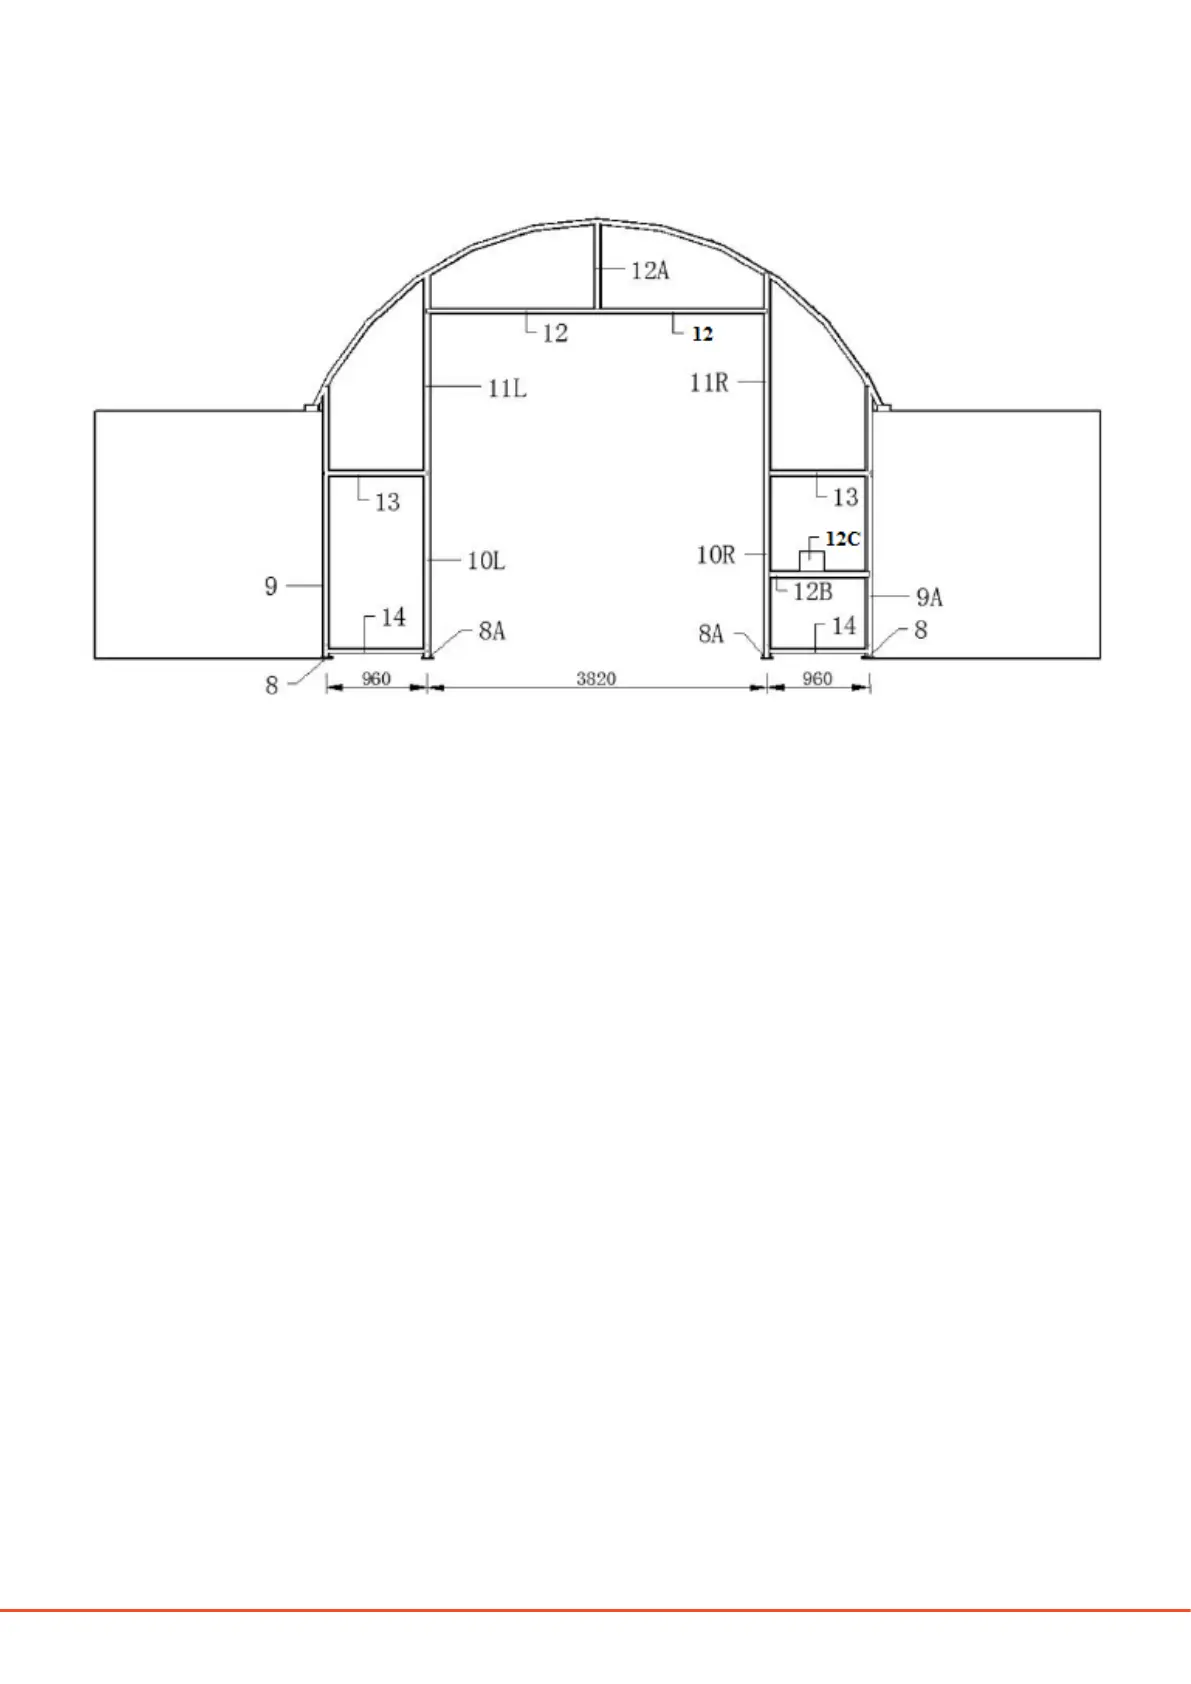
1. Install both end panels’ base plates at the side (component code 8) and the base plates for the front door
(component code 8A), as shown in Figure 1.
2. Secure the base plates at the side (8) using two 450 mm stake pegs (component code 34) each, and secure
the base plates for the front door (8A) using two 700 mm stake pegs (component code 35) each, as shown
in Figure 2.
3. Install the standing legs at the side (component code 9) and the standing legs at the front panel’s side
(component code 9A) on the base plates, as shown in Figure 1. e bottom of the standing legs is nar-
rower than the short tubes that are welded on the base plates and can be inserted into it. Secure the upper
ends of the standing legs (9 and 9A) to the arch using clips (component code 37), as shown in Figure 2.
4. Insert the winch door’s le lower track (component code 10L) and the winch door’s right lower track
(component code 10R) on the base plates for the front door (8A), as shown in Figure 1. e bottom of the
lower tracks is narrower than the short tubes that are welded on the base plates and can be inserted into
it.
5. Insert the winch door’s le upper track (component code 11L) into the winch door’s le lower track
(component code 10L) and the winch door’s right upper track (component code 11R) into the winch
door’s right lower track (component code 10R), as shown in Figure 1.
FRONT WALL ASSEMBLY
Figure 1