8 – English
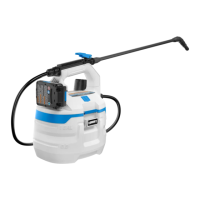
FILLING THE TANK
See Figure 5.
WARNING:
Beforefillingthetank,alwaysremovethebatterypack.
Wipeupanyspillsbeforeinsertingthebattery pack.
Following this rule will reduce the risk of electric shock
andcorrosiveliquidsenteringthebatterypack,which
can cause battery pack failure including short circuit
resultinginsmoke,fire,and/orseriouspersonalinjury.
WARNING:
Alwaysfollowthechemicalmanufacturer’sinstructions
printed on their product labeling for use, cleaning, and
storage.Donotcombinechemicals.Clean thoroughly
after each use, following the instructions in the Main-
tenance sectionofthismanual.Chemicalsshouldbe
storedoutofthereachofchildren.Failuretodosomay
resultinseriouspersonalinjury.
WARNING:
Donotallowconductiveorcorrosivefluidstogetinside
thebatterypack.Ifconductiveorcorrosivefluidsare
spilled on the battery, refer to the instructions in your
batteryoperatorsmanual.
When adding spray solutions, you may add water and the
desired chemical solution directly into the tank, or use a
solution that has been premixed in a separate container,
thenpouredintothesprayer,usingafunnelifneeded.For
either method, remember:
Liquidsusedmustbeasthinaswater.Thickerliquids
willnotsprayproperly.
Donotoverfillthetank.
NOTE: If using a measuring container or funnel to fill the
tank, be sure to thoroughly clean and rinse these items after
use.Ifpremixingthesprayingsolution,rinsethecontainer
usedformixing.
To fill:
Removethebatterypack.
Unscrewthecapandremoveitfromthetank.
Fill the tank with the desired amount of liquid (up to 1 gal-
lon).
NOTE: To ensure proper operation of the sprayer, do
not fill past the max fill line.
Screw the cap back onto the sprayer, making sure it is
tightenedsecurely.
NOTE:Wipe the outside of the tank with a dry cloth and
cleanupanyspillsbeforeinsertingthetank.
Reinstallthebatterypack.
NOTE: If using a measuring container other than the mea-
suring cap, or if using a funnel to fill the tank, be sure to
thoroughlycleanandrinsetheseitemsafteruse.Ifpremix-
ingthespraysolution,rinsethecontainerusedformixing.
NOTICE:
It is important to thoroughly clean the unit after each
use. Allowing liquid to remain in an idle tool for an
extended period may cause its moving pieces and
connectorstoseizeup.
INSTALLING/REMOVING BATTERY PACK
See Figure 6.
WARNING:
Alwaysremovebatterypackfromyourtoolwhenyou
areassemblingparts,makingadjustments,cleaning,
orwhennotinuse.Removingbatterypackwillprevent
accidental starting that could cause serious personal
injury.
To install:
Aligntheraisedribonthebatterypackwithgrooveinthe
batteryportandplacethebatterypackinthetool.
Make sure the latch on the battery pack snaps in place
and that the battery pack is secured in the tool before
beginningoperation.
To remove:
Depress the latch on the battery pack to release the bat-
terypackandremoveitfromthetool.
For complete charging instructions, see the operator’s
manualsforyourbatterypackandcharger.
WARNING:
Risk of fire or explosion. Spray area must be well-
ventilatedandawayfromsparksorflames.
TURNING THE SPRAYER ON/OFF
See Figures 7 - 8.
To turn the sprayer ON,depresstheON/OFFbutton.
To start the flow of liquid at the spray wand, depress the
trigger.
To stop the flow of liquid at the spray wand, release the
trigger.
To turn the sprayer OFF, depress the ON/OFF button
again.
OPERATION

 Loading...