USE ONLY HAYWARD GENUINE REPLACEMENT PARTS
6
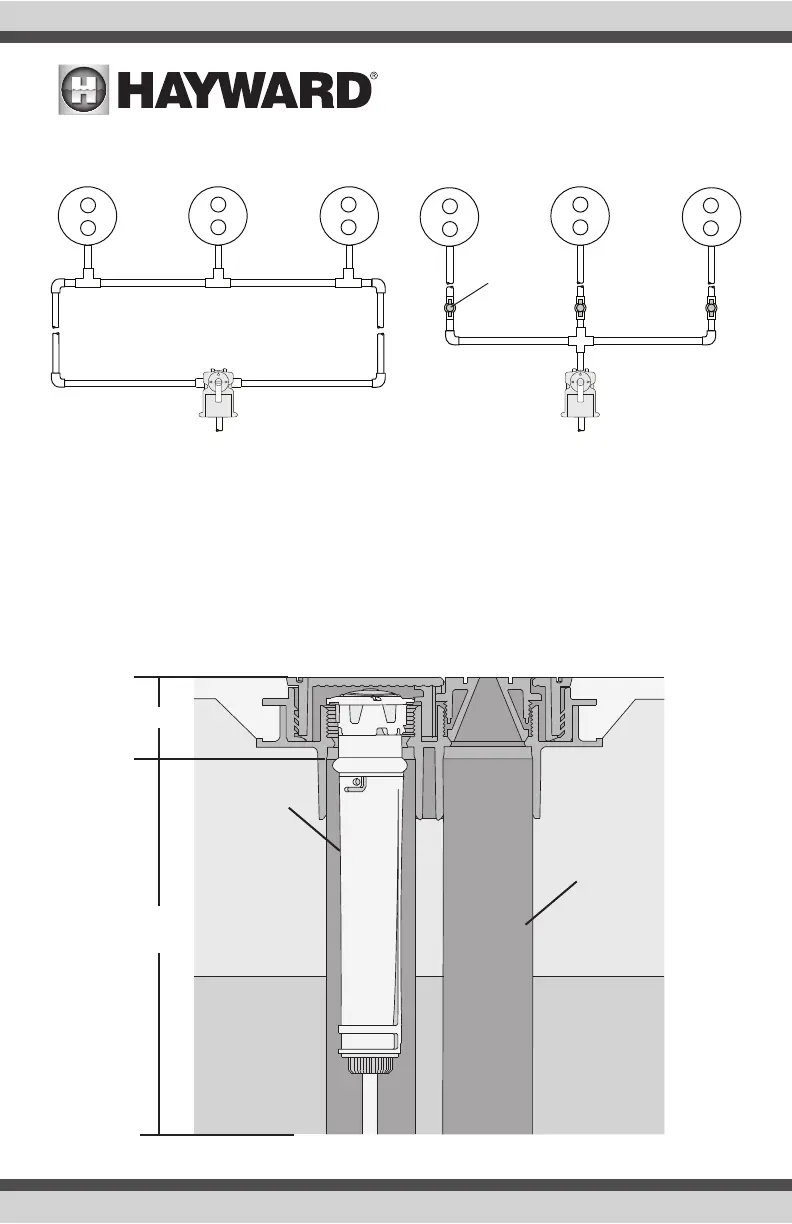
Installation Steps
Follow the steps below to ensure proper installation of the ColorLogic Bubbler.
1. Cut the two pieces of 1.5” pipe to no less than 2” and no more than 2.125” beneath the sur-
face level to ensure proper final installation height. Refer to the table on page 7 for minimum
clearance height if accent lighting is desired. If lighting will not be used, it is recommended
that you still leave enough room in case of a future upgrade. See the image below for refer-
ence.
Use the looped plumbing scheme below if multiple
bubblers will be installed at the same depth.
Use the plumbing scheme below with individual
valves if bubblers will be installed at different depths.
From Pool or Spa Water Supply From Pool or Spa Water Supply
Valve
2”
Refer to table
on page 7
Finish Height
1.5” SCHED
40 Electrical
Conduit
1.5” SCHED
40 PVC Pipe
Finish Height
 Loading...