22
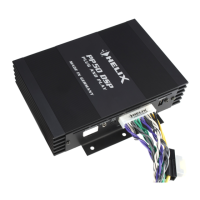
Hardware conguration
use an active USB extension cable with inte-
grated repeater.
3. First turn on the amplier and then start
the software. The operating software will be
updated automatically to the latest version if it
is not up-to-date.
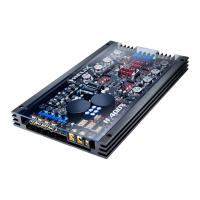
8. Adjustment of the input sensitivity of the
analog signal inputs
ATTENTION: It is mandatory to prop-
erly adapt the input sensitivity of the
P SIX DSP ULTIMATE to the signal source
in order to achieve the best possible signal
quality and to avoid damage to the ampli-
er. It is also mandatory to adjust the “Volt-
age Range” to the output voltage of your
signal source (see page 19, point 1).
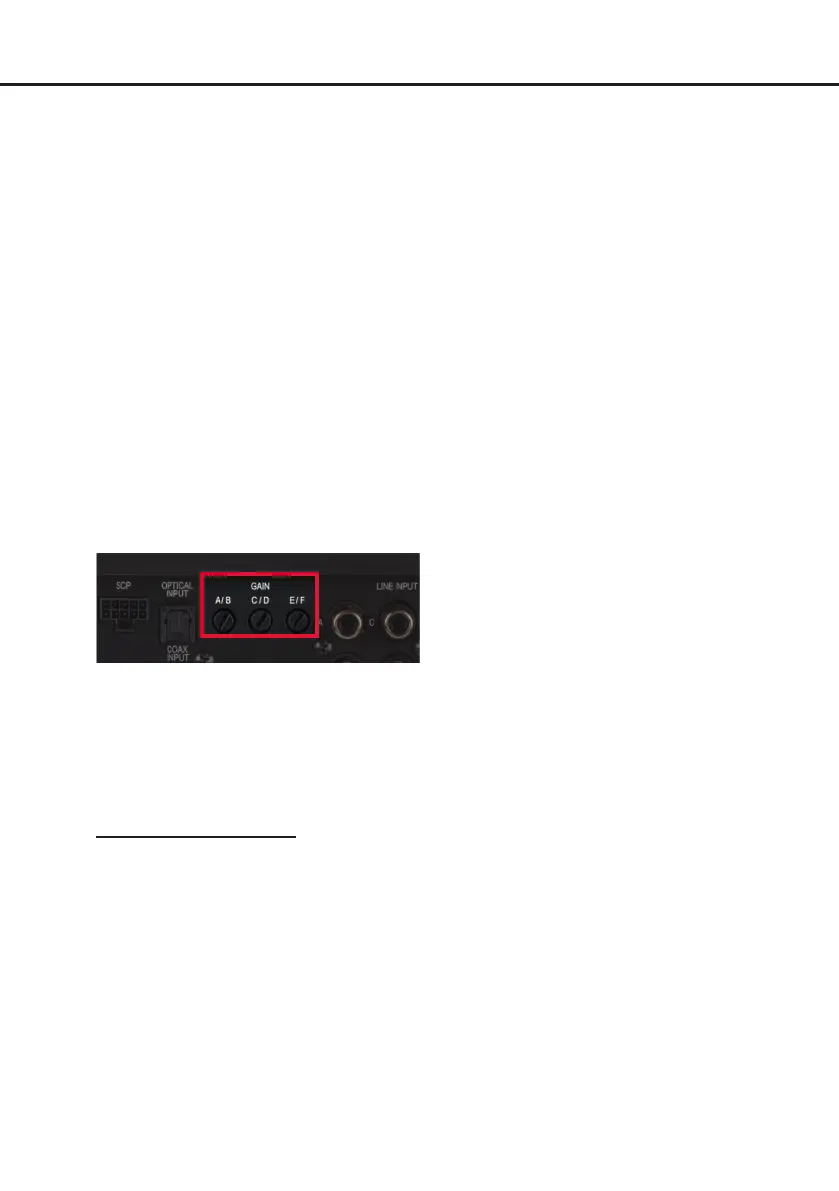
The input sensitivity of each channel pair can
be optimally adapted to the signal source us-
ing the three gain controls.
The setting of the controls aects both the
lowlevel and the highlevel inputs!
Input sensitivity is factory set to 16 Volts (high-
level) and 4 Volts (RCA / Cinch). This is de-
nitely the best setting in most applications.
The gain control ranges are:
Low Voltage Range conguration:
Highlevel: 4 - 16 Volts
RCA / Cinch: 1 - 4 Volts
High Voltage Range conguration:
Highlevel: 8 - 32 Volts
RCA / Cinch: 2 - 8 Volts
If the signal source provides a lower output
voltage, the input sensitivity can be smoothly
increased via the controls.
If your signal source delivers a higher output
voltage – for example, if a factory-installed
amplier serves as signal source – the input
sensitivity must be lowered via the controls
and the correct conguration of the “Voltage
Range” jumpers must be checked.
If you are not sure regarding the signal sourc-
es output voltage, please contact your HELIX
specialist dealer.
The Clipping LED (see page 18, point 8)
serves as monitoring tool.
Note: Don‘t connect any ampliers or
loudspeakers to the outputs of the HELIX
P SIX DSP ULTIMATE during this setup.
For ne adjustment please proceed as fol-
lows:
1. Turn on the amplier.
2. Adjust the volume of your radio to approx.
90 % of the max. volume and playback
an appropriate test tone, e.g. pink noise
(0 dB).
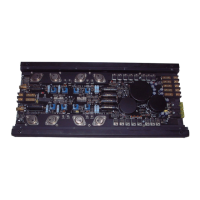
3. If the Clipping LED already lights up, you
have to reduce the input sensitivity via the
appropriate gain control (see image left
side) until the LED turns o.
4. Increase the input sensitivity by turning the
gain control clockwise until the Clipping
LED lights up. Now turn the control coun-
terclockwise until the Clipping LED turns
o again.
5. Repeat this process for each channel pair
you are using.
Various adjustment examples of the input sen-
sitivity can be found on page 24. For further
applications please contact your HELIX spe-
cialist dealer.
9. Conguration of the internal DSP
The general DSP settings should be con-
ducted with the DSP PC-Tool software be-
fore using the amplier for the rst time.
Now you are able to congure your
P SIX DSP ULTIMATE with our intuitive DSP
PC-Tool software. Useful hints for the correct
setting can be found in our knowledge base at
www.audiotec-scher.com.
Caution: We highly recommend to set the
volume of your car radio to minimum position
during rst start-up. Additionally no devices
 Loading...