UM DS-2CE7xH0T-ITxxx Series Turret 052020NA 9
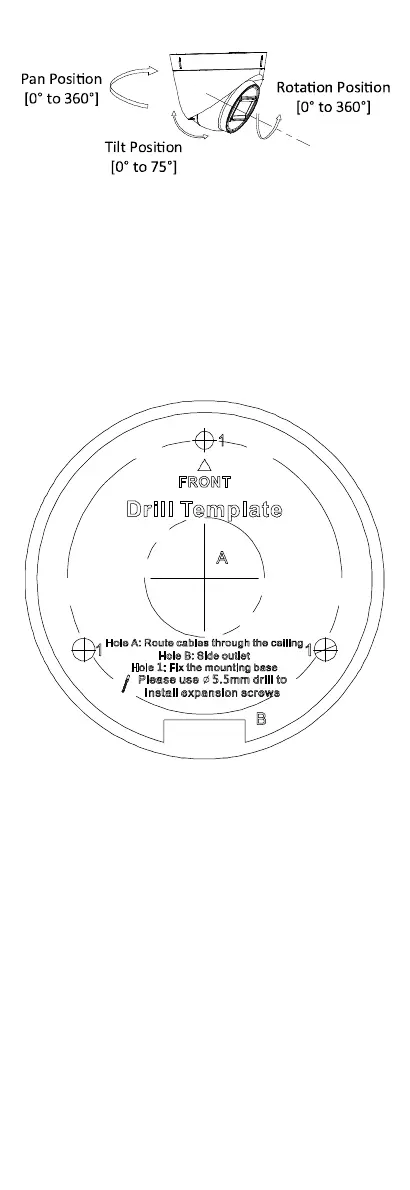
camera according to the figure below.
Figure 8, 3-Axis Adjustment
3.1.2
Ceiling/Wall Mounting with Junction Box
Before You Start
You need to purchase a junction box in advance.
1. Paste the drill template where you want to install
the camera.
2. Drill screw holes and the cable hole (optional)
according to the drill template.
Figure 9, Drill Template
3. Take apart the junction box, and align the screw
holes of the mounting base with those on the
junction box’s cover.
4. Install the mounting base on the junction box’s
cover with three PM4 screws.
5. Secure the junction box’s body on the wall with
three PA4 × 25 screws.
 Loading...