EN 14
Starting setup
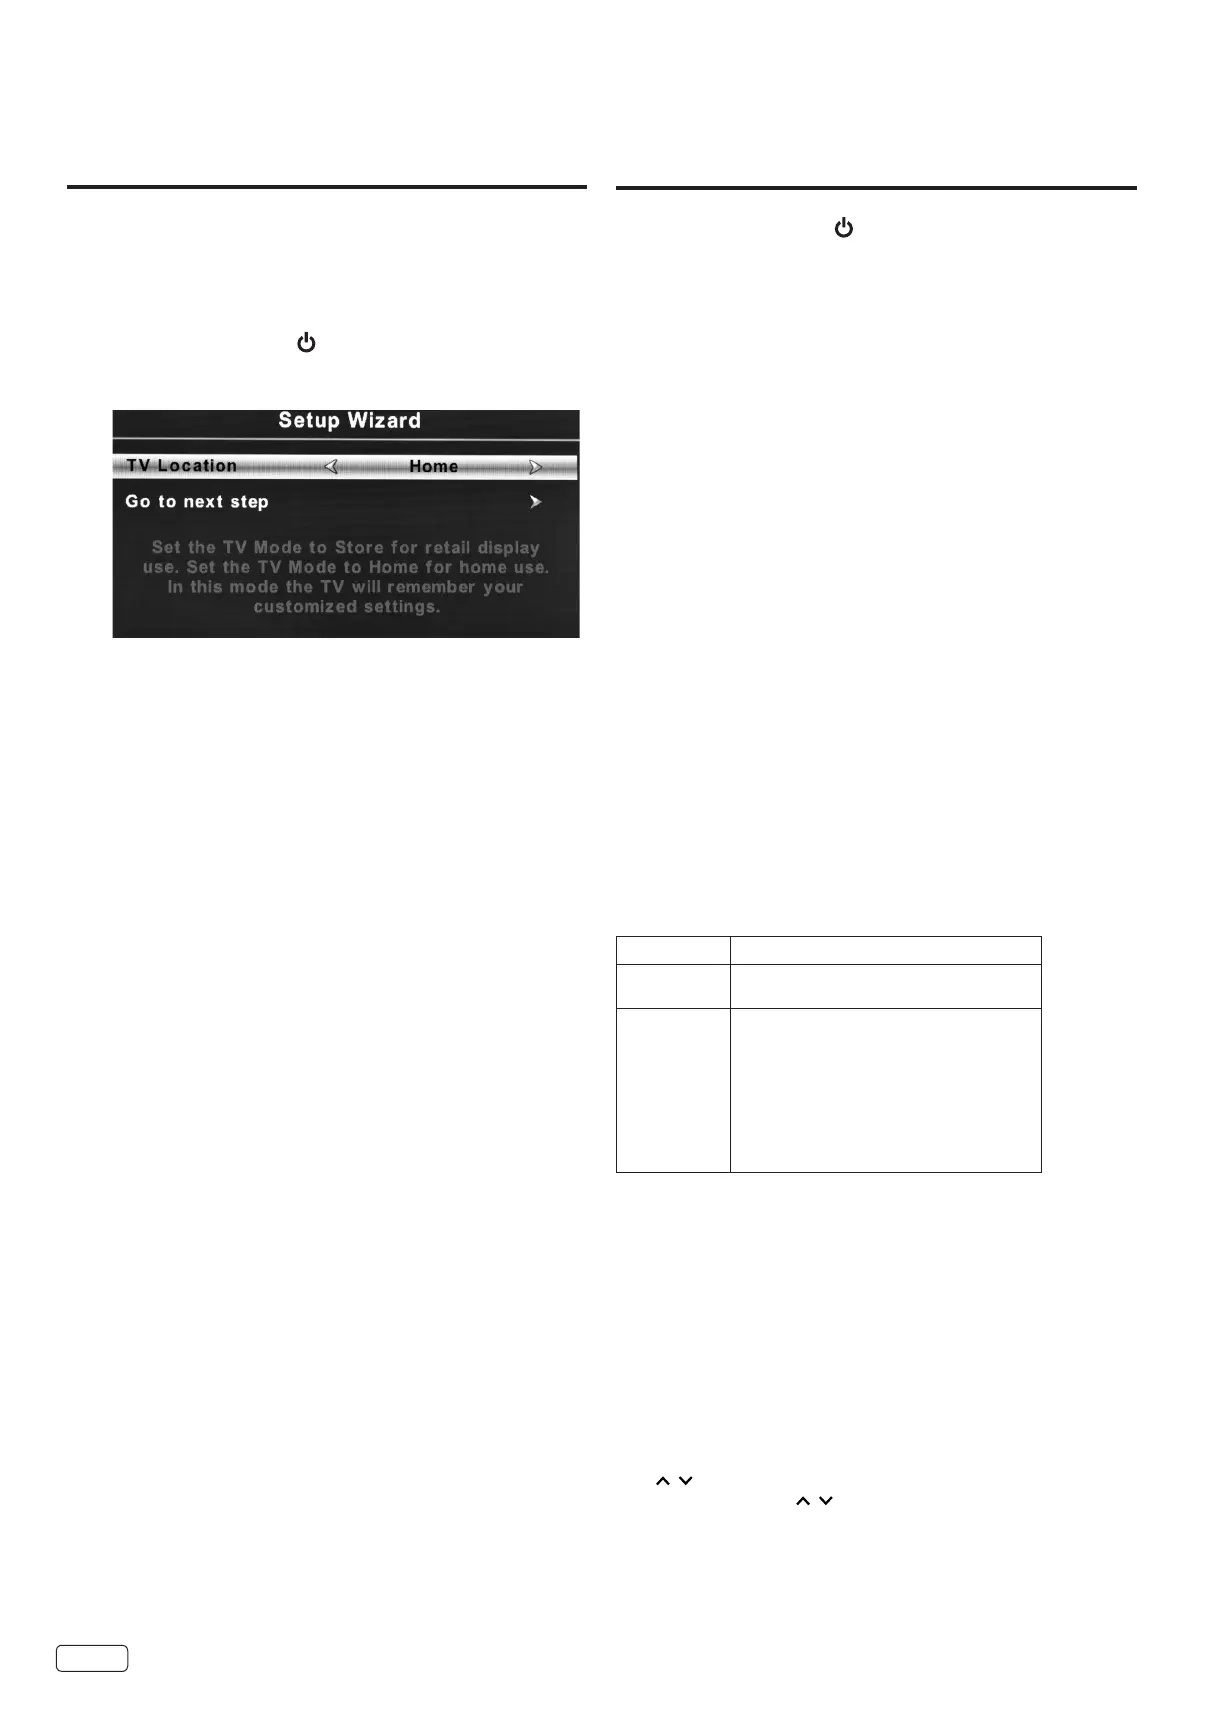
The Setup Wizard appears the rst time you turn on the
TV, and assists you to specify the Air/Cable setting, and
program your channels automatically.
IMPORTANT: Make sure that the antenna or cable TV system
connection is made.
1
To turn on the TV, press . It may take approx. 10 seconds for
a picture to appear on screen. The Initial Setup Wizard begins.
2
3
Select your “TV Mode” by pressing ◀ or ▶ to select “Home”
or “Store”.
NOTE:
Home mode will remember customized user settings in TV.
Store mode is intended for in-store display and resets user
settings each time TV is turned o.
4
Press ▶ or OK to go to the next step.
5
Press ◀ or ▶ to select your menu language, then press ▼
or OK.
Press ▶ or OK to go to the next step.
6
Press ◀ or ▶ to select your time zone, then press ▼ or OK.
• In the rare event that you live within broadcast range
of two stations in two dierent time zones, the TV may
recognize the wrong station for the auto clock set.
7
Press ◀ or ▶ to select daylight saving time on or o, then
press ▼ or OK.
8
Press ◀ or ▶ to your desired time format, then press ▼ or
OK.
9
Press ▶ or OK to go to the next step.
10
Press ◀ or ▶ to select the signal type that you using, then
press ▼ or OK.
11
Press ▶ or OK to go to the next step.
12
Auto Channel Scan will begin. After the scan is completed,
a TV channel appears on the screen.
• Depending on the reception condition, it may take up to
30 minutes to complete scanning channels. Please allow
the process to complete without interruption.
NOTE:
• If you press EXIT during the “Auto Channel Scan” process,
the Auto Channel Scan will stop and the TV will change to the
normal view.
When you make a menu selection, your changes
occur immediately. You do not have to press EXIT to see your
changes.
TV operation
1
To turn on the TV, press . It may take approx.10 seconds for a
picture to appear on screen.
2
Adjust the volume level by pressing VOL (VOLUME) + or – .
The volume level will be indicated on the screen by a volume
bar.
If the volume increases, the number of bars also increases.
If the volume decreases, the number of bars also decreases.
3
Set the Source option to the appropriate selection (see “Air/
Cable selection” on page 19).
4
Press the Direct Channel Selection Buttons (0-9, –) to
select the channel.
TO SELECT ANALOG CHANNELS
1-9: Press 1-9 as needed. Example, to select channel 2,
press 2, then press OK.
10-99: Press the 2 digits in order. Example, to select
channel 12, press 1, 2, then press OK.
100-135: Press the 3 digits in order. Example, to select
channel 120, press 1, 2, 0, then press OK.
TO SELECT DIGITAL CHANNELS
Press the rst digits, then press the – button followed by the
remaining number.
Example: To select channel 15-1, press 1, 5, –, 1, then press
OK.
• I
f a channel is selected with only audio content, “Audio Only”
will be displayed on the screen.
• If a channel is selected with a weak digital signal, “No Signal”
will be displayed on the screen.
• The same program may be available on either an analog
channel or a digital channel. You may choose to watch
either format.
VHF/UHF/CABLE CHANNELS
Air Cable
VHF
2-13
VHF
2-13
UHF
14-69
STD/HRC/IRC
14-36 (A) (W)
37-59 (AA) (WW)
60-85 (AAA) (ZZZ)
86-94 (86) (94)
95-99 (A-5) (A-1)
100-135 (100) (135)
01 (4A)
NOTE:
• If a channel with no broadcast is selected, the sound will
automatically be muted.
• It may take a few seconds for a digital channel picture to appear
on screen after being selected.
• To direct tune to a digital channel that is not stored in the
channel list enter the rst digits followed by - and press OK. For
example if you want to select channel 15-2, press
1, 5, - then press OK.
To select the video input source
To view a signal from another device connected to your TV, such
as a VCR player, press INPUT, then press ▲ or ▼ to select the
desired input, then press OK.
CH /
Press and release CH / . The TV automatically stops at the
next channel.
For proper operation, before selecting channels, they should be
set into the memory. See “Channels setup” on page 19.
Chapter 2 TV Operation
 Loading...