--- 25 ---
15
16
17
18
47
48
19
20
21
22
23
24
25
26
27
28
34
29
30
31
32
33
31
35
36
37
38
43
46
45
49
50
51
52
53
54
55
56
57
58
59
60
61
62
63
65
68
66
67
69
73
70
71
72
76
77
78
79
80
81
82
74
75
69
44
A
A
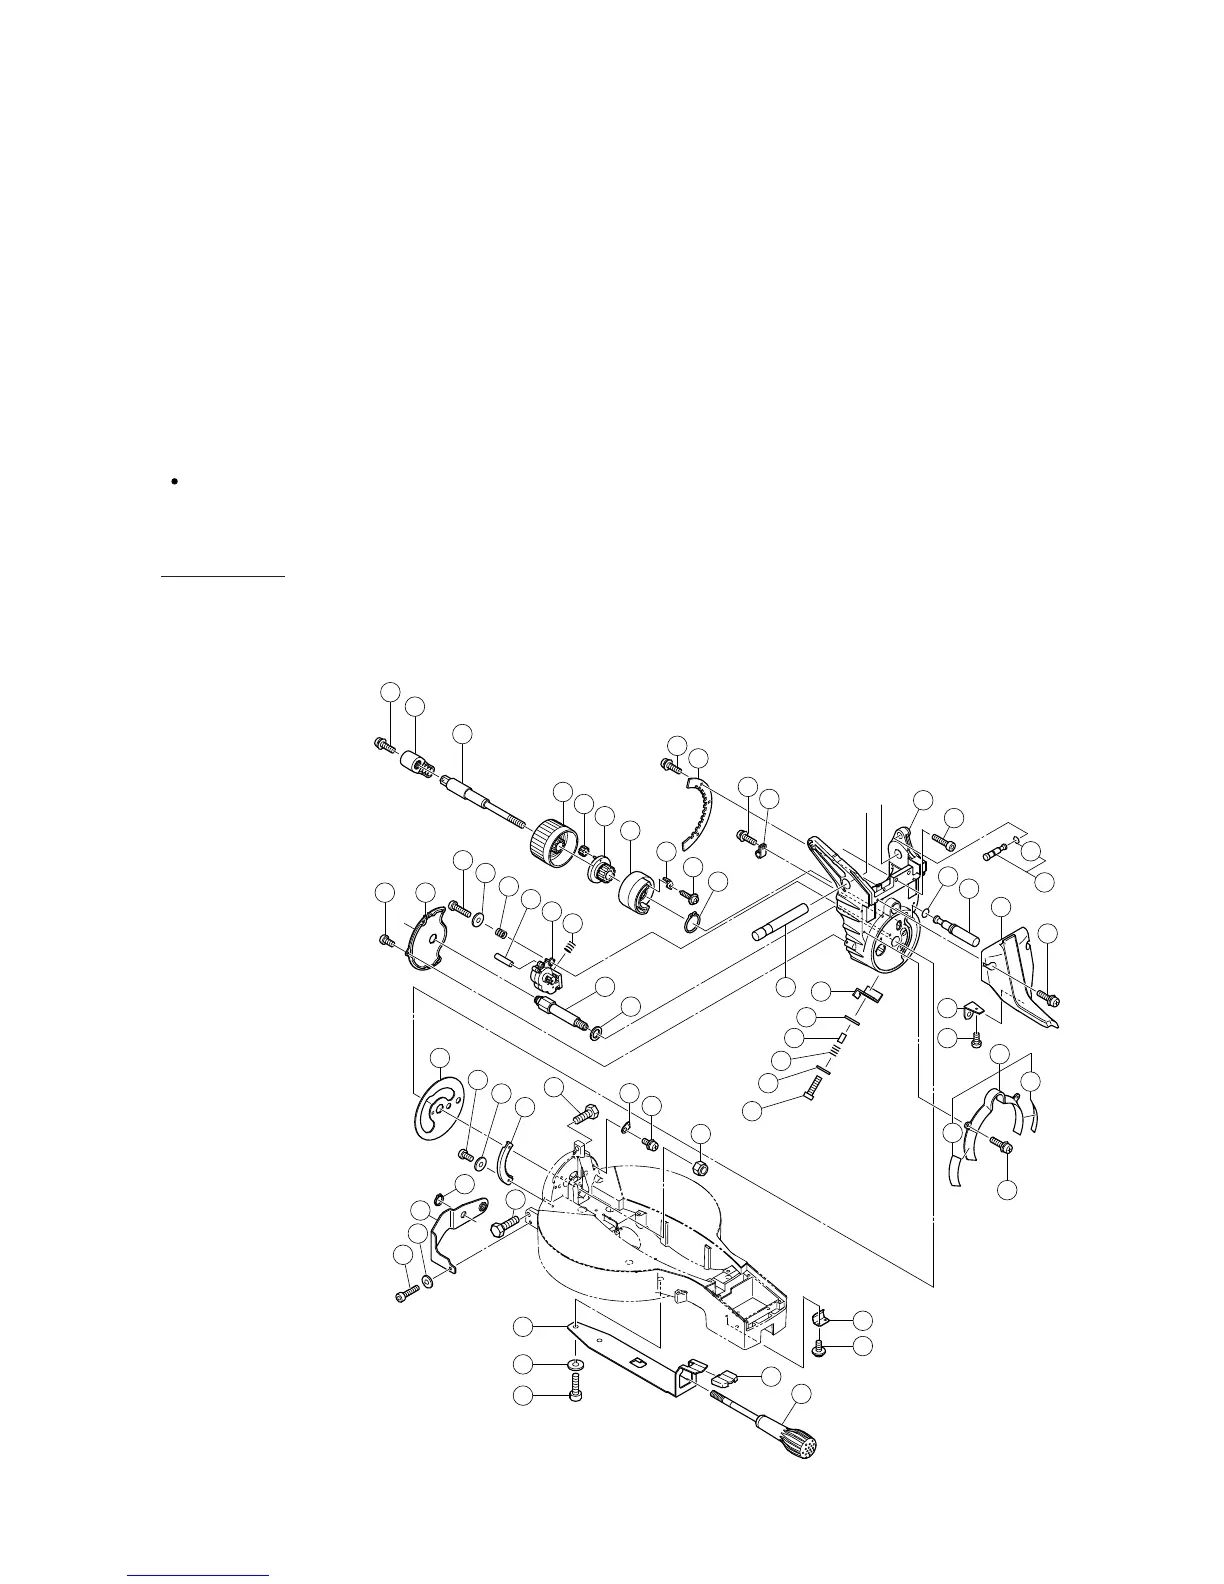
11. PRECAUTIONS IN DISASSEMBLY AND REASSEMBLY
11-1. Precautions in Disassembly and Reassembly of the Laser Marker
Do not stare into the laser emitting aperture during disassembly and reassembly of the laser marker. Do not
observe beam directly with an optical instrument. Use of controls or adjustments or performance of procedures
other than those specified in this TECHNICAL DATA AND SERVICE MANUAL and the Instruction Manual may
result in hazardous radiation exposure.
11-2. Disassembly
Special attention in disassembly should be given to the following items. The circled numbers in the figures and
the [Bold] numbers in the descriptions below correspond to the item numbers in the pars list and exploded
assembly diagram of the Model C 12LDH. For the Model C 12FDH, refer to the parts list separately.
Be sure to first disconnect the power plug when performing disassembly or replacement of the saw blade.
A. Turn table ass'y, base ass'y and hinge ass'y
Tools required:
• Phillips screwdriver
• Flat-blade screwdriver
• Snap ring pliers (For C type axis)
• Box wrench 13 mm
• Box wrench 17 mm
• Box wrench 19 mm
• Wrench 10 mm
• Hex. bar wrench 4 mm
• Hex. bar wrench 6 mm
• Nipper
Fig. 41
 Loading...