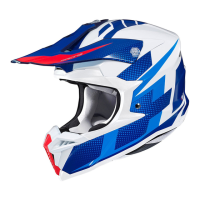
Interior Cleaning
Although we recommend changing a helmet every 3 to 5 years, the accumulation of sweat, humidity and
dirt can deteriorate the fabric and stitching and this may cause odor. To wash HJC removable pads, hand
washing is recommended. If you use a washing machine, please use on “Delicate” setting and air dry. HJC
do not recommend using spin-dryer for the interior pads as it may damage the material. For non-removable
interiors, HJC recommends using anti-bacteria and mildew eliminating products such as “Helmet Fresh.”
or other similar product.
Vent Cleaning
Dirt and debris can find its way into venting of your HJC helmet. Compressed air cans used for cleaning
computer keyboards may be used to blow the debris from the ventilation system. It is recommended that
you remove any removable pads before doing this process.
Always check to make sure helmet pads are installed before using the helmet. A helmet
with missing or improperly installed pads may increase your risk of serious injury
or death in an accident.
Cheek Pad Removal
There are 3 snaps holding the cheek pad in place.
1. Gently pry the cheek pad away from the interior, releasing the snaps.
2. Grasp the cheek pad near its center and gently pull it free from the chin strap.
Cheek Pad Installation
1. Feed the chin strap through the opening in the cheek pad.
2. Align and fully slide the cheek pad plastic plate between shell and EPS.
3. Clip the cheek pad’s 3 small male snaps to the 3 female snaps fixed on the shell interior.
Crown Pad Removal
1. Grasp the crown pad fabric as close as possible to its plastic base and pull/pry away from the helmet.
Notice how the crown pad plastic section aligns with the shell plastic sleeve. This will help orient you
with the reinstallation.
2. Repeat same at rear.
Crown Pad Installation
※Slide tab 'A' from the cheek pad into
ㅤthe holder 'B'.(Repeat same on opposite side)
1. Install the front section first by aligning the plastic shell base and the crown pad plastic sleeve, ensuring
that the center and side holes are properly aligned. Press the crown pad plastic sleeve (center portion)
into the center of the channel which is built into the plasticshell base, working your way outward to each
side.
2. Align and snap the two rear snaps into place.
1. Turn the holder mouth to the direction of the arrow below.
2. Gently pull the mouth vent to the direction of the arrow shown below to detach upper part.
3. Unhook the bottom part gently to the direction of the arrow shown below to fully remove it
Mouth Vent Removal
Holder Mouth

 Loading...