2 of 3 AII 49542 (1306) © 2013 American Honda Motor Co., Inc. – All Rights Reserved.
Installing the Rear Splash Guards
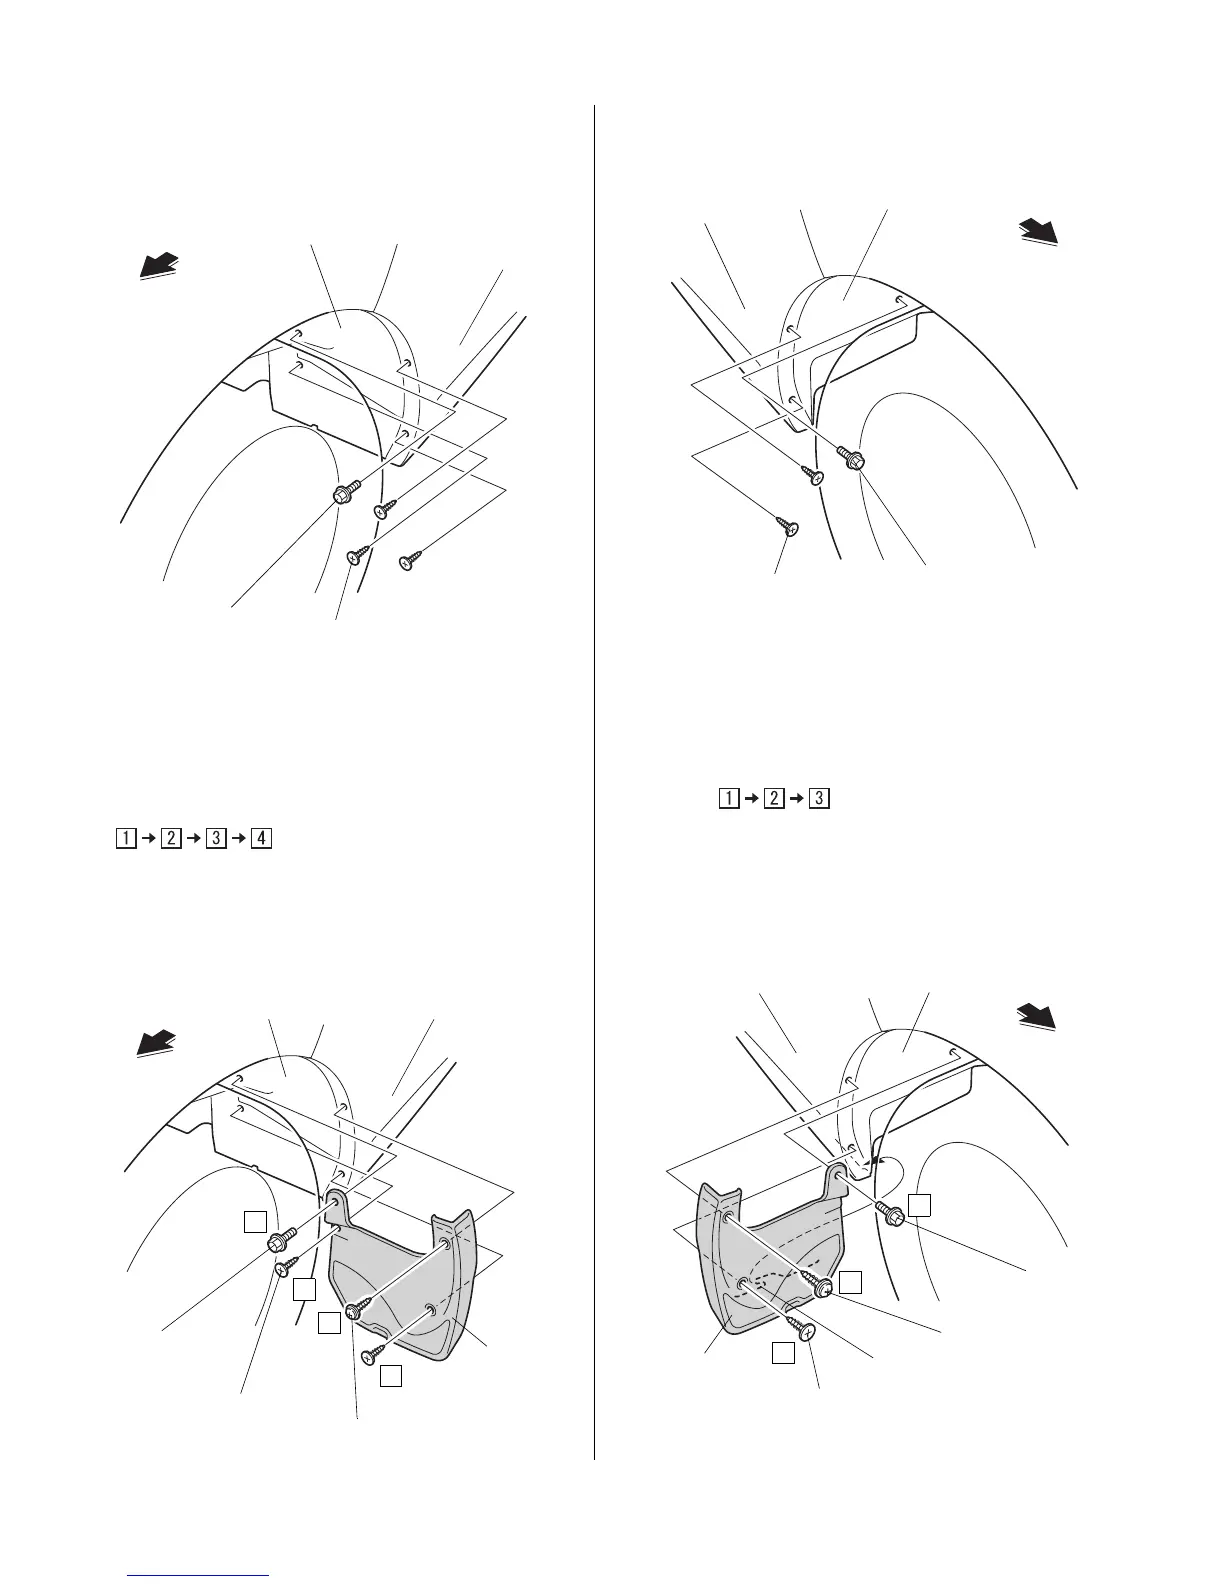
1. Remove one bolt and three screws from the left rear
inne
r fender and rear bumper.
LEFT REAR
INNER FENDER
FRONT
REAR
BUMPER
3 SCREWS
BOLT
2. Secure the left rear splash guard to the left rear inner
fender and rear bumper with one 5 x 25 mm self-
tapping screw, one bolt removed step in 1 and two
screws removed step in 1. While holding the splash
guard firmly against the fenderwell, tighten the self-
tap
p
ing screw, screws and bolt in the order
.
NOTE: Check for a gap between the splash guard
an
d the body. If a gap exists, loosen the screws and
repeat the above procedure.
LEFT REAR
INNER FENDER
LEFT
REAR
SPLASH
GUARD
FRONT
BOLT
5 x 25 mm
SELF-TAPPING SCREW
1
2
3
REAR
BUMPER
4
2 SCREWS
3. Remove one bolt and two screws from the right rear
inner fender and rear bumper.
RIGHT REAR
INNER FENDER
FRONT
REAR
BUMPER
BOLT
2 SCREWS
4. Secure the right rear splash guard to the right rear
inner fender and rear bumper with one hook, one 5 x
25 mm self-tapping screw, one bolt removed step in
3 and one screw removed step in 3. While holding
the splash guard firmly against the fenderwell,
tigh
te
n the self-tapping screw, screw and bolt in the
order
.
NOTE: Check for a gap between the splash guard
and the
body. If a gap exists, loosen the screws and
repeat the above procedure.
RIGHT REAR
INNER FENDER
RIGHT
REAR
SPLASH
GUARD
FRONT
BOLT
1
2
3
REAR
BUMPER
HOOK
SCREW
5 x 25 mm
SELF-TAPPING
SCREW
 Loading...