120 Servicing Your Honda
Drive Chain
For maximum service life, the drive chain should
be cleaned, lubricated, and adjusted before each
outing.
1. Remove the master link retaining clip (1) with
pliers.
Do not bend or twist the clip.
2. Remove the master link (2). Remove the drive
chain.
3. Clean the drive chain in high flash-point
solvent and allow it to dry.
4. Inspect the drive chain for possible wear or
damage. Replace the drive chain if it has
damaged rollers, loose fitting links, or
otherwise appears unserviceable.
Chain:
5. Inspect the sprocket teeth for wear or damage.
We recommend replacing the sprocket
whenever a new chain is installed.
Both chain and sprockets must be in good
condition, or the new replacement chain or
sprocket (s) will wear rapidly.
Excessively worn sprocket teeth have a
hooked, worn appearance. Replace any
sprocket which is damaged or excessively
worn.
NOTICE
Use of a new chain with worn sprockets will cause
rapid chain wear.
6. Install the chain.
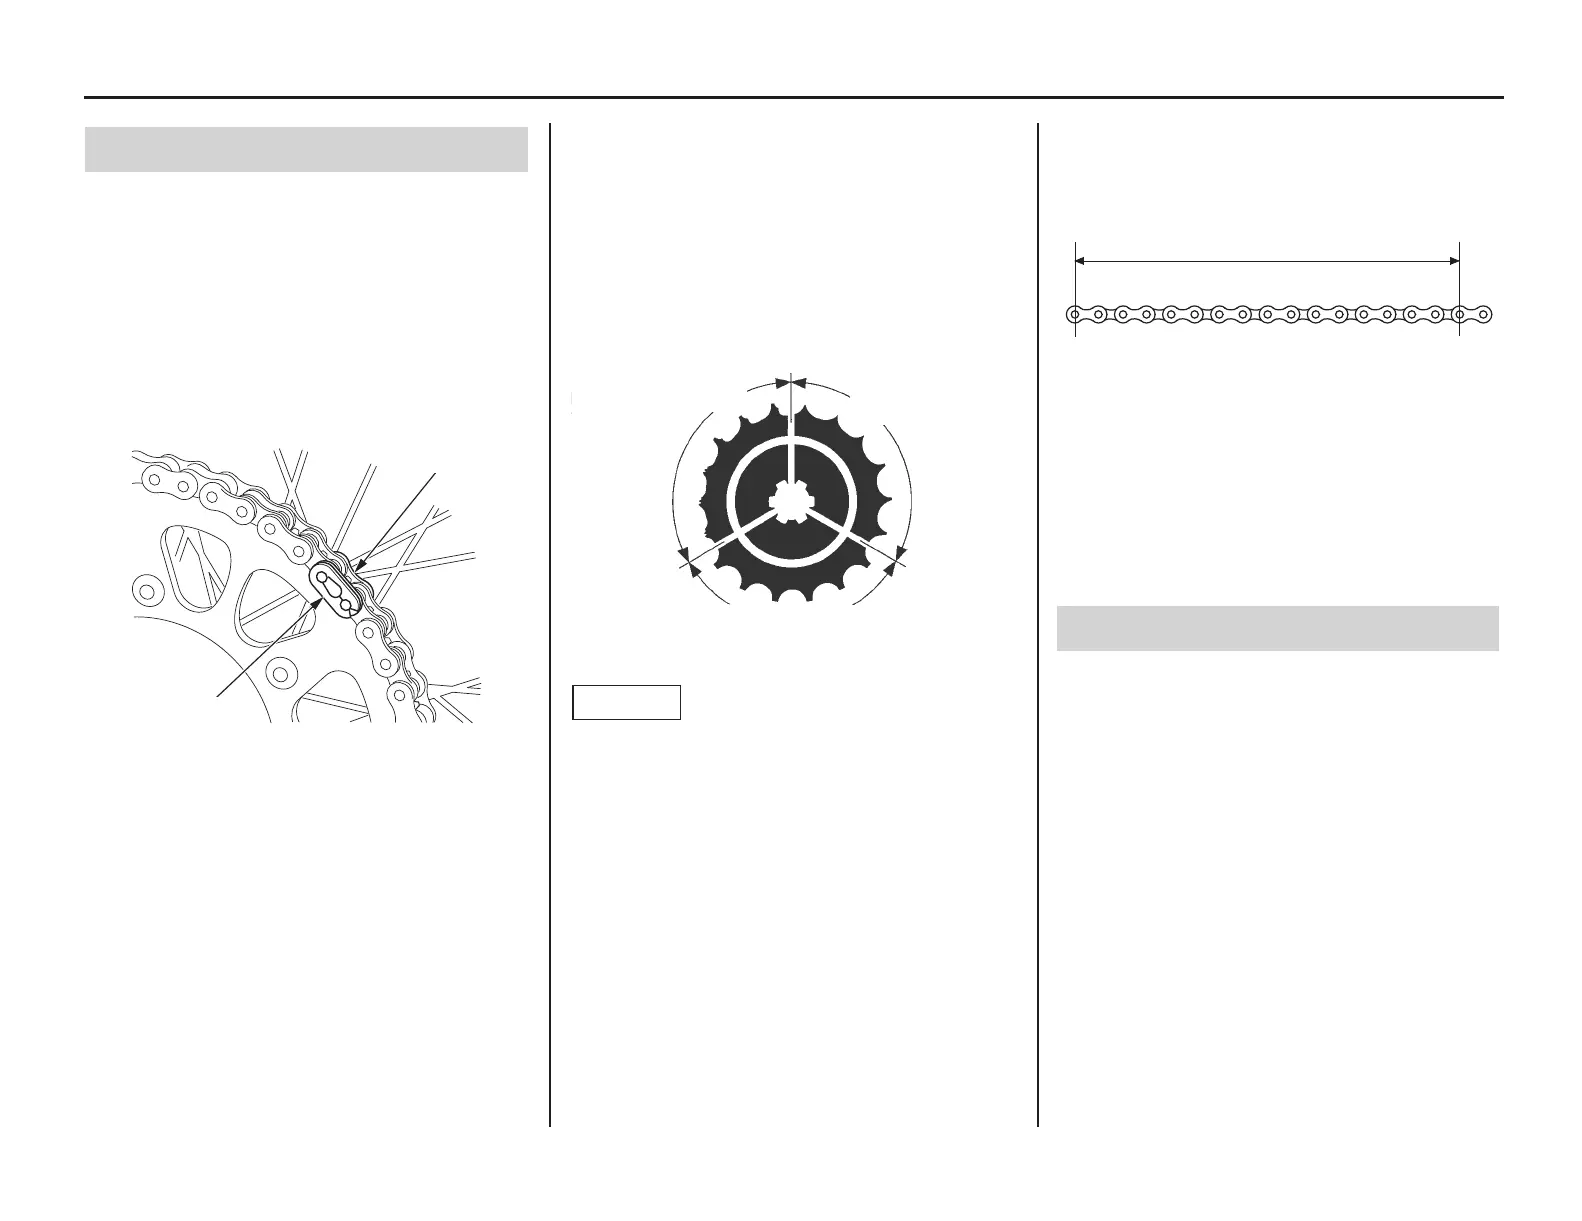
7. Measure a section of the drive chain to
determine whether the chain is worn beyond its
service limit. Put the transmission in gear, and
then turn the rear wheel forward until the lower
section of the chain is pulled taut. With the
chain held taut and any kinked joints
straightened, measure the distance between a
span of 17 pins, from pin center to pin center.
If the measurement exceeds the service limit,
replace the chain. After the chain is measured, shift
the transmission into neutral again before
proceeding with inspection and service.
8. Lubricate the drive chain (page 119).
9. Pass the chain over the sprockets and join the
ends of the chain with the master link. For ease
of assembly, hold the chain ends against
adjacent driven sprocket teeth while inserting
the master link. Install the master link retaining
clip so that the closed end of the clip will face
the direction of forward wheel rotation.
10. Recheck chain slack and adjust as necessary.
• The master link is the most critical element of
drive chain security. Master links are reusable,
as long as they remain in excellent condition.
We recommend installing a new master link
retaining clip when the drive chain is
reassembled.
• You may find it easier to install a new chain by
connecting it to the old chain with a master link
and pulling the old chain to position the new
chain on the sprockets.
Removal, Cleaning & Replacement
(1) master link retaining clip
(2) master link
Size/link:
D.I.D 520DMA4/116RB
RK520TXZ/116RJ
(2)
(1)
Normal Sprocket Teeth
Damaged Sprocket
Teeth
Worn Sprocket
Teeth
REPLACEREPLACE
GOOD
Service limit: 10.20 in (259.0 mm)
More About Drive Chain
MEASURE A SPAN OF 17 PINS (16 PITCHES)

 Loading...