Suspension
(cont’d)
Servicing Your Honda 89
1. Remove the number plate (page 125).
2. Place your CRF on an optional workstand or
equivalent support with the front wheel off the
ground.
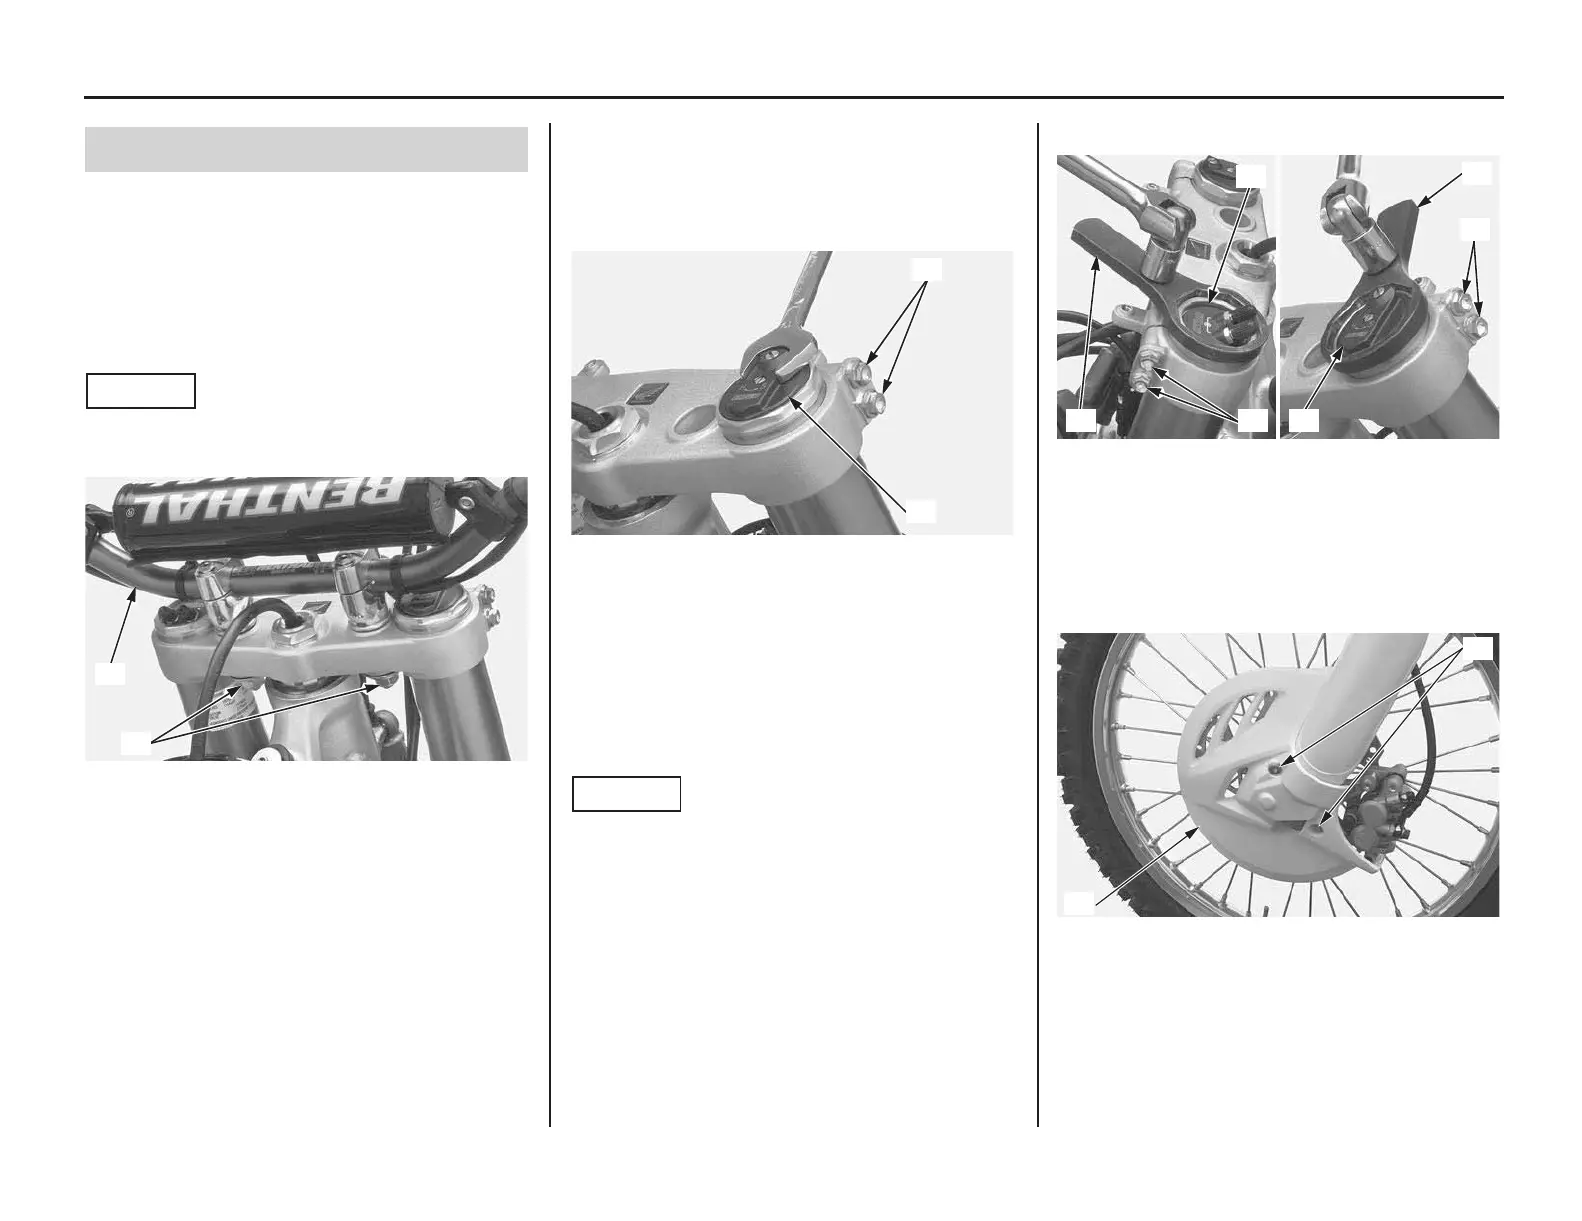
3. Remove the handlebar lower holder nuts,
washers, mounting rubbers (1) and handlebar
(2).
NOTICE
Keep the master cylinder upright to prevent air
from entering system.
4. When the right fork damper oil is ready to be
changed, loosen the right fork bridge upper
pinch bolts (3) and fork cap assembly (4), but
do not remove it yet.
5. Loosen the right and left fork bridge upper
pinch bolts (3).
6. When the fork is ready to be disassembled,
loosen the air cylinder unit (5) and/or fork
damper (6) using a lock nut wrench (7), but do
not remove them yet.
• Lock nut wrench 07WMA-KZ30100
NOTICE
Do not use an adjustable wrench to loosen the fork
cap assembly, fork damper and air cylinder unit:
it may damage them.
7. Remove the disc cover (8) by removing disc
cover socket bolts (9) from the left fork.
Fork Removal
(1) handlebar lower holder nuts, washers and mounting
rubbers
(2) handlebar
(1)
(2)
(3) fork bridge upper pinch bolts
(4) fork cap assembly
(3) fork bridge upper pinch bolts
(5) air cylinder unit
(6) fork damper
(7) lock nut wrench
(8) disc cover
(9) disc cover socket bolts
(6)
Left fork:
(3)
Right fork:
(3)(7)
(5)
(7)

 Loading...