Action Figure Page
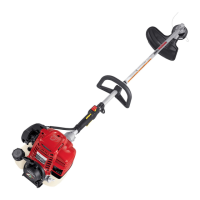
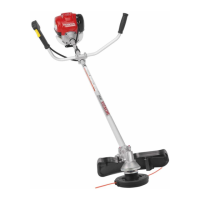
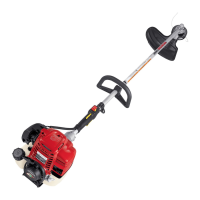
Product Features
A
70
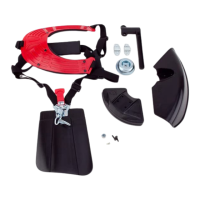
Delivery scope
B
71
Mounting the protection guard
C
71
Mounting the plant protector
D
72
Mounting the handle/operating
advice for right-handers
E
73
Mounting the handle/operating
advice for left-handers
F
73
Mounting the carrying strap
G
74
Battery charging and inserting
H
74
Switching on and o
I
75
Mounting the cutting line*
J
76
Line feeding
K
77
Removing the spool
L
77
Action Figure Page
Working Advice 1
M
78
Working Advice 2
N
78
Working with the plant protector
O
79
Storage
P
80
Maintenance
Q −R
80 −81
Accessories
S
82
* Only use genuine parts
The declared vibration total value(s) and the declared
noise emission value(s) have been measured in accordance
with a standard test method and may be used for
comparing one tool to another.
The declared vibration total value(s) and the declared
noise emission value(s) may also be used in a preliminary
assessment of exposure.
The vibration and noise emissions during actual use
of the power tool can dier from the declared values
depending on the ways in which the tool is used especially
what kind of workpiece is processed; and of the need to
identify safety measures to protect the operator that are
based on an estimation of the exposure measures in the
actual conditions of use (taking account of all parts of
the operating cycle such as the times when the tool is
switched o and when it is running idle in addition to
the trigger time).
Mounting and Operation
Line Length Adjustment
To feed the line simply tap the trimmer spool onto the
ground. The spool will release approximately 10 mm of
line to each side of the spool.
If the line has broken o close to the eyelet, tapping
should be repeated a few times in order to cut at the full
33 cm diameter.
Replacing the Line
The spool enables line loading without the need to
disassemble the spool. In case the spool needs reloading
with line:
Problem Possible Cause Corrective Measure
Motor refuses to start Battery discharged
Check the battery charge-control indicator and
charge the battery
Battery too hot/cold Allow to cool/warm
Battery not fully inserted Ensure battery is inserted correctly
Grass wrapped around the spool Remove battery, then remove grass
Garden tool functions
intermittently
On/O switch defective Contact dealer
Internal wiring of garden tool defective Contact dealer
Cutting head is blocked
Remove the cutting head, clear any blockages
and reinsert the cutting head
Troubleshooting
Lawn Trimmer
7 | English
– cut o 3m of the cutting line accessory,
– align the arrows on the spool with the line feed button,
– insert the line through the eyelet marked 'line in' and
pull it through the other side. Measure an equal amount
of line on both sides,
– use the line feed button to wind the line onto the spool
by turning it in an anti-clockwise direction (see arrows
on spool) until approximately 10 cm of line is left on
each side.

 Loading...