11
Blade Removal and Installation
If you remove the blades for sharpening or replacement, you will need
a torque wrench for installation. Wear heavy gloves to protect your
hands.
BLADE SHARPENING: To avoid weakening the blades or causing
imbalance or poor cutting, the blades should be sharpened by trained
staff at an authorized Honda servicing dealer.
BLADE REPLACEMENT: Use Honda Genuine replacement blades or
their equivalent (page 20).
Blade Removal
1. Turn the fuel valve OFF (page 8). Disconnect the spark plug cap
(page 13), then tilt the mower to the right side so the air cleaner
side is up. This will help prevent fuel leakage and hard starting due
to carburetor flooding.
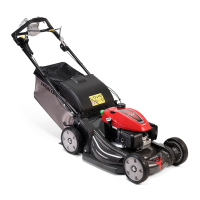
2. Remove the two blade bolts with a 14 mm (6 point) socket wrench.
Use a wooden block to prevent the blades from turning when
removing the bolts. Remove the blades.
Blade Installation
1. Clean dirt and grass from around the blade mounting area.
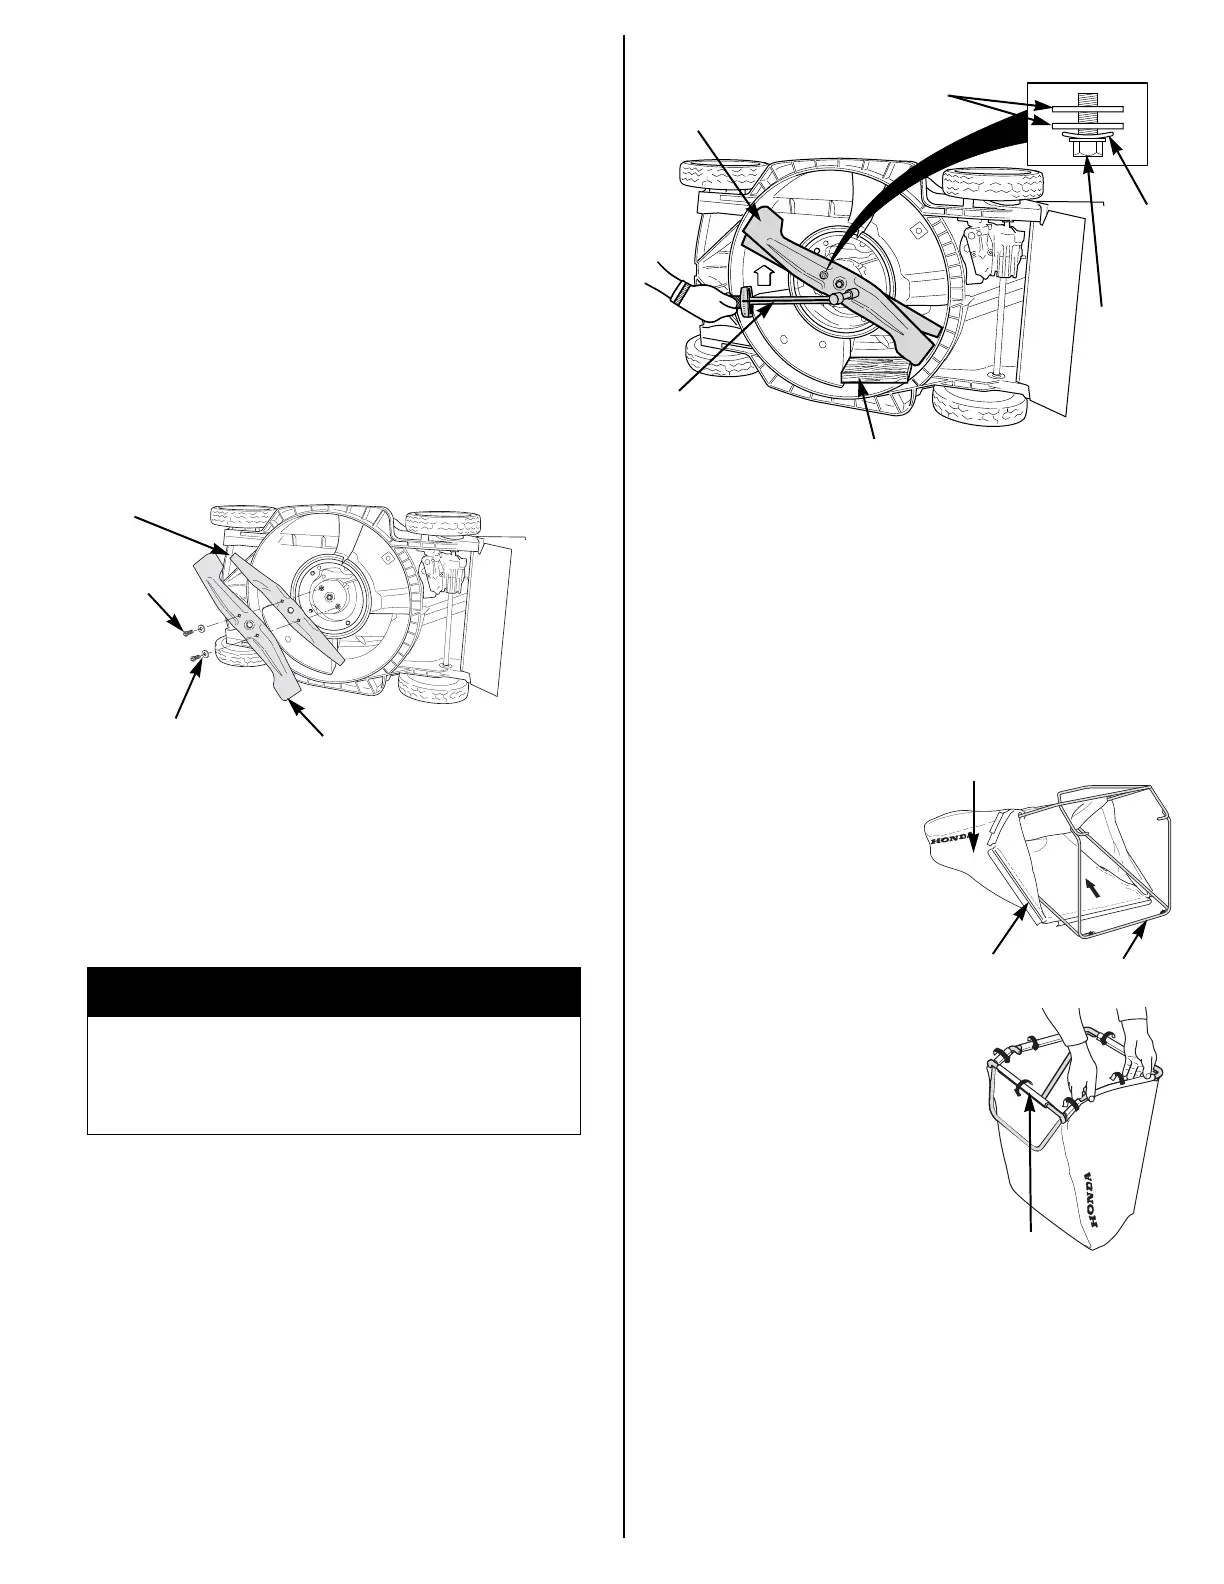
2. Install the blades using the two blade bolts and special washers as
shown. Be sure to install the special washers with the concave side
toward the blades and the convex side toward the bolts.
The blade bolts and washers are specially designed for this
application. When replacing bolts and washers, use only Honda
Genuine replacement parts.
3. Tighten the blade bolts with a torque wrench. Use a wooden block
to prevent the blades from turning when tightening the bolts.
Blade bolt torque: 36 ~ 43 ft-lb; (49 ~ 59 N·m)
If you do not have a torque wrench, have an authorized Honda
servicing dealer tighten the blade bolts before you use the mower.
If the blade bolts are overtightened, they could break. If the blade
bolts are not tightened enough, they could loosen or come out. In
either case, it would be possible for the blades to fly off while you
are operating the mower.
Always use an upper and lower blade as a set.
GRASS BAG CLEANING AND REPLACEMENT
Grass Bag Cleaning
Wash the bag with a garden hose and allow it to dry completely before
use; a wet bag will clog quickly.
Grass Bag Replacement
Replace a worn or damaged bag with a Honda replacement bag or its
equivalent (page 20).
Bag Removal
1. Unclip the plastic edges of the
bag from the frame.
2. Remove the bag from the
frame.
Bag Installation
1. Insert the bag frame into the
bag, as shown.
2. Clip the plastic edges of the
bag onto the frame, as shown.
B WARNING
Operating this mower with only one blade will result in an
improperly seated blade that can be thrown from the
mower and seriously hurt or kill someone.
Always install both blades as a set.
UPPER
BLADE
LOWER
BLADE
BLADE
BOLT (2)
SPECIAL
WASHER (2)
BLADES
SPECIAL
WASHER
BLADE
BOLT (2)
TORQUE
WRENCH
BLADES
WOODEN
BLOCK
FRAME
PLASTIC EDGE
BAG
PLASTIC
EDGE
 Loading...