5
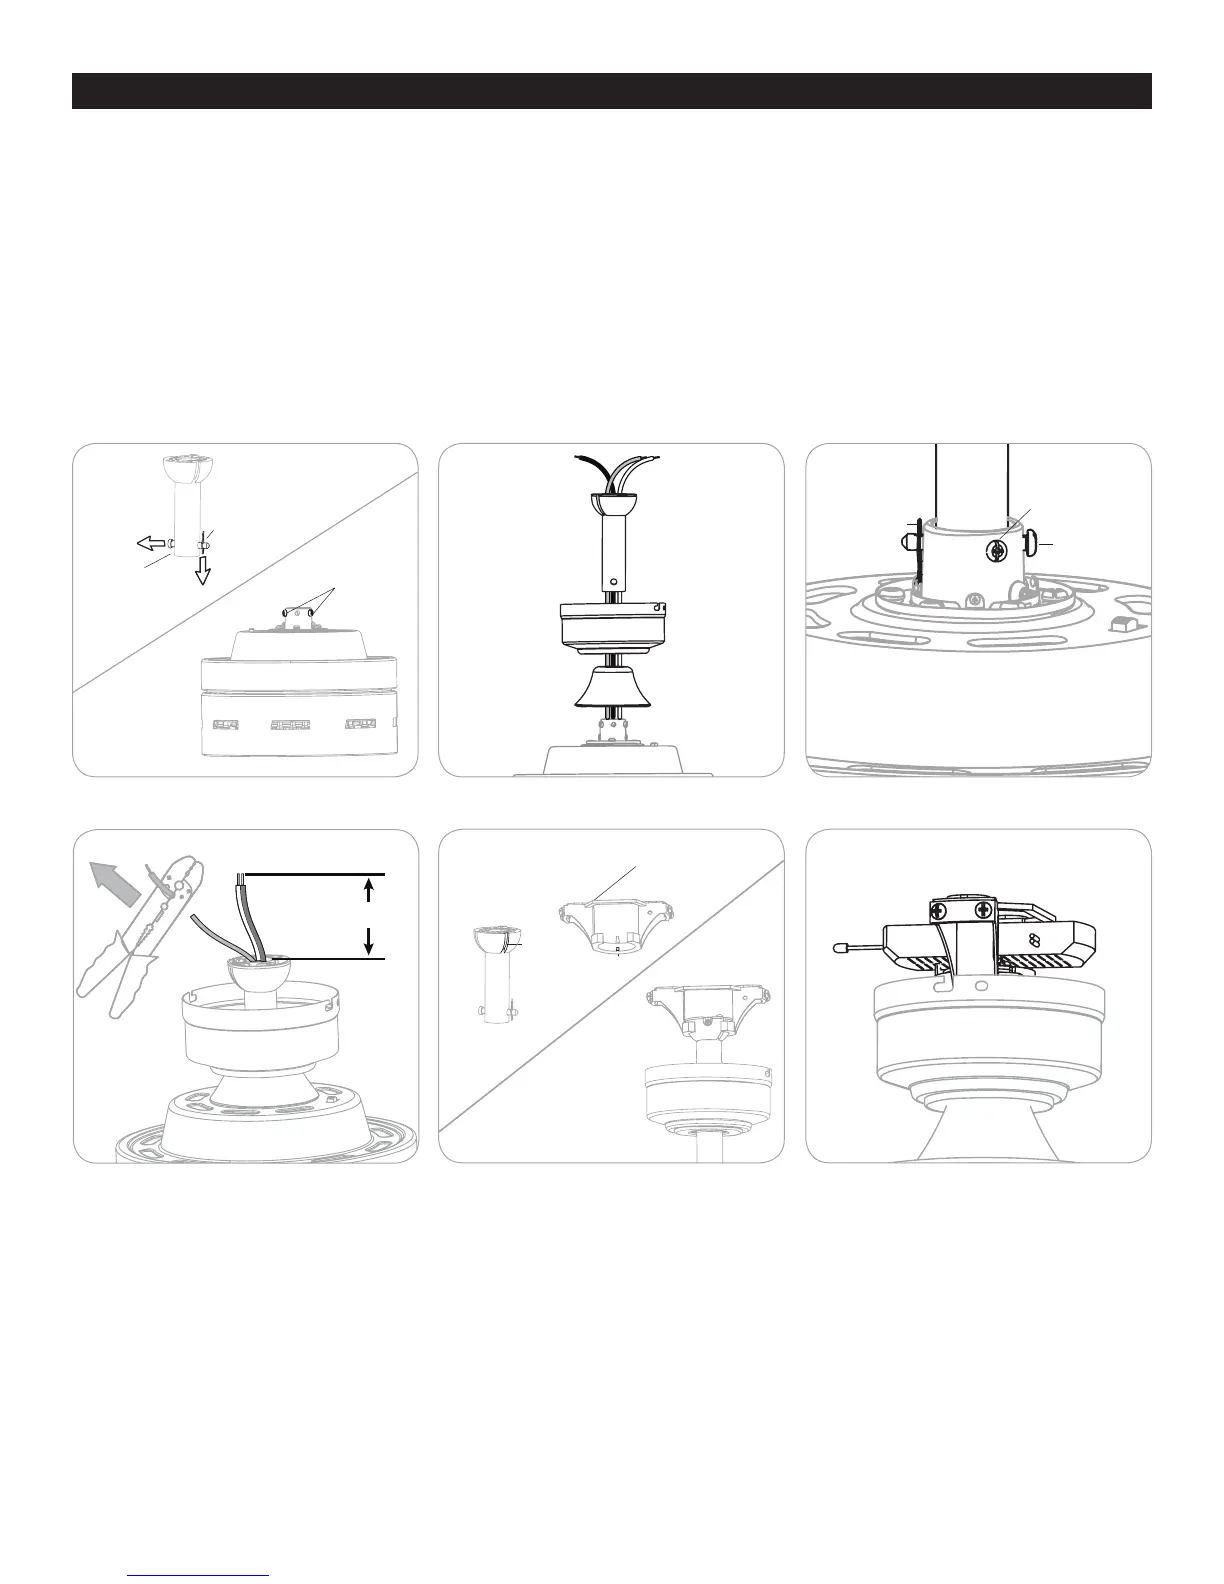
STANDARD OR ANGLE MOUNT INSTRUCTIONS
1. Remove the downrod clip and downrod pin from the downrod. Then partially loosen the set screws in the yoke at the top of
the motor assembly (Figure 3.1).
2. Feed the fan wires through the yoke cover, canopy and downrod (Figure 3.2).
3. Slide the downrod into the yoke of the motor assembly. Align holes and reinstall the downrod pin and downrod clip and
secure with the two set screws (Figure 3.3).
4. Depending on the length of downrod you use, you may want to cut the fan wires to simplify wiring. After pulling the wires all
the way through the downrod, measure 8 inches of wire. Cut off the excess wire using wire cutters (not included). Then strip
1/2 inch of insulation from the end of each wire strand (Figure 3.4).
5. Install the ball end of the downrod into the opening of the mounting bracket (Figure 3.5). WARNING: Failure to align the slot
in the ball with the tap on the mounting bracket may cause the fan to fall, which could result in injury or death.
6. Insert the receiver into the opening of the mounting bracket with at side facing up (Figure 3.6).
Skip to FINAL INSTALLATION, page 6.
Figure 3.1
Figure 3.5 Figure 3.6
Downrod Clip
Mounting
Bracket
Mounting
Bracket
Receiver
Downrod
Downrod
Downrod Pin
Set Screw
Downrod
Tab
Canopy
Slot
Yoke Cover
Figure 3.2 Figure 3.3
Figure 3.4
Set Screw
Downrod Clip
Downrod Pin
 Loading...