temporarily, the spa lock can be applied over an already-applied temperature lock. Then, when the spa lock is removed, the temperature lock will
remain on, to prevent unwanted tampering with the set temperature.
MAIN CONTROL PANEL BUTTONS AND DISPLAY
The main control panel has buttons which the spa user presses to set the temperature, initiate the clean cycle, vary the intensity of the light, and
activate or deactivate the jet pump. With the exception of the CLEAN button, the control panel display responds to let you know you’ve pressed a
button, and that the selected function has been performed. After a period of non-use, pressing any button will wake up a sleeping display, as well
as performing its function.
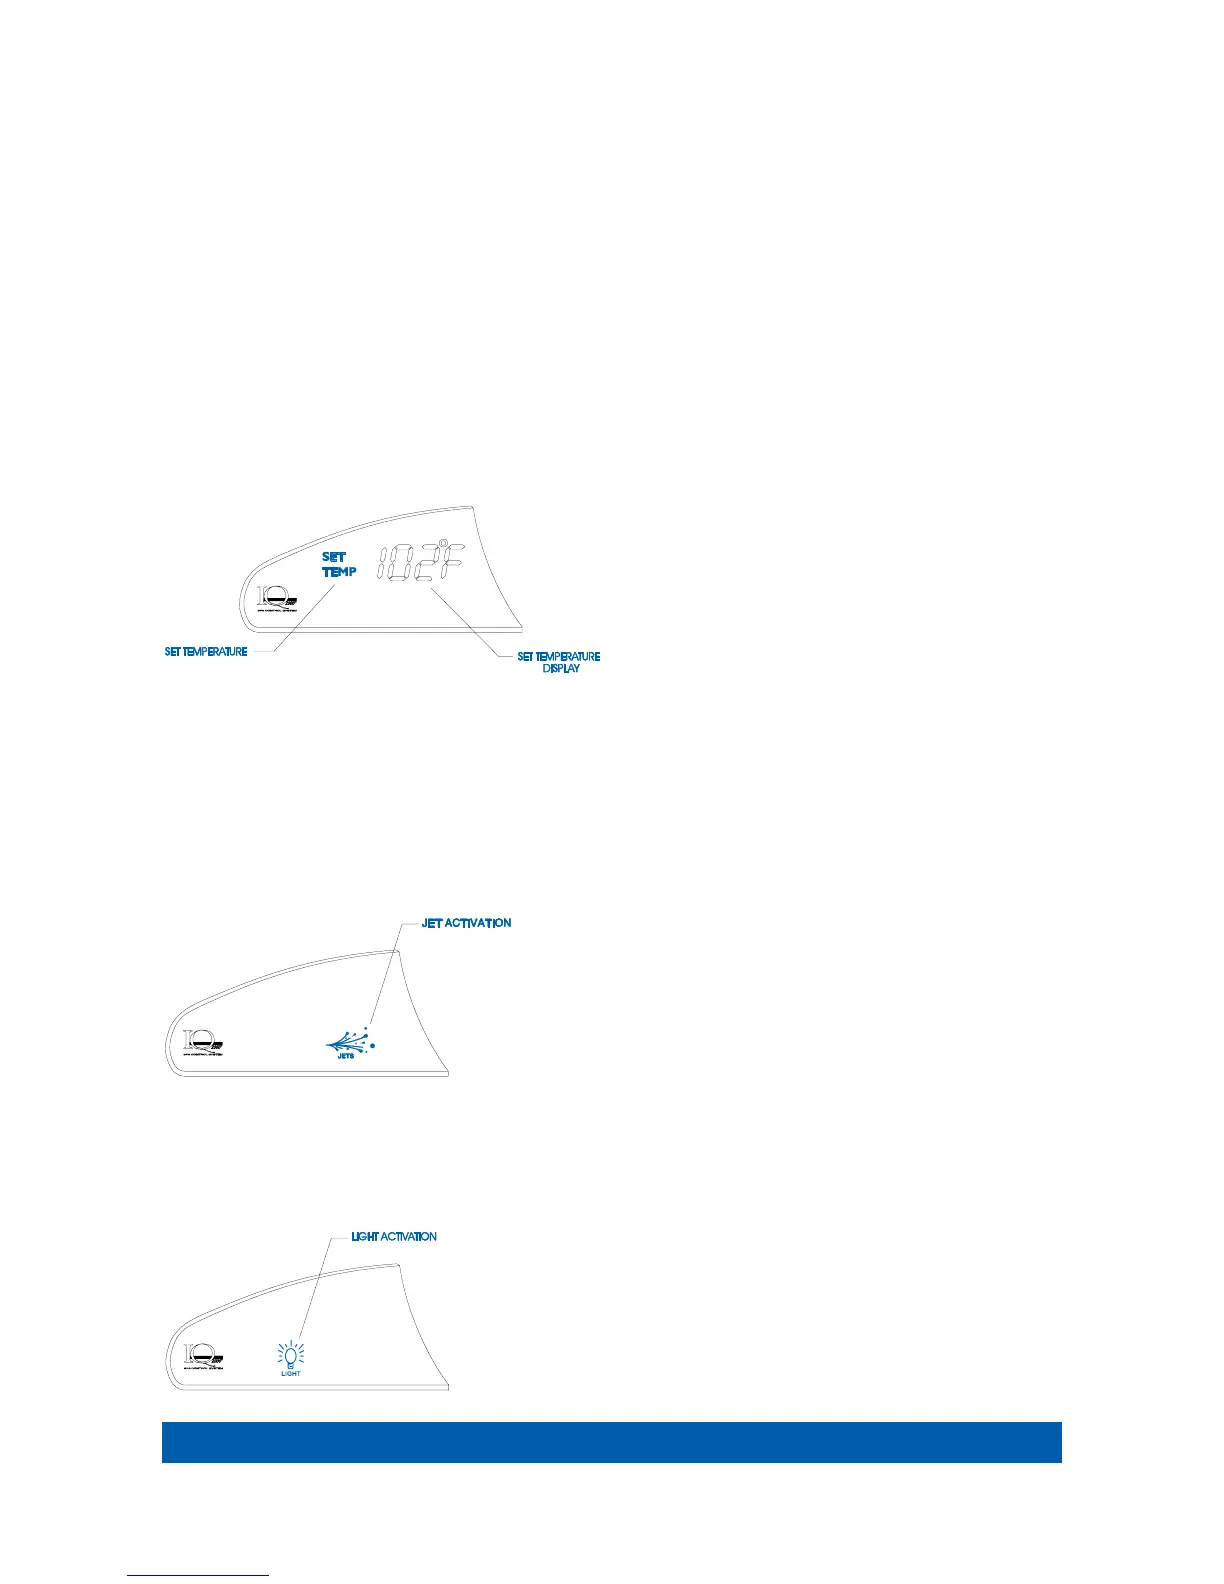
TEMPERATURE CONTROL
The set temperature range is from 80°F to 104°F (27°C to 40°C). (The temperature of any setting may rise slightly depending on the current use
and condition of your spa, and on outside temperatures.)
The set temperature of the spa water will automatically be 102°F (
39°C) the first time that power is applied. This is the setting programmed at the
factory. After the spa has been set up and used, the last temperature value set by the user will be stored in memory. If power is disconnected from
the spa, it will automatically revert to the last set temperature when power is reapplied.
To display the set temperature of the spa, press the TEMP plus (+) button. The set
temperature will be displayed, unless the spa is locked (in which case the word SPA is
displayed with the lock symbol). The set temperature display will automatically shut off
after 30 seconds.
To increase the set temperature of the spa water, press the TEMP plus (+) button.
Each time the button is pressed, the set temperature display will increment by one
degree. If the button is held down, the set temperature display will
increase by one degree every half-second.
To decrease the set temperature of the spa water, press the TEMP
minus (-) button. Each time the button is pressed, the set temperature display will decrement by one degree. If the button is held down, the set
temperature display will decrease by one degree every half-second.
If the set temperature value will not change, check the TEMP LOCK and SPA LOCK features. When either of these features is applied, the
temperature control is disabled.
JETS CONTROL
There are two buttons (three buttons on Vista
®
,Grandee
®
, Envoy
®
, Aria
™
and Vanguard
®
(VV) models) which affect the jet pump(s):
The JETS button (all models) / JETS 1 (Vista, Grandee, and Envoy, Aria and Vanguard models only) activates the jet pump. When the JETS or JETS 1 button
is pressed, the jets symbol will illuminate on the control panel display. The symbol will remain lit until the button is pressed to turn off the jet pump,
or after two hours of continuous operation when the pump is automatically shut off by the control system.
The JETS 2 button (Vista, Grandee, Envoy, Aria and Vanguard (VV) only) activates
the second jet pump. When the JETS 2 button is pressed, the jets symbol will
illuminate on the control panel display. (Vista, Envoy & Aria will run in low speed with
first press and high speed with second press). The symbol will remain lit until the button is
pressed to turn off the jet pump, or after two hours of continuous operation when the pump
is automatically shut off by the control system.
The CLEAN button, provided as a convenient timer for water maintenance, activates the jet
pump for a ten minute period. The CLEAN indicator will turn on and the JET symbol on the
display will illuminate to indicate the jet pump is engaged. Next you may add properly
measured spa water chemicals into the filter compartment. The jet pump and clean indicator will automatically shut off after ten minutes.
If the jet pump will not engage, make sure SPA LOCK is deactivated. SPA LOCK disables the controls on both the main and auxiliary control panels.
LIGHT CONTROL - STANDARD
The intensity of the spa’s light is controlled using the LIGHT plus (+) or LIGHT minus (-) buttons. To turn on the spa light, press the LIGHT plus (+)
button. The light will turn on at maximum intensity and the light symbol will illuminate on the
control panel display.
To reduce the intensity of the light, press the LIGHT minus (-) button. The intensity of the light will
decrease each time the button is pressed. Additionally, if either of the LIGHT buttons (+ or -) on
the Main Control panel only, are held down, the light intensity will increase or decrease at the rate
of one intensity level every half-second.
To turn off the light, hold the LIGHT minus (-) button. The light will dim and turn off. When the light
turns off, the light symbol on the display will also turn off.
If the light is left on, it will automatically be turned off by the control system after six hours of
Page 46
Control Panel Operations
 Loading...