Step 3—Attaching the rack mount tray to the
workstation
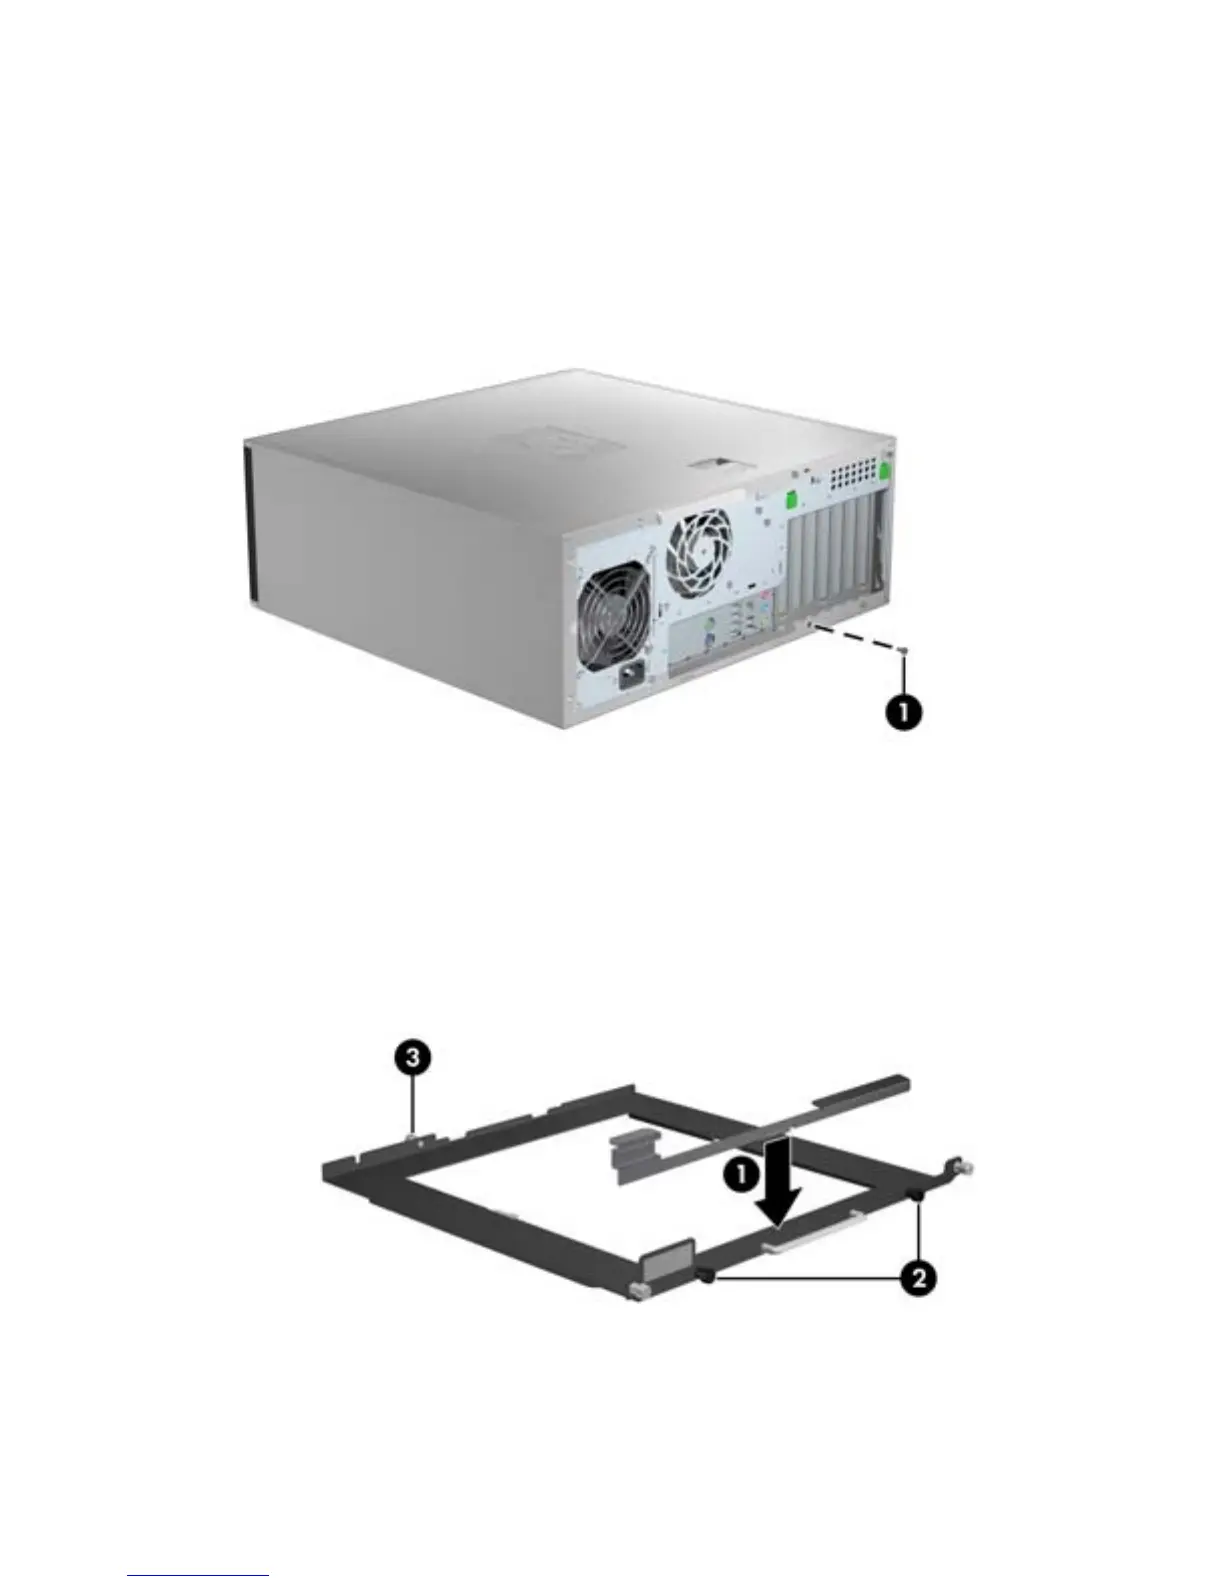
1. Using a T-15 Torx screwdriver, remove the indicated chassis screw (1), if present, from the rear of
the workstation. Some workstation models do not use the chassis screw as shown.
Figure 2 Removing the chassis screws
2. To prepare the tray:
a. Select the adapter bracket with the label that matches your workstation model.
b. To install the adapter bracket onto the tray, fit the tab (1) on the adapter bracket into the
locking hole on the tray, and then secure the two black captive screws (2).
c. Loosen the black rear captive screw (3). This will be used to secure the rear of the
workstation, once seated in the tray.
Figure 3 Installing the adapter bracket on the tray
4 Rack mount tray installation ENWW
 Loading...