4
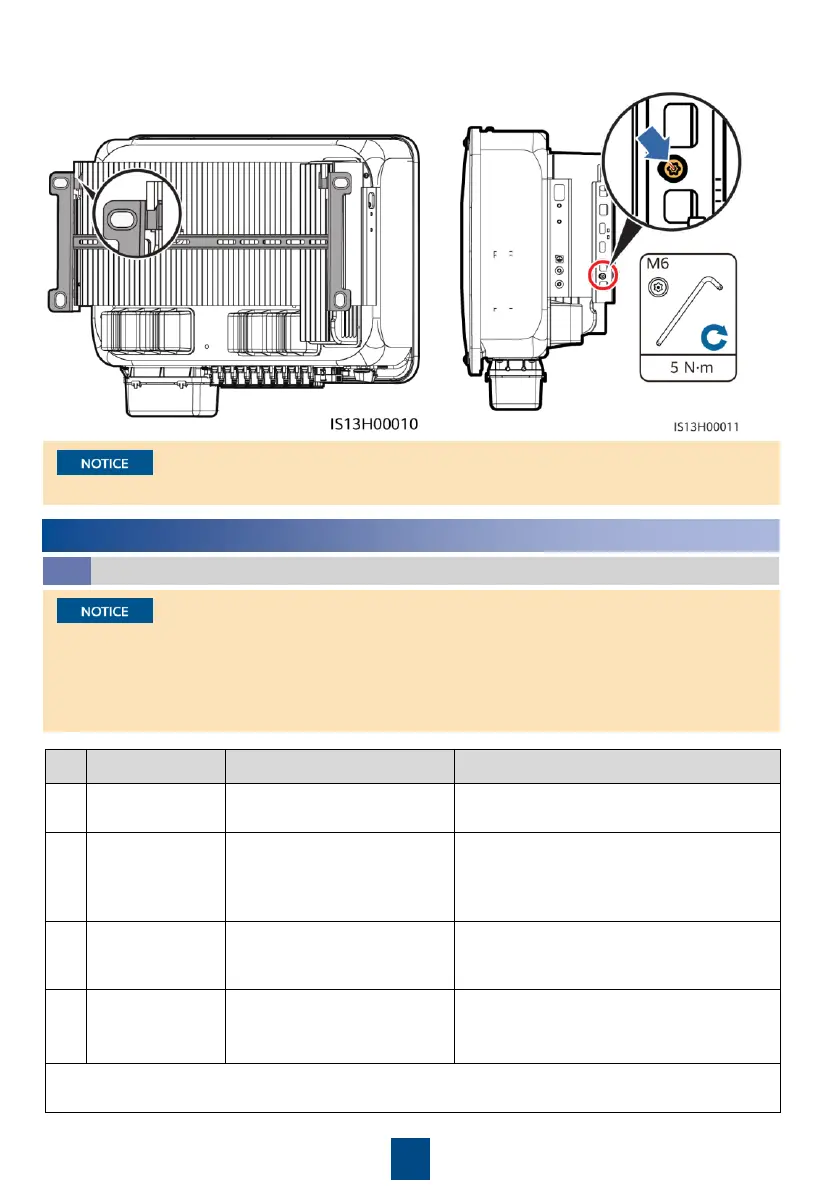
2. Install the solar inverter onto the
mounting bracket.
3. Tighten the security Torx screws on both
sides.
Preparations
4.1
4
Connecting Cables
•
Connect cables in accordance with local installation laws and regulations.
•
The cable specifications must comply with local standards.
•
Before connecting cables, ensure that the DC switch of the solar inverter and all the switches
connected to it are set to OFF. Otherwise, the high voltage produced by the solar inverter
may cause electric shocks.
Conductor cross-sectional area: 16-50
mm
2
outdoor copper-core cable or 35-
50 mm
2
outdoor aluminum-core cable
a
Cable outer diameter: 16–38 mm
Common outdoor PV cable in
the industry (recommended
model: PV1
Conductor cross-sectional area: 4–6
mm
2
Cable outer diameter: 5.5–9 mm
(Optional) RS485
communications
cable
twisted pair (recommended
model: DJYP2VP2
Conductor cross-sectional area: 0.2–1
mm
2
Cable outer diameter: 4–11 mm
-core cables with a cross-sectional area of 5 x 35 mm
2
or 5 x 50 mm
2
are not
Secure the screws on the sides before connecting cables.
 Loading...