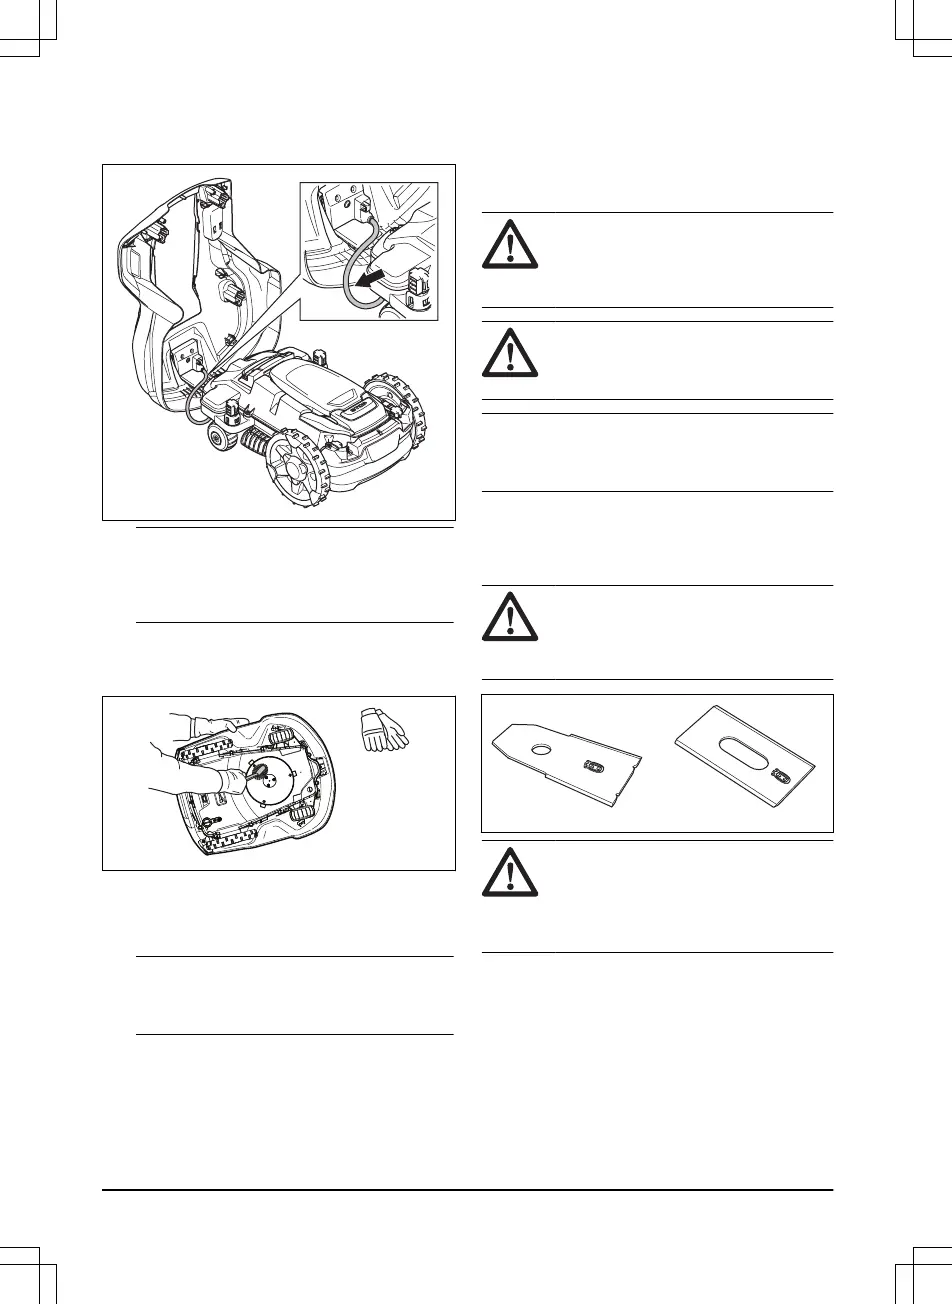
7. Carefully lift the body at the rear and fold it over
to remove the body, do not remove the charging
cable.
Note: Make sure the that the grommets for
the charging cable are correctly installed to seal
against moisture after you remove the body of the
product.
8. Clean the blade disc and chassis with a brush.
At the same time, make sure that the blade disc
rotates freely. Make sure that the blades are not
damaged and can pivot freely.
9. To install the body of the product, put it on the
chassis and push into position.
10. To install the top cover, put it on the body of the
product and push into position.
Note:
Make sure the that the grommets for
the charging cable are correctly installed to seal
against moisture.
5.2.2 To clean the wheels
The product does not operate satisfactorily in slopes if
the wheels are blocked with grass.
• Use a soft brush to clean the wheels.
5.2.3 To clean the body of the product
• Use a moist cloth and a weak soap solution to
clean the body of the product.
5.2.4 To clean the charging station
WARNING: Disconnect the power
supply from the power outlet before
maintenance, or when you clean the
charging station or power supply.
CAUTION: Do not use a high-pressure
washer or running water to clean the
charging station.
Note: The product cannot enter the charging station
if there are objects in the charging station. Clean the
charging station regularly.
• Remove grass, twigs and other objects from the
charging station.
5.3 Replacement of the blades
WARNING: Husqvarna can only
guarantee safety if you use Husqvarna
original blades with the embossed crowned
H-mark logotype.
WARNING: You must replace the
screws when you replace the blades. The
used screws can wear quickly and make the
blade come loose, this can cause serious
injury.
Replace worn or damaged blades for a safe operation.
Replace the blades regularly for a satisfactory cut result
and a low energy use. All 3 blades and screws must
be replaced at the same time to get a balanced cutting
system.
5.3.1 To replace the blades
1. Push the STOP button
2. Push the ON/OFF button for 3 seconds to switch
off the product.
34
- Maintenance 1650 - 005 - 17.03.2022

 Loading...