114674_0512 6-1 REV B
DECK ADJUSTMENTS
Deck Leveling – 48”/54” Side Discharge Deck
Leveling the deck must be done in the following manner and
order:
1. Check tire pressures to make certain they are properly
inflated before starting to level deck. The recommended
pressures are as follows:
Drive wheels tire pressure . . . . . . . . .8 - 12 psi
Gauge wheels tire pressure . . . . . . . .8 - 12 psi
2. Park the unit on a flat surface.
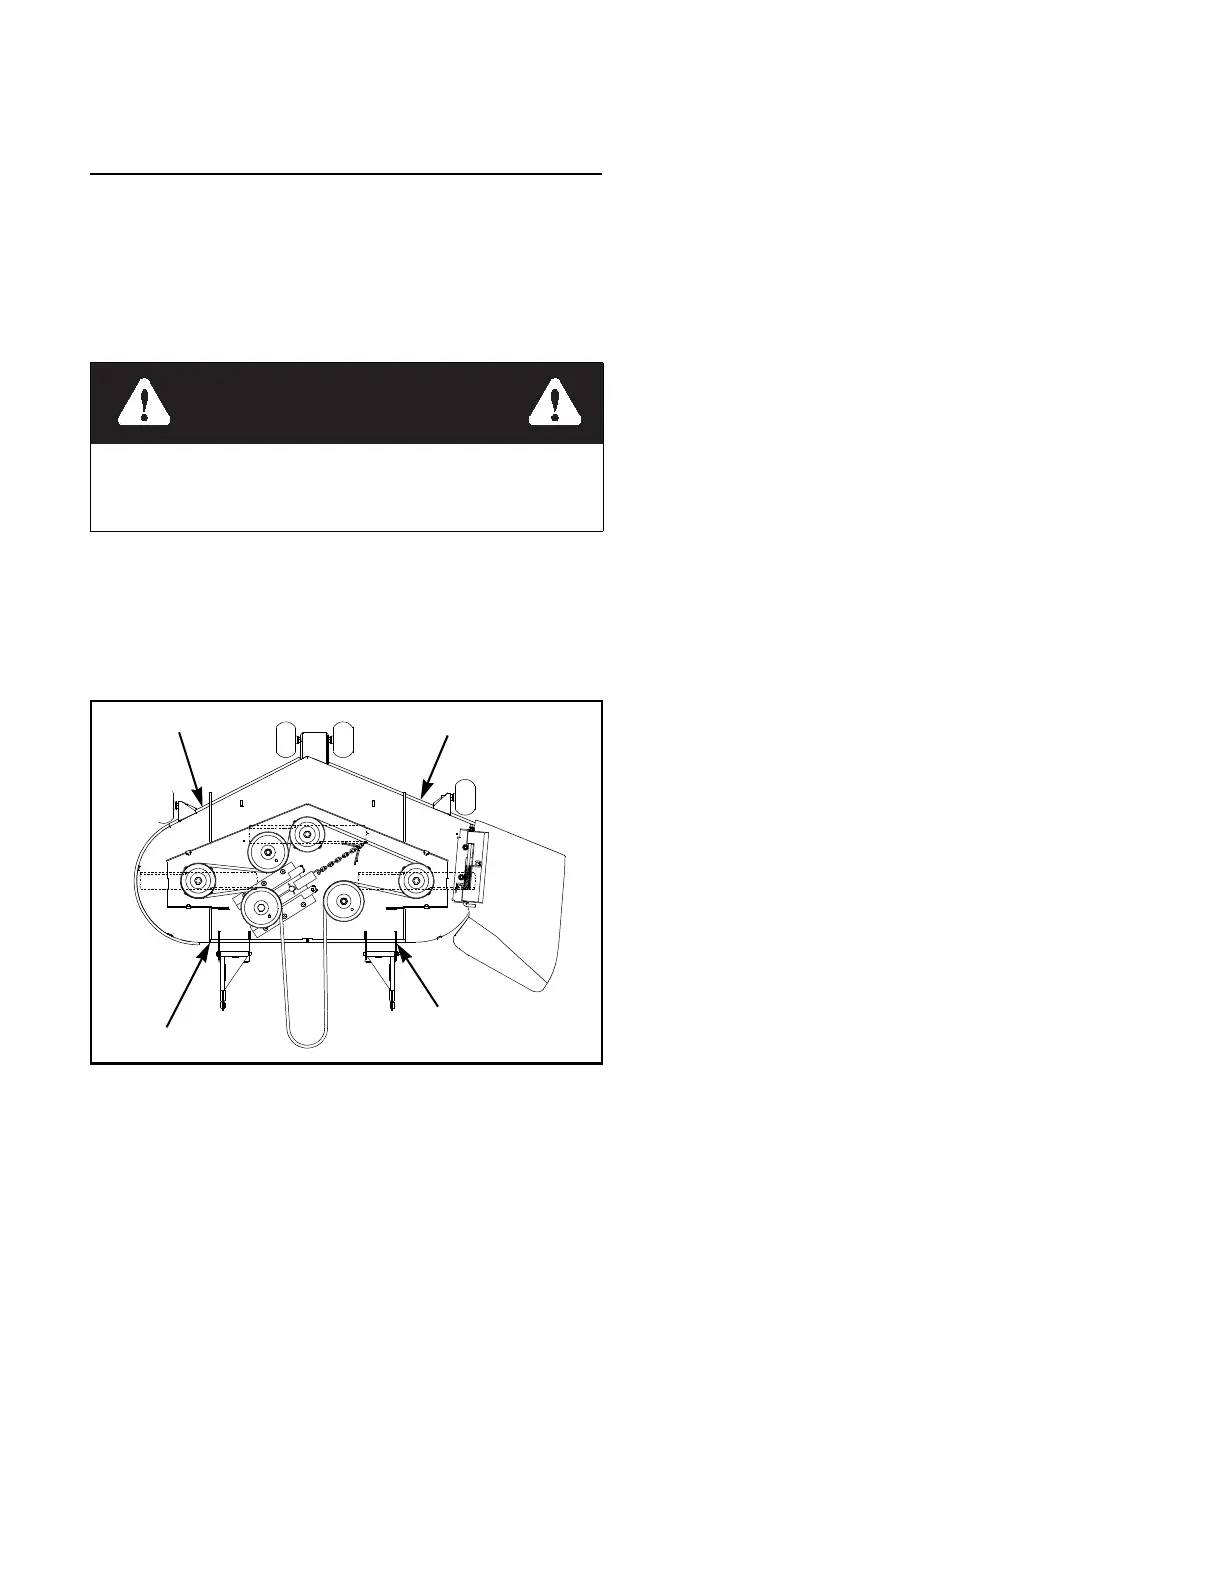
3. Place 3” high deck support blocks (two stacked 2” x 4”
blocks can be used to create a 3” [7.62cm] high support)
at the four corners of the deck as shown. NOTE: Back of
deck will automatically be set 1/4” (6.35mm) higher.
Figure 6-1
4. Place the height stop in the 3” (7.62cm) hole, with the flat
side of the height adjusting stop against the stop handle.
Clamp the height adjusting stop against the deck stop
bracket. This will assure that the height will not move
during the setting process. Figure 6-2
5. Loosen all nuts on the deck lift threaded rods, and the
hardware on the height indicator bar (on the right front),
until all the deck lift chains are loose, and the deck is
sitting tightly on all four blocks. Figure 6-2
6. Loosen the two nuts on the front of height indicator bar
so that the bar has play. Figure 6-2
7. Start the leveling process on the left front of the mower.
8. Set the amount of threads protruding on the deck lift rod
from the lift block at approximately 1" (2.54cm) (left &
right side). Figure 6-2
9. Jam both nuts against the block. Push or pull on the deck
lift bell crank until the chain on the left front just
becomes tight, making sure that the deck stays tight
against the block. Figure 6-2
10. While keeping the chain tight, tighten the nuts against the
deck lift block on the height indicator rod, just enough to
carry most of the deck weight on that side — the block
should be able to move with only a slight drag. Figure 6-2
11. Jam nuts tightly together against the deck lift block.
Figure 6-2
12. Go to the right front of the mower.
13. Loosen the 5/16” jam nut on the adjuster lift chain, and
back the adjuster bolt out to allow the adjuster to move
up and down freely. Figure 6-2
14. Tighten the adjuster bolt until the chain just becomes
tight. Then tighten just enough to carry the weight of the
front of the deck on that side—to check, move the blocks
back and forth; they should move with a slight drag.
Figure 6-2
15. Tighten the adjuster bolt jam nut to prevent the adjuster
bolt from moving. Figure 6-2
16. Tighten the hardware holding the chain and adjuster onto
the deck lift arm. Go to the right rear of the mower.
17. Make sure that there is still slack in the chain. If not,
loosen the two nuts on the block holding the threaded rod
until there is slack in the deck lift chain. Figure 6-2
18. Tighten the appropriate nut until the chain just becomes
tight, and carries most of the deck weight. Check by
moving the block—it should move with a slight drag.
Figure 6-2
19. Tighten the other nut on the opposite side of the block,
and jam them tightly together against the block.Go to the
left rear of the mower. Figure 6-2
20. Make sure that there is still slack in the chain. If not,
loosen the two nuts on the block holding the threaded rod
until there is slack in the deck lift chain. Figure 6-2
21. Tighten the appropriate nut until the chain just becomes
tight, and carries most of the deck weight. Check by
moving the block—it should move with a slight drag.
Figure 6-2
22. Tighten the other nut on the opposite side of the block,
and jam them tightly together against the block.Figure 6-
2
23.
When completed, all chains will be tight, and deck
cutting height will be set to the deck height indicator.
Stop engine. Make sure deck clutch switch is in the down
(OFF) position. Place neutral lock/park brake lever in the
brake (engaged) position.
Figure 6-1

 Loading...