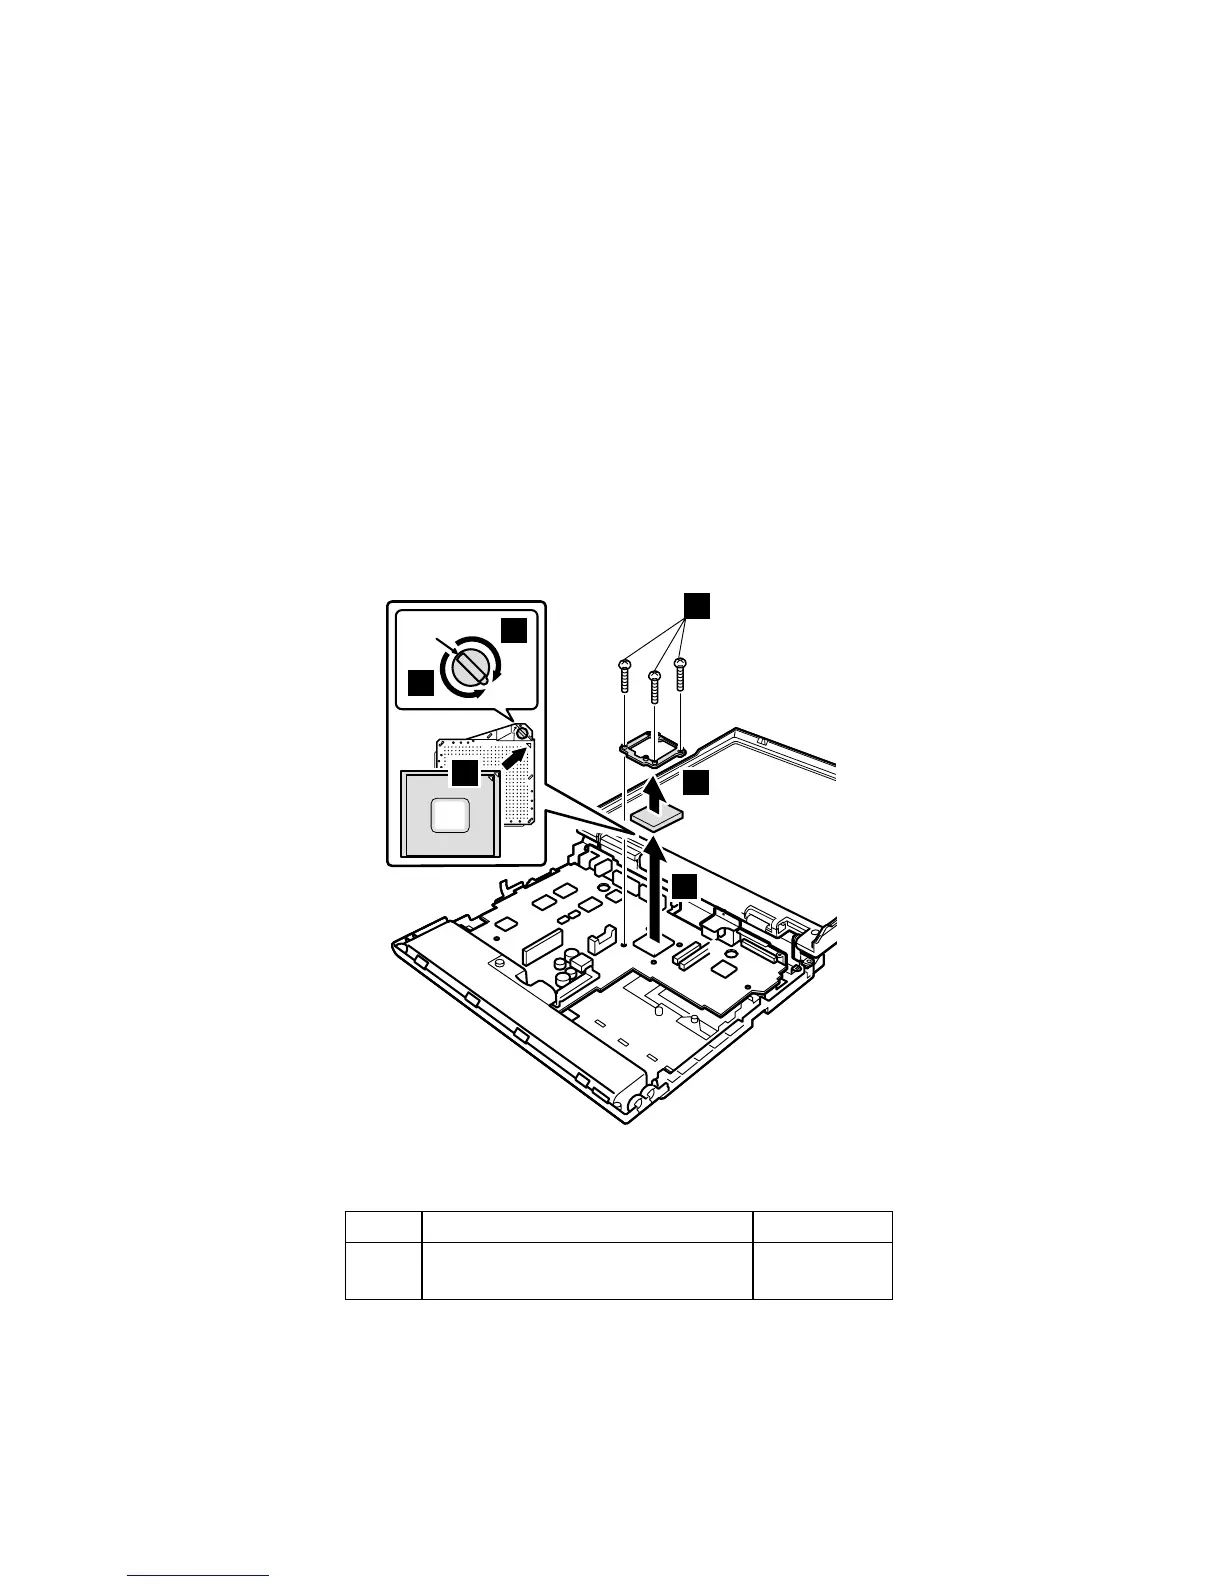
1190 CPU socket and CPU
For access, remove these FRUs, in order:
v “1010 Battery pack” on page 58
v “1020 DIMM” on page 59
v “1050 Hard-disk drive or RF ID adapter” on page 64
v “1060 Ultrabay 2000 device” on page 66
v “1070 Dummy card” on page 68
v “1080 Keyboard” on page 69
v “1090 Keyboard CRU insulator” on page 72
v “1100 Hinge cover and clear sheet icon” on page 73
v “1110 Keyboard bezel and speaker” on page 74
v “1120 Speaker cable” on page 77
v “1130 Wireless PC Card and sub card” on page 78
v “1140 PC Card slot assembly” on page 87
v “1150 Fan assembly” on page 89
v “1160 Diskette drive” on page 91
v “1170 Upper shield” on page 93
1
a
2
3
c
b
A
Rotate the screw head (A) 180° in the direction of the
arrow a to release the lock; then remove the CPU.
Step Screw (quantity) Torque
1 M2.5 × 15 mm, nylon-coated (3) 0.392 Nm
(4 kgfcm)
When installing the CPU, do as shown in the figure.
v Rotate the screw head (A) 180° in the direction of the
arrow b to lock the CPU.
v When attaching the CPU to the socket, do as shown in
step c.
Removing and replacing a FRU
ThinkPad A22m wireless models 95
 Loading...