36
classic HE P - Installation & Servicing
SERVICING
64
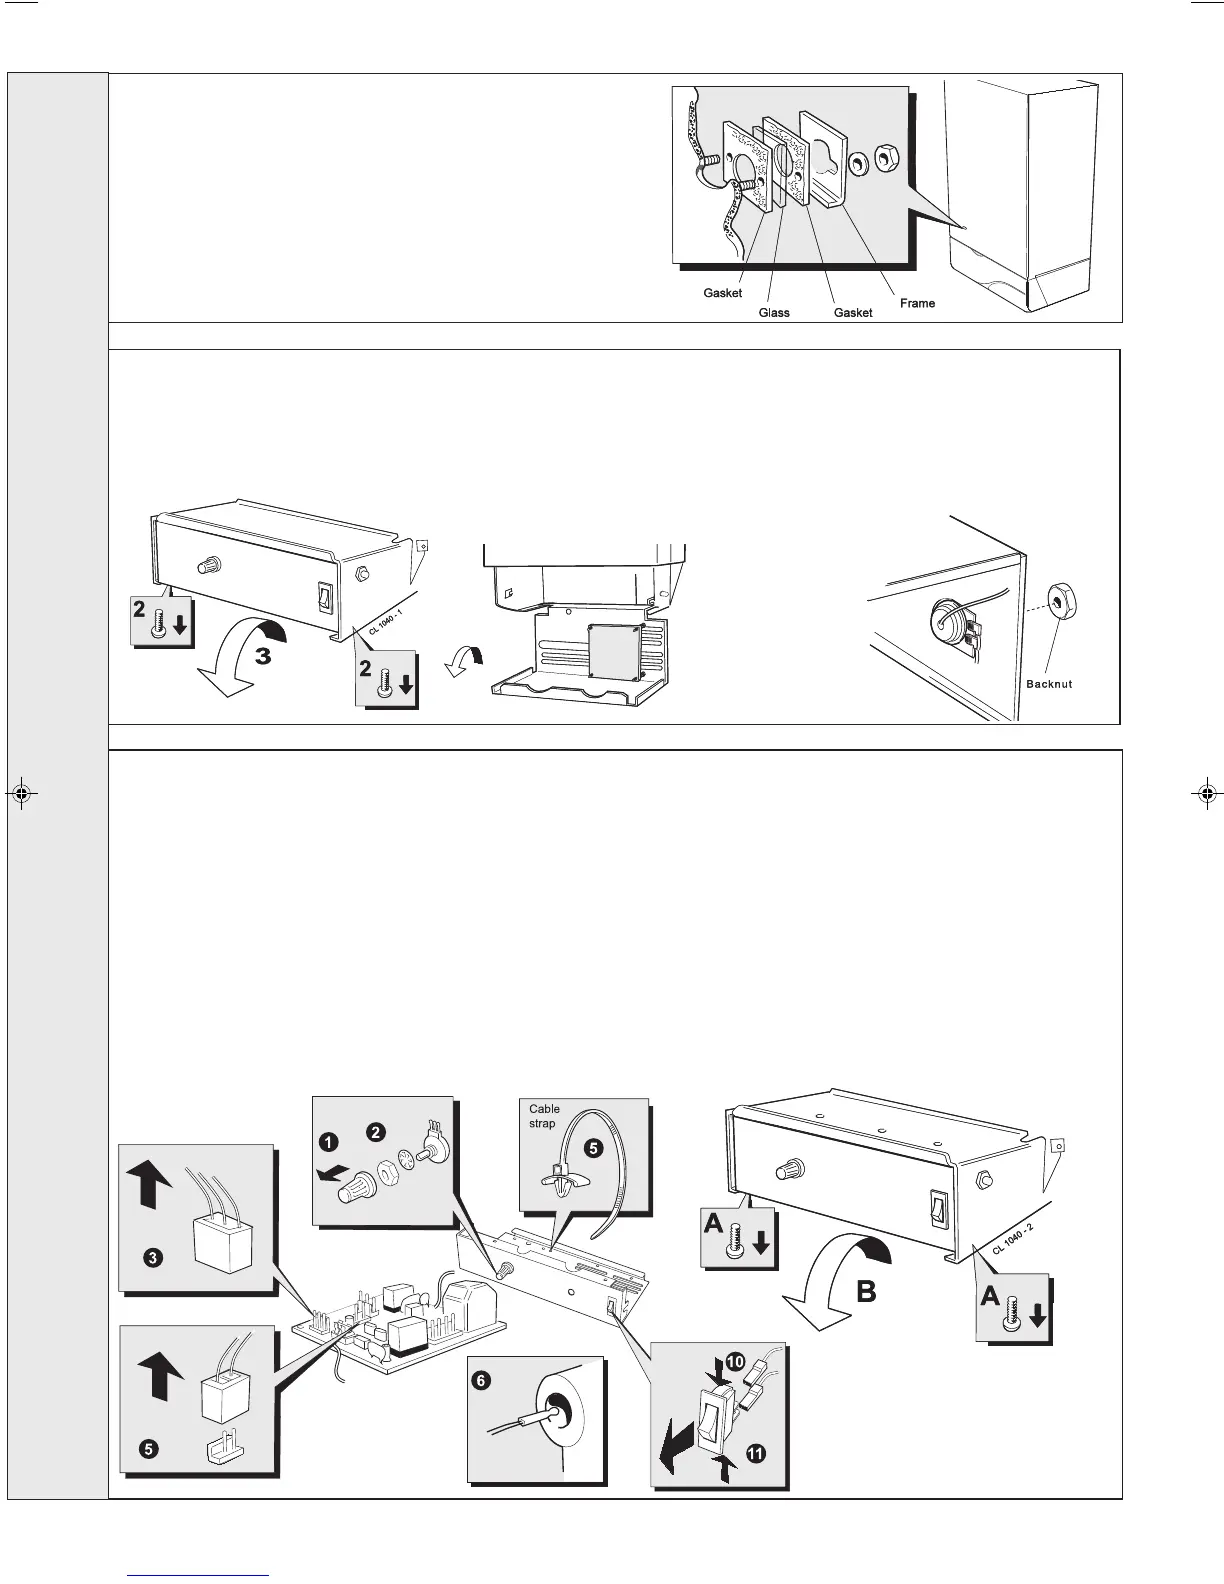
THERMOSTAT CONTROL, THERMISTOR SENSOR LEAD & ON/OFF SWITCH REPLACEMENT
Refer also to Frame 61.
A. Remove the control box fixing screws
B. Swing the control box down into the servicing position.
Thermostat control
1. Pull the knob off the shaft.
2. Remove the backnut securing the thermostat control to the
control box.
3. Pull off the Molex connector from the printed circuit board.
4. Replace and reassemble in reverse order.
Thermistor sensor lead
5. Pull the sensor lead connector off the printed circuit board
and cut the cable strap securing the thermistor harness to
the bottom panel of the control box (if fitted) and remove the
strap.
1. Refer to Frame 61.
2. Remove the control box fixing screws.
3. Swing the control box down into the servicing position.
63
OVERHEAT THERMOSTAT REPLACEMENT
4. Pull off the electrical connections at the thermostat. Remove
the backnut retaining the thermostat to the casing. Withdraw
the thermostat phial from the heat exchanger pocket and
unclip from the casing.
5. Fit the new thermostat and reassemble in reverse order.
6. Check the operation of the boiler.
cla7994
6. Remove the sensor from the heat exchanger pocket and
unclip from the casing.
7. Remove the strain relief bush from the back panel base.
8. Remove the sensor lead through the grommet in the
control box.
9. Replace and reassemble in reverse order, ensuring the
new cable strap is fitted and securing the thermistor
harness.
On/off switch
10. Disconnect the electrical connectors from the rear of the
switch.
11. Press in the 2 side retaining clips and remove the switch.
12. Reassemble in reverse order.
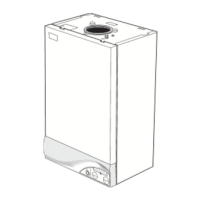
1. Refer to Frame 61.
2. Unfasten the 2 nuts and washers holding the sightglass
assembly to the casing front panel.
3. When fixing the new assembly ensure that the parts are in the
correct order. The frame must have the return edge at the bottom.
4. Retighten the 2 nuts to ensure an airtight seal. Do NOT
overtighten.
5. Replace the boiler front panel. Refer to Frame 49 .
62
SIGHTGLASS REPLACEMENT
SERVICING
202107-6.pmd 20/02/2008, 13:5736
 Loading...