13
Classic LX, RS - Installation
INSTALLATION
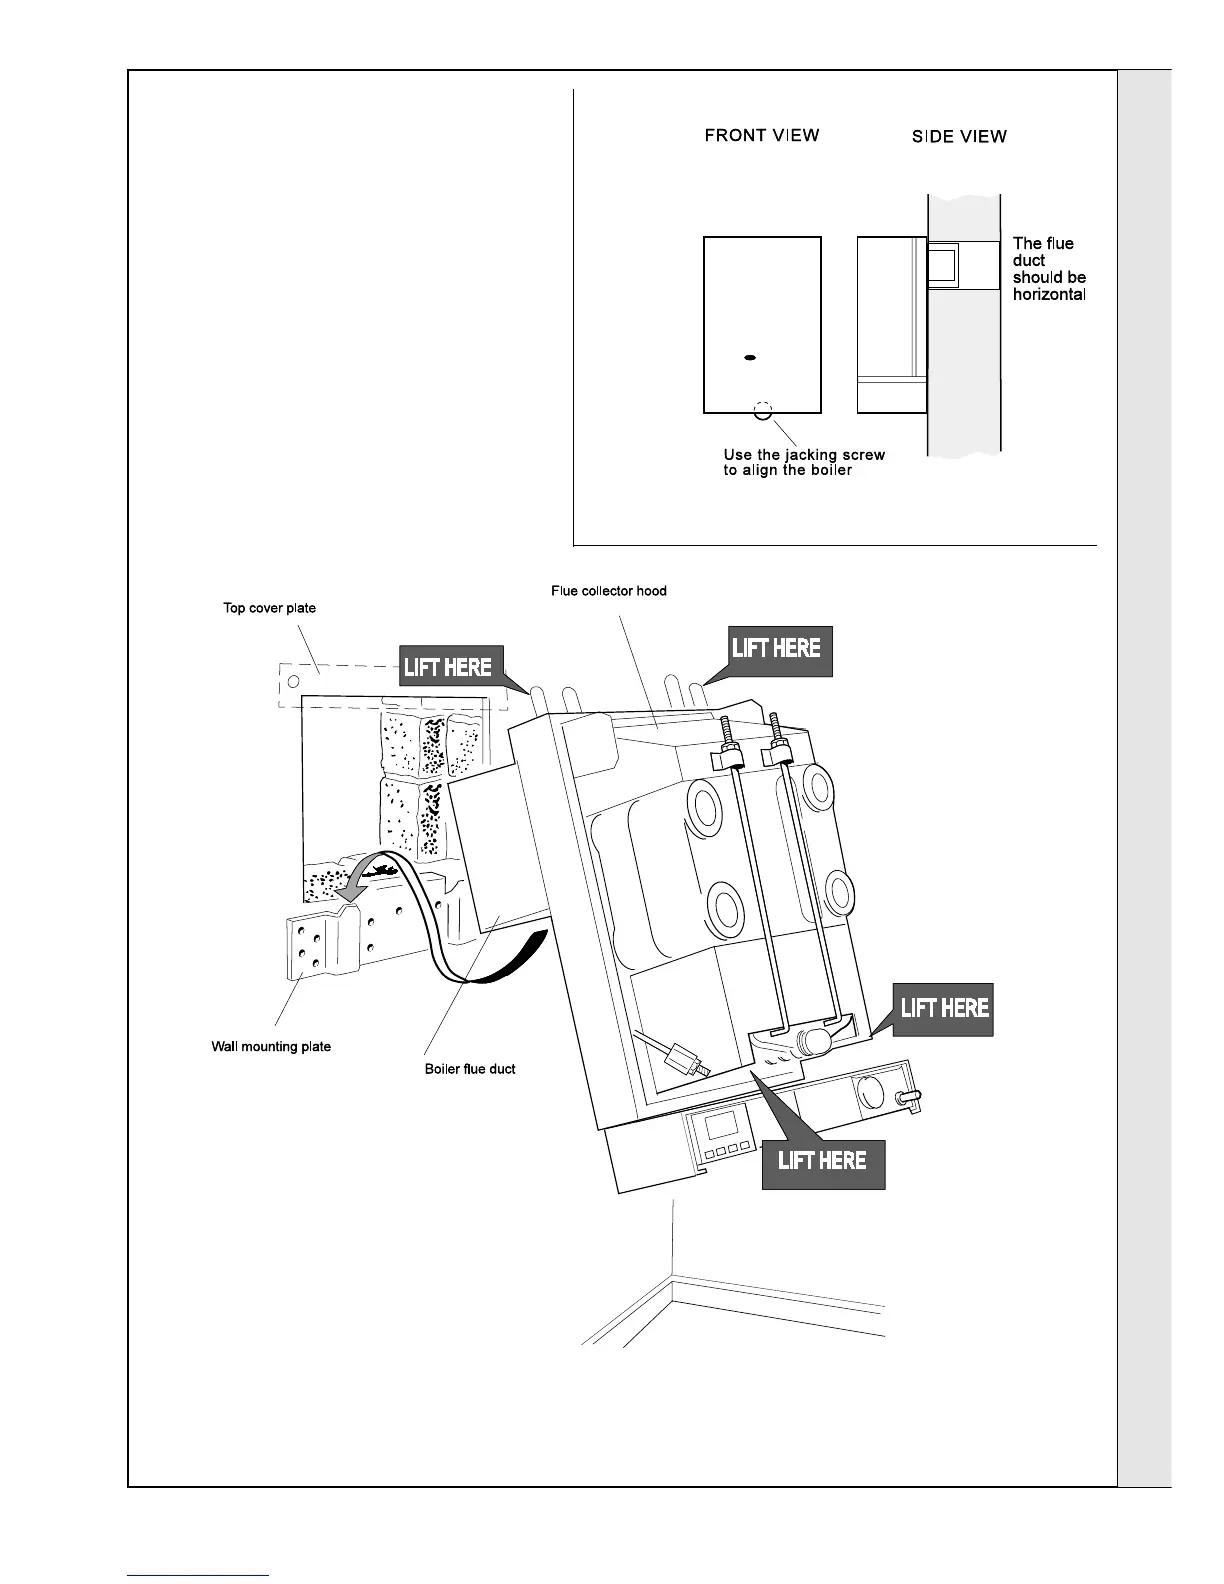
Flue Alignment
It is
most
important
that the
boiler is
installed
in the
vertical
position
The wall must be of suitable load-bearing capacity
1. Lift the boiler onto the wall mounting plate,
entering the projecting flue duct into the opening
cut in the wall, and lowering the 2 slots in the
boiler back panel onto the angled tabs on the
top of the wall mounting plate.
DO NOT USE THE BURNER ASSEMBLY FOR
LIFTING.
2. Adjust the flue to its horizontal position by tilting
the boiler forward at the bottom then turning the
jacking screw. Release and check alignment with
a spirit level. Secure the jacking screw with a
No.10 x 50 mm wood screw.
3. Fit the top cover plate in position above the
boiler air duct with the 2 No.10 x 50 mm screws
provided.
INSTALLATION
Do NOT use the burner assembly for lifting
12
MOUNTING THE BOILER
 Loading...