Lai lejupielādētu pilno versiju, apmeklējiet vietni www.ikea.com
16LATVISKI
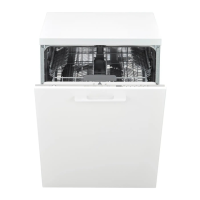
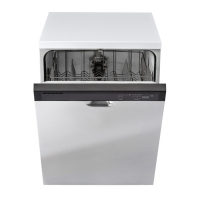
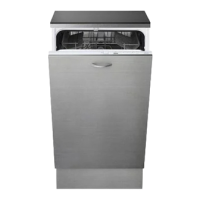
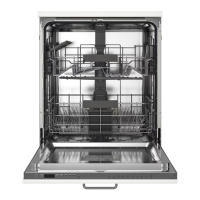
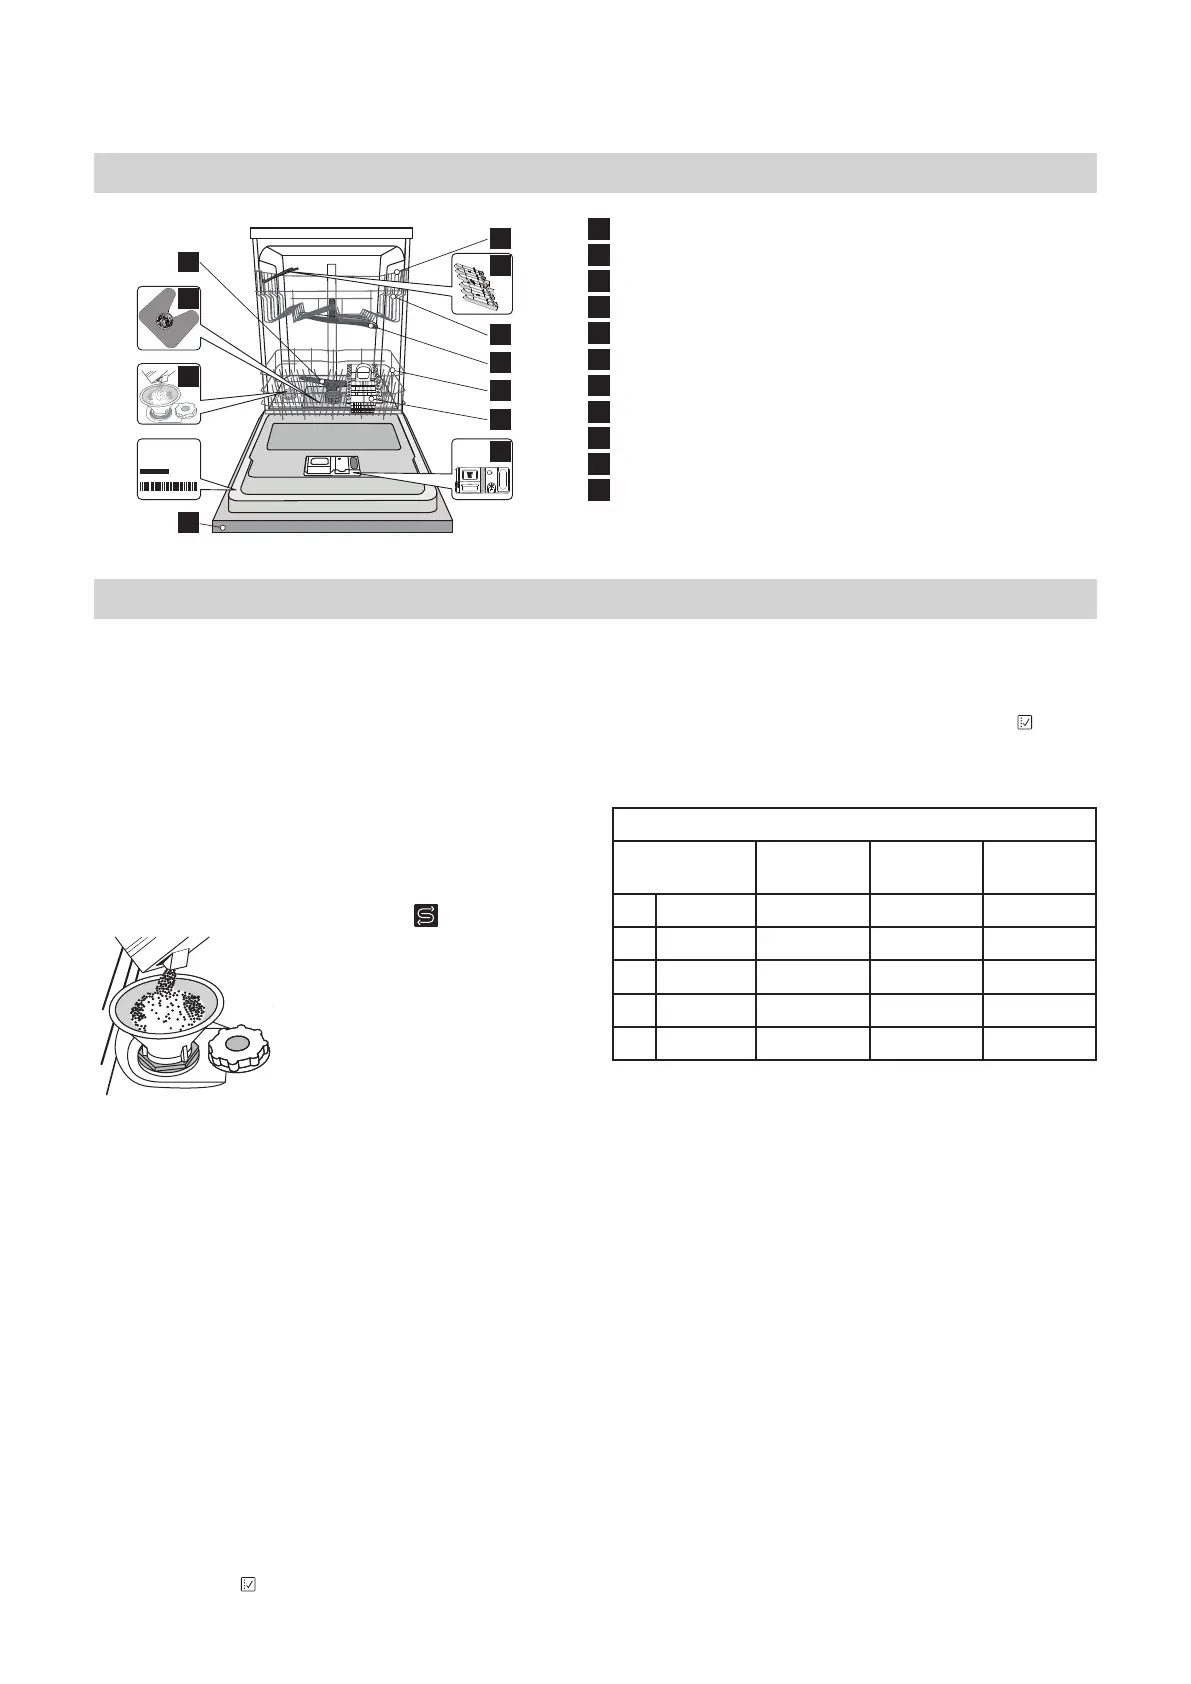
Izstrādājuma apraksts
1
Augšējaisstatīvs
2
Pielāgojamieatloki
3
Augšējāstatīvaaugstumaregulators
4
Augšējāsmidzināšanassvira
5
Apakšējaisstatīvs
6
Piederumugrozs
7
Apakšējāsmidzināšanassvira
8
Filtrukomplekts
9
Sālstvertne
10
Mazgāšanasunskalošanaslīdzekļadozators
11
Vadībaspanelis
Pirmā lietošanas reize
Ieteikumi pirmajai lietošanas reizei
Pirmsierīcesuzstādīšanasunpirmāslietošanaslūdzam
uzmanīgiizlasīt„DROŠĪBAunGARANTIJA”un„UZSTĀDĪŠANAS
INSTRUKCIJAS”norādījumus,kaspieejamiizstrādājuma
dokumentusomā.Neaizmirstietnoņemtnotraukumazgājamās
mašīnasvisustransportēšanasaizsarglīdzekļus.
Sāls tvertnes uzpilde
SālslietošananovēršKAĻĶAKMENSveidošanosuztraukiemun
ierīcesfunkcionālajāmdaļām.
• Irsvarīgi,laiSĀLS TVERTNE NEKAD NEBŪTU TUKŠA.
• Irsvarīgiiestatītūdenscietību.
Sālstvertneatrodastraukumazgājamāsmašīnasapakšējādaļā
(skatietIZSTRĀDĀJUMAAPRAKSTU)untājāuzpilda,javadības
panelīiededziesSĀLSUZPILDESindikators
ENGLISH
7
Control panel
Product description
1. Upper rack
2. �������
3. Upper rack height adjuster
4. Upper sprayer arm
5. Lower rack
6. Cutlery basket
7. Lower sprayer arm
8. Filter Assembly
9. Salt reservoir
10. Detergent and Rinse Aid dispensers
11. Rating plate
12. Control panel
1
2
3
4
5
6
10
7
11
9
8
First use
ADVICE REGARDING THE FIRST TIME USE
After installation, remove the stoppers from the racks and the
retaining elastic elements from the upper rack.
FILLING THE SALT RESERVOIR
The use of salt prevents the formation of LIMESCALE on the
dishes andon the machine’s functional components.
• It is important that the salt reservoir be never empty.
• It is important to set the water hardness.
The salt reservoir is located in the lower part of the
dishwasher (see PRODUCT DESCRIPTION) and should be
filled when the SALT REFILL indicator light in the
control panel is lit .
1. Remove the lower rack and
unscrew the reservoir cap
(anticlockwise).
2. Only the first time you do this: fill
the salt reservoir with water.
3. Position the funnel (see figure)
and fill the salt reservoir right up
to its edge (approximately 1 kg);
it is not unusual for a little water to
leak out.
4. Remove the funnel and wipe any
salt residue away from the
opening.
1. On-Off/Reset button with indicator light
2. Program selection button
3. Salt refill indicator ligh
4. Rinse Aid refill indicator ligh
5. Program number and delay time indicator
6. Tablet indicator light
7. Display
8. Half Load indicator light
9. Half Load button
10. Delay button
11. START/Pause button with indicator light / Tab
1 2 3 4 5 6 7 8 9 10
11
3sec
h
.
1. Izņemietzemākostatīvuun
atskrūvējiettvertnesvāciņu(pretēji
pulksteņarādītājavirzienam).
2. Novietojietpiltuvi(skatītattēlu)un
piepildietsālstvertnilīdzaugšai
(aptuveni1kg);notānevajadzētu
iztecētūdenim.
3. Šī darbība jāveic tikai pirmo reizi:
uzpildiet sāls tvertni ar ūdeni.
4. Izņemietpiltuviunnoslaukietuz
atverespalikušosāli.
2
2
1
5
4
3
6
1011
12
0000 000 00000
Service:
7
8
9
11
Pārliecinieties,kavāciņširstingripieskrūvēts,laimazgāšanas
programmaslaikātvertnēneiekļūtumazgāšanaslīdzeklis(tas
varsabojātūdensmīkstinātāju).
Tiklīdzšīdarbībairpabeigta,palaidietprogrammu,neievietojot
mašīnātraukus.
Izmantojiet tikai tādu sāli, kas paredzēta lietošanai trauku
mazgājamās mašīnās. Ja sāls tvertne nav uzpildīta, var
rasties ūdens mīkstinātāja un sildelementa bojājumi
kaļķakmens nogulsnēšanās dēļ. Sāli ieteicams lietot kopā ar
visu veidu trauku mazgāšanas līdzekļiem.
Ja nepieciešams pievienot sāli, obligāti jāveic nepieciešamās
darbības pirms mazgāšanas cikla ieslēgšanas, lai novērstu
koroziju.
Ūdens cietības iestatīšana
Laiļautuūdensmīkstinātājamdarbotieskāparedzēts,irsvarīgi
norādīttāduūdenscietību,kādairūdenimjūsumājās.Šādu
informācijuvaratuzzinātpievietējāūdenspiegādātāja.Rūpnīca
iestatanoklusējumavērtībuūdenscietībai.
• Ieslēdzietierīci,nospiežotIESLĒGŠANAS/IZSLĒGŠANASpogu.
• Izslēdzietierīci,nospiežotIESLĒGŠANAS/IZSLĒGŠANASpogu.
• Nospiedietpogu
ENGLISH
8
• Switch on the appliance by pressing the ON/OFF button.
• Switch off the appliance by pressing the ON/OFF button.
• Hold down button
for 5 seconds, until you hear a beep.
• Switch on the appliance by pressing the ON/OFF button.
•
•
The current selection level number and the salt indicator light
������
Press button to select the desired hardness level (see
WATER HARDNESS TABLE).
• Switch off the appliance by pressing the ON/OFF button.
Setting is complete!
Water Hardness Table
Level
°dH
German degrees
°fH
French degrees
1 Soft 0 - 6 0 - 10
2 Medium 7 - 11 11 - 20
3 Average 12 - 17 21 - 30
4 Hard 18 - 34 31 - 60
5 Very hard 35 - 50 61 - 90
Make sure the cap is screwed on tightly, so that no detergent can
get into the container during the wash program (this could damage
the water softener beyond repair).
As soon as this procedure is complete, run a program without
loading. The “Pre-Wash” program alone is NOT������
Residual saline solution or grains of salt can lead to corrosion,
irreparably damaging the stainless steel components.
The guarantee is not applicable if faults are caused by such
circumstances.
��������������������������������s.
��������������������������������
heating element may be damaged as a result.
Whenever you need to add salt, it is mandatory to complete
the procedure before the beginning of the washing cycle.
SETTING THE WATER HARDNESS
To allow the water softener to work in a perfect way, it is essential
that the water hardness setting is based on the actual water hard-
ness in your house. This information can be obtained from your local
water supplier. The factory setting is for average (3) water hardness.
FILLING THE RINSE AID DISPENSER
Rinse aid makes dish DRYING easier. The rinse aid dispenser A
should be lled when the RINSE AID REFILL indicator light
in the control panel is lit.
1. Open the dispenser B by pressing and pulling up the tab on
the lid.
2. Carefully introduce the rinse aid as far as the maximum
(110 ml) reference notch of the lling space - avoid spilling it.
If this happens, clean the spill immediately with a dry cloth.
3. Press the lid down until you hear a click to close it.
NEVER pour the rinse aid directly into the tub.
A
B
ADJUSTING THE DOSAGE OF RINSE AID
If you are not completely satised with the drying results, you can
adjust the quantity of rinse aid used.
• Switch the dishwasher on using the ON/OFF button.
• Switch it off using the ON/OFF button.
• Press button
three times - a beep will be heard.
• Switch it on using the ON/OFF button.
•
•
The current selection level number and rinse aid indicator light ash.
Press button to select the level of rinse aid quantity to be
supplied.
• Switch it off using the ON/OFF button.
Setting is complete!
If the rinse aid level is set to ZERO (ECO), no rinse aid will be
supplied. The LOW RINSE AID indicator light will not be lit if you
run out of rinse aid. A maximum of 5 levels can be set according to
the dishwasher model. The factory setting is specic to the model,
please follow instruction above to check this for your machine.
• If you see bluish streaks on the dishes, set a low number (1-2).
• If there are drops of water or limescale marks on the dishes,
set a high number (3-4).
FILLING THE DETERGENT DISPENSER
������������������������������
dishwashers.
To achieve the best washing and drying results, the combined
useof detergent, rinse aid liquid and rened salt is required.
We recommend using detergents that do not contain phosphates
or chlorine, as these products are harmful to the environment.
Good washing results also depend on the correct amount of
detergent being used.
Exceeding the stated amount does not result in a more effective
wash and increases environmental pollution.
The amount can be adjusted to the soil level. In the case of
normally soiled items, use approximately either 35g (powder
detergent) or 35ml (liquid detergent) and additional tea spoon of
detergent directly inside the tub. If tablets are used, one tablet
will be enough.
If the crockery is only lightly soiled or if it has been rinsed with
water before being placed in the dishwasher, reduce the amount
of detergent used accordingly (minimum 25 g/ml) e.g. skip the
powder/gel putted inside the tub.
To open the detergent dispenser
press button A.
Introduce the detergent into
the dry dispenser B only.
Place the amount of detergent
for pre-washing directly inside
the tub.
A
B
1.
2.
When measuring out the detergent refer to the mentioned ear-
lier information to add the proper quantity. Inside the dispenser
B there are indications to help the detergent dosing.
Remove detergent residues from the edges of the dispenser
and close the cover until it clicks.
3. Close the lid of the detergent dispenser by pulling it up until
the closing device is secured in place.
The detergent dispenser automatically opens up at the right time
according to the program. If all-in-one detergents are used, we
recommend using the TABLET button, because it adjusts the
program so that the best washing and drying results are always
achieved.
unturietto5sekundes,līdzdzirdat
skaņassignālu.
• Ieslēdzietierīci,ātrinospiežotIESLĒGŠANAS/IZSLĒGŠANAS
pogu.
• Mirgošobrīdatlasītālīmeņanumursunsālsindikatora
gaismiņa
• Laiatlasītuvēlamocietībaslīmeni,nospiedietpogu
ENGLISH
8
• Switch on the appliance by pressing the ON/OFF button.
• Switch off the appliance by pressing the ON/OFF button.
• Hold down button
for 5 seconds, until you hear a beep.
• Switch on the appliance by pressing the ON/OFF button.
•
•
The current selection level number and the salt indicator light
������
Press button to select the desired hardness level (see
WATER HARDNESS TABLE).
• Switch off the appliance by pressing the ON/OFF button.
Setting is complete!
Water Hardness Table
Level
°dH
German degrees
°fH
French degrees
1 Soft 0 - 6 0 - 10
2 Medium 7 - 11 11 - 20
3 Average 12 - 17 21 - 30
4 Hard 18 - 34 31 - 60
5 Very hard 35 - 50 61 - 90
Make sure the cap is screwed on tightly, so that no detergent can
get into the container during the wash program (this could damage
the water softener beyond repair).
As soon as this procedure is complete, run a program without
loading. The “Pre-Wash” program alone is NOT������
Residual saline solution or grains of salt can lead to corrosion,
irreparably damaging the stainless steel components.
The guarantee is not applicable if faults are caused by such
circumstances.
��������������������������������s.
��������������������������������
heating element may be damaged as a result.
Whenever you need to add salt, it is mandatory to complete
the procedure before the beginning of the washing cycle.
SETTING THE WATER HARDNESS
To allow the water softener to work in a perfect way, it is essential
that the water hardness setting is based on the actual water hard-
ness in your house. This information can be obtained from your local
water supplier. The factory setting is for average (3) water hardness.
FILLING THE RINSE AID DISPENSER
Rinse aid makes dish DRYING easier. The rinse aid dispenser A
should be lled when the RINSE AID REFILL indicator light
in the control panel is lit.
1. Open the dispenser B by pressing and pulling up the tab on
the lid.
2. Carefully introduce the rinse aid as far as the maximum
(110 ml) reference notch of the lling space - avoid spilling it.
If this happens, clean the spill immediately with a dry cloth.
3. Press the lid down until you hear a click to close it.
NEVER pour the rinse aid directly into the tub.
A
B
ADJUSTING THE DOSAGE OF RINSE AID
If you are not completely satised with the drying results, you can
adjust the quantity of rinse aid used.
• Switch the dishwasher on using the ON/OFF button.
• Switch it off using the ON/OFF button.
• Press button
three times - a beep will be heard.
• Switch it on using the ON/OFF button.
•
•
The current selection level number and rinse aid indicator light ash.
Press button to select the level of rinse aid quantity to be
supplied.
• Switch it off using the ON/OFF button.
Setting is complete!
If the rinse aid level is set to ZERO (ECO), no rinse aid will be
supplied. The LOW RINSE AID indicator light will not be lit if you
run out of rinse aid. A maximum of 5 levels can be set according to
the dishwasher model. The factory setting is specic to the model,
please follow instruction above to check this for your machine.
• If you see bluish streaks on the dishes, set a low number (1-2).
• If there are drops of water or limescale marks on the dishes,
set a high number (3-4).
FILLING THE DETERGENT DISPENSER
������������������������������
dishwashers.
To achieve the best washing and drying results, the combined
useof detergent, rinse aid liquid and rened salt is required.
We recommend using detergents that do not contain phosphates
or chlorine, as these products are harmful to the environment.
Good washing results also depend on the correct amount of
detergent being used.
Exceeding the stated amount does not result in a more effective
wash and increases environmental pollution.
The amount can be adjusted to the soil level. In the case of
normally soiled items, use approximately either 35g (powder
detergent) or 35ml (liquid detergent) and additional tea spoon of
detergent directly inside the tub. If tablets are used, one tablet
will be enough.
If the crockery is only lightly soiled or if it has been rinsed with
water before being placed in the dishwasher, reduce the amount
of detergent used accordingly (minimum 25 g/ml) e.g. skip the
powder/gel putted inside the tub.
To open the detergent dispenser
press button A.
Introduce the detergent into
the dry dispenser B only.
Place the amount of detergent
for pre-washing directly inside
the tub.
A
B
1.
2.
When measuring out the detergent refer to the mentioned ear-
lier information to add the proper quantity. Inside the dispenser
B there are indications to help the detergent dosing.
Remove detergent residues from the edges of the dispenser
and close the cover until it clicks.
3. Close the lid of the detergent dispenser by pulling it up until
the closing device is secured in place.
The detergent dispenser automatically opens up at the right time
according to the program. If all-in-one detergents are used, we
recommend using the TABLET button, because it adjusts the
program so that the best washing and drying results are always
achieved.
(skatiet
ŪDENSCIETĪBASTABULU).
• Izslēdzietierīci,nospiežotIESLĒGŠANAS/IZSLĒGŠANASpogu.
Iestatīšanairpabeigta!
Ūdenscietībastabula
Līmenis °dH
Vācugrādi
°fH
Frančugrādi
°Clark
Angļugrādi
1 Mīksts 0 - 6 0 - 10 0 - 7
2 Mērens 7 - 11 11 - 20 8 - 14
3 Vidējs 12 - 16 21 - 29 15-20
4 Ciets 17 - 34 30 - 60 21 - 42
5 Ļoticiets 35-50 61 - 90 43 - 62
Ūdens mīkstināšanas sistēma
Ūdensmīkstinātājsautomātiskisamazinaūdenscietību,līdzar
topastāvīginovēršotkaļķakmensveidošanossildītājā,kāarī
uzlabojotmazgāšanasefektivitāti.Šīsistēmatiekautomātiski
reģenerētaarsāli,tādēļirnepieciešamspapildinātsālstvertni,
jatāirtukša.Reģenerācijasbiežumsiratkarīgsnoūdens
cietībaslīmeņaiestatījuma-pēcnoklusējumareģenerācija
notiekikpēc5Ekocikliemarūdenscietībaslīmeni,kasiestatīts
uz3.
Reģenerācijasākaspēdējāsskalošanasciklalaikāunbeidzas
žāvēšanasfāzē,pirmsciklapabeigšanas.
*Vienareģenerācijasciklalaikātiekpatērēts:aptuveni3,5l
ūdens,
*Tasaizņempapildu5minūtesciklā;
*Tiekpatērētsmazākpar0,005kWhenerģijas.
ENGLISH
7
Control panel
Product description
1. Upper rack
2. �������
3. Upper rack height adjuster
4. Upper sprayer arm
5. Lower rack
6. Cutlery basket
7. Lower sprayer arm
8. Filter Assembly
9. Salt reservoir
10. Detergent and Rinse Aid dispensers
11. Rating plate
12. Control panel
1
2
3
4
5
6
10
7
11
9
8
First use
ADVICE REGARDING THE FIRST TIME USE
After installation, remove the stoppers from the racks and the
retaining elastic elements from the upper rack.
FILLING THE SALT RESERVOIR
The use of salt prevents the formation of LIMESCALE on the
dishes andon the machine’s functional components.
• It is important that the salt reservoir be never empty.
• It is important to set the water hardness.
The salt reservoir is located in the lower part of the
dishwasher (see PRODUCT DESCRIPTION) and should be
filled when the SALT REFILL indicator light in the
control panel is lit .
1. Remove the lower rack and
unscrew the reservoir cap
(anticlockwise).
2. Only the first time you do this: fill
the salt reservoir with water.
3. Position the funnel (see figure)
and fill the salt reservoir right up
to its edge (approximately 1 kg);
it is not unusual for a little water to
leak out.
4. Remove the funnel and wipe any
salt residue away from the
opening.
1. On-Off/Reset button with indicator light
2. Program selection button
3. Salt refill indicator ligh
4. Rinse Aid refill indicator ligh
5. Program number and delay time indicator
6. Tablet indicator light
7. Display
8. Half Load indicator light
9. Half Load button
10. Delay button
11. START/Pause button with indicator light / Tab
1 2 3 4 5 6 7 8 9 10
11
3sec
h
 Loading...