Installation Steps
CAUTION: Improperly installed systems could result in water damage due to leaks or flooding.
Proper installation of this system requires familiarity with standard sink plumbing and proper use of
common hand and power tools. If you are not familiar with standard sink plumbing and proper use
of common hand and power tools or have any difficulty with installing this system, please consult a
licensed professional, such as a contractor or plumber.
1. Preparation
① Location: This water filter can be installed anywhere with a proper cold water supply,
such as under the kitchen sink, behind the refrigerator, next to your aquarium, inside
the RV, etc.
② Tools needed:
1. 3/8 inch and 1/4 inch wrenches or adjustable wrench
2. Phillips and flathead screwdrivers
3. Scissors or utility knife
4. Bucket and towel to catch water drips
5. Variable speed power drill with 1-inch steel or marble hole saw bit if a hole on the counter
is to be drilled
2. Steps for installing under the kitchen sink (other locations may vary)
① Installing the Feed Water Adapter
1.1 Turn off your Inlet Water Valve (COLD) and open the kitchen faucet to release water
pressure.
1.2 With a towel or bucket underneath, disconnect the Faucet water hose from Inlet Water
Valve using the 3/8 inch wrench and install the Feed Water Adapter (AFW) between them.
Make sure the rubber washers are still in place. It is usually not necessary to use Teflon tape
here. Hand tighten the hex nut and use the wrench for the final 1/4 - 1/2 turn. Do not
overtighten.
1.3 Install the 1/4 inch WHITE tubing on the Feed Water Adapter using the 1/4 inch wrench.
Hand tightens it, then tightens up half to one turn using the wrench. If you received the feed
water adapter with quick fitting, insert the tubing 1/2 inch deep into the fitting. It will lock
automatically.
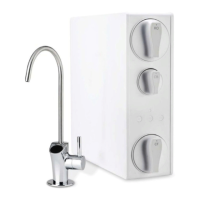
② Installing the drinking faucet
2.1 If your kitchen sink does not have a spare 1” hole, you will need to drill one. (Refer to
Quick Tips for Drilling a Hole in Sink or Counter-top). Wipe clean, and dry the area.
2.2 If there is a blue protection film on the Front Plate, remove it. Slip the front plate with a
black rubber washer onto the faucet stem. Insert the faucet stem into the hole on the counter.
Optionally, plumber glue or sealer could be used.
2.3 Under the sink, slip on the Back Plate and tighten the Hex Nut.
NOTE: Please contact us if you plan to “tee off” the pure water line and connect it to your
fridge, as you would need a regular RO faucet along with a pressure regulator.
Page 7 www.123filter.com | (678) 261-7611 | support@123filter.com
 Loading...