W
W
a
a
t
t
e
e
r
r
S
S
y
y
s
s
t
t
e
e
m
m
s
s
,
,
L
L
L
L
C
C
www.123filter.com
- Page 7 of 12 -
PORCELAIN ENAMEL SINK/ STAINLESS STEEL SINK/ ALUMIUM SINK
A 5/8” hole is required for the faucet. It is recommended that you get special drill bit for porcelain and tile counter.
1. Place a piece of masking tape or duct tape on the determined location where the hole is to be drilled.
2. Use a variable speed drill at slow speed with 1/8” drill bit, and drill a centering hole in the center of the desired faucet location.
3. Enlarge the hole using a 1/ 4” drill bit.
4. Enlarge the hole using 7/16”, 1/ 2”, and 5/8” drill bit. Pause occasionally to cool drill bits.
5. File or clean the surrounding area and remove the masking or duct tape. (NOTE: the metal chips on porcelain will stain very fast)
6. DON’T put Teflon tape at the tip of the threaded mounting base of the faucet since it’s a compression fitting.
7. Put the small rubber washer, the chrome base plate, large rubber washer according to the diagram through the threaded mounting
tube at the base of the faucet.
8. From under the sink, install the bottom plate, lock washer, and nut. Then screw on tightly.
9. According to the diagram, put the brass nut through the BLUE tubing first, then plastic sleeve (preferred), or brass sleeve, then the
plastic insert. Push the white plastic sleeve against the insert.
10. Screw on the Blue tubing with brass nut to the faucet base. Uses wrench to tighten the nut but don’t over tighten it. Too tight would
cause leak.
11. The spout can swivel 360-degrees. The faucet lever can be pushed down for dispensing or pulled up for continuing dispensing.
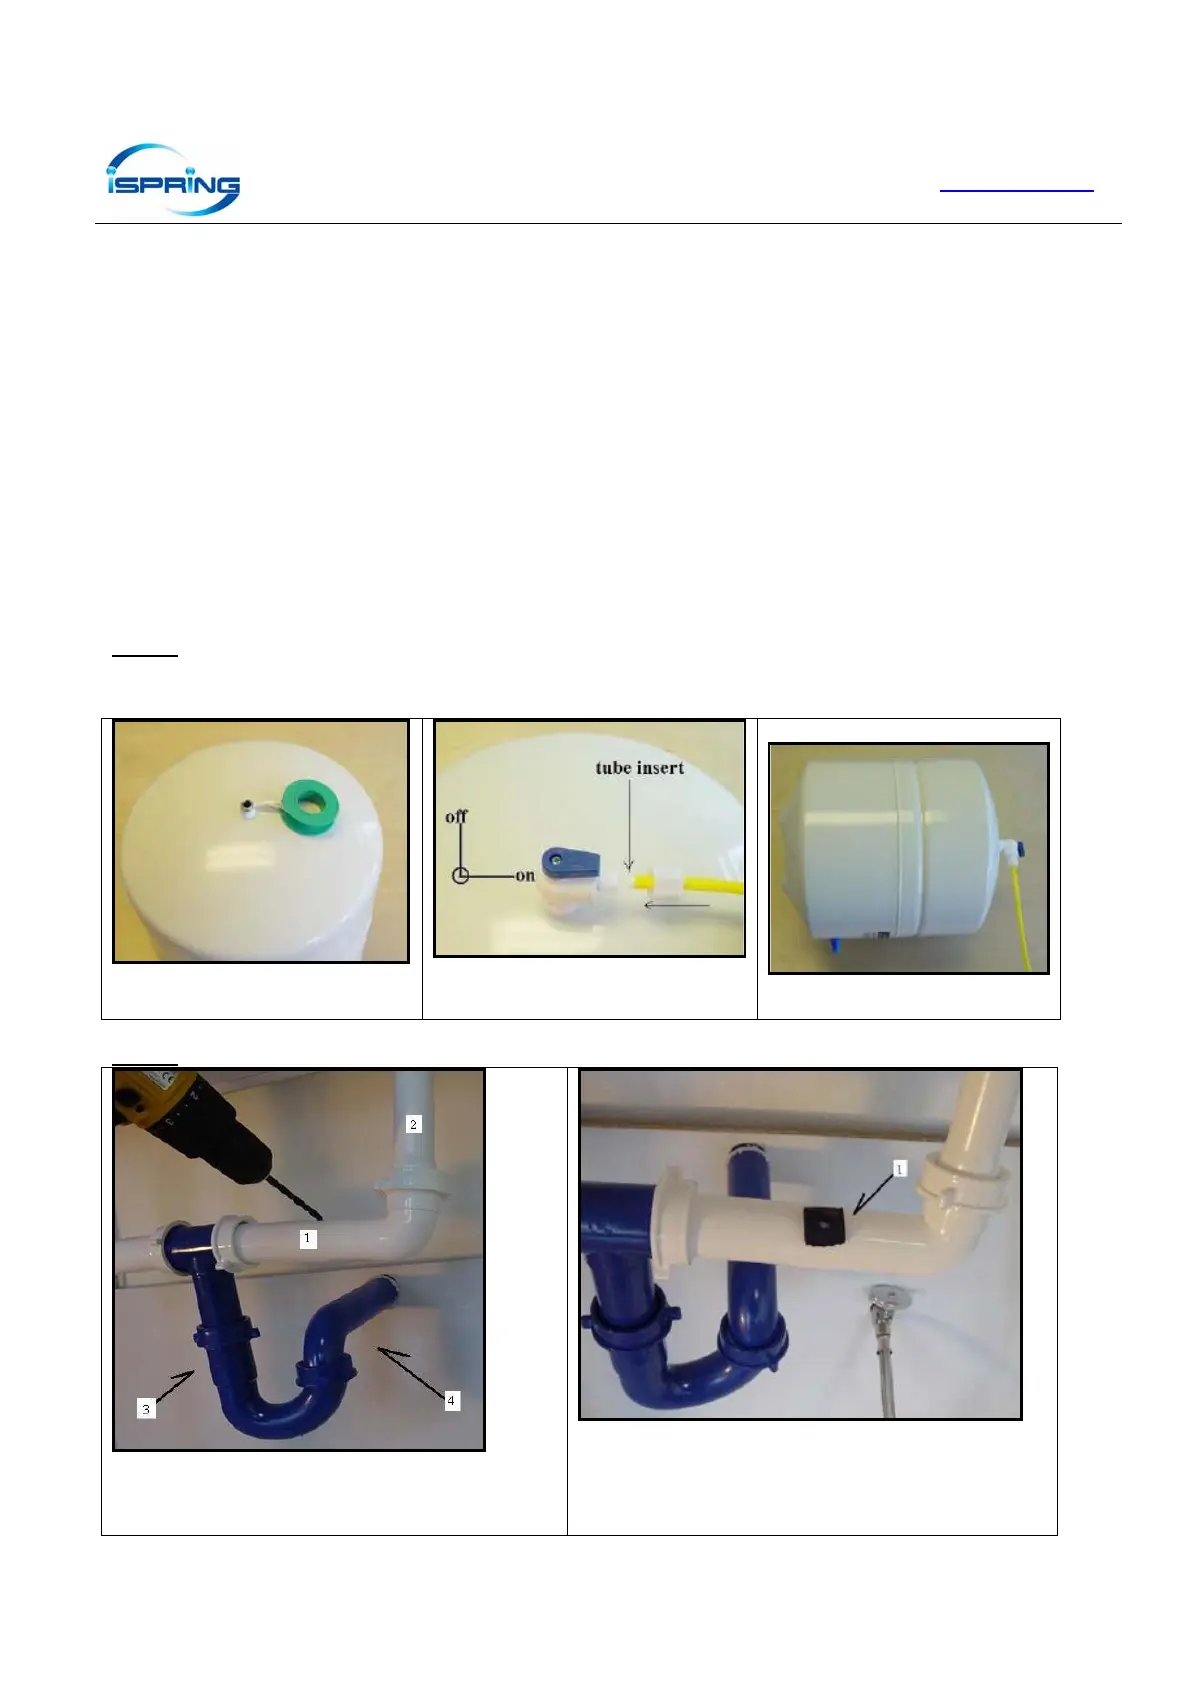
STEP 3: MOUNTING THE TANK BALL VALVE
Do not release air from the air valve on the lower side of the storage tank. It is pre-charged at 7-10 psi at the factory.
Put Teflon tape, 6 – 8 turns
Screw on ball valve hand tight, push tubing
through the nut, put tube insert, screw on the
nut
The tank can be positioned
laying down or standing upright
STEP 4
: MOUNTING THE DRAIN SADDLE VALVE (don’t put in blue area)
The drain saddle valve should fit most standard drain pipe. It
should be installed above the trap and on the horizontal pipe
(1) or vertical pipe (2).
DON’T put on position (3), (4), or blue section
Position the drain saddle in desired location, mark spot. You need to
consider available space for drain tubing.
Drill 1/ 4” hole into the drainpipe above the water line of the pipe.
Clean the surface of the pipe.
Peel off the sticky foam pad, then align the center hole around the
drilled pipe hole. Then tape it.
 Loading...