PLEASE READ THE INSTRUCTIONS CAREFULLY BEFORE IN-
STALLING.
Important
Please ensure that you thoroughly check the product upon receipt
since we cannot accept responsibility for any damage reported af-
ter installation. Should you find any damage, please immediately
notify the forwarder.
WE RECOMMEND VERIFYING THAT ALL ARRANGEMENTS
COMPLY WITH THE INSTRUCTIONS FOR PRE-INSTALLATION.
I Unpack the tub and lift it only by the edge and never by the
pipes.
I Remove the protective film and check for any defects. The
guarantee is not valid after installation in the event of
damage caused by impacts or abrasion.
I Check that the clamps holding the rubber couplings and
the air lines are tightly fastened.
I The installation of the whirlpool baths must be made on nished
(tiled) walls and oor.
Removablepanels must be provided toensure accessto the elec-
tro-mechanical parts under the tub, as well as proper ventilation
required for air-water mixture during the hydromassage.
Aeration must be guaranteed even if Jacuzzi
®
panels are
not used (see “Instruction for pre-installation). Panels
must be firmly installed and proper tools must be used
when they are removed. Openings, holes, grids, used
for aeration, should not allow the insertion of objects hav-
ing a diameter of 12 mm or larger.
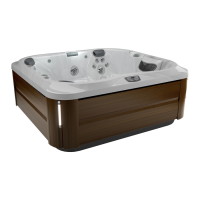
Info
The Opalia tubs and nearly all of the models in the Aura range
are provided without the panel included.
Aura Corner 140 Wood and Aura Corner 160 Wood are avail-
able with the closure panel in wood or acrylic. For Nova Cor-
ner it is available only in acrylic. All tubs are equipped with a
finishing edge frame, which may be made of wood, or marble,
granite, stone or Corian®: in the first instance the frame is as-
sembled in the factory, or the various components may be as-
sembled at the installation site (the marble frame components
are disassembled and supplied in a separate package).
PLEASE NOTE: for all Aura and Opalia models with marble
tops: the edge of the tub must rest aginst a surface that can
bear the weight of the frame.
Preliminary operations (all models)
I (
i
1) Place the tub in its location of installation. Level it and
adjust the height by manually turning the feet (A) located on
the corners of the tub.
NOTE: For tubs with frames in marble, granite stone or Corian®,
given their significant weight, we recommend adjusting the feet
before assembling the frame.
The measurements of height of the tub edge above the floor vary
based on the model.
To identify the heights, refer to the table : the measurement (H)
refers to the height of the top of the tub with no frame, whereas
(H1) indicates the total height including the frame.
To compensate for possible irregularities of the floor, the feet can
beadjustedfrom-0,5+1cm.
DO NOT TOUCH BLOCKING NUTS (G) MARKED WITH A RED
ARROW STICKER (
i
2)
I (
i
2) Mark on the floor a hole for each outer foot. One hole
is enough.
Remove the tub and drill the holes in the floor.
Inser t screw anchors (B). Adjust center feet (A1) so they rest
firmly on the floor(
i
1).
Assembling the taps and fittings
(if included)
In the accessor y kit box, which contains the various taps and
fittings, you will find the instructions for assembling them.
NOTE: assembly of the taps and fittings must be done
with the tub outside of the place of installation and before
it is fastened to the floor.
IMPORTANT! For tubs with frames in marble, granite s-
tone or Corian®, follow the instructions which feature in
the dedicated chapter in the present manual ("Variants for
models with frames in marble, granite stone or Corian®").
Plumbing connection
I Position the tub where it is to be installed and connect the
siphon to the drain with the hose.
Note: If a metallic drain pipe is used (dierent from the one
provided), remember to connect it to the grounding contact (see
“Electric Safety” section in the “WIRING DIAGRAM” manual).
I (
i
3) Before you secure t he tube to the floor fill it with wa-
ter to a level that is ~7 over the highest hydromassages, and
make sure there are no leaks. Leave it filled for at least an hour.
(IEC 60335-1/A2:2006) the pressure in the plumbing
system feeding the device must not exceed 600 kPa (6 bars).
ELECTRICAL connection
I Make the connection (see electrical diagrams) between the
electrical box and the power supply line, respecting the symbols
“L” -phase, “N” -neutral and -earth. Remove the box lid and, af-
ter making the c onnections, replace the lid car efully and tighten
the cable clamp well, in order to guarantee protection from water
splashes.
8
 Loading...