15 - Engine
18 - Engine Belt
21 - Tensioner
15 - 85 9813/2700-2 15 - 85
21 - Tensioner
Remove and Install
This procedure is applicable for machines installed
with Poly-V drive belt.
Important: The drive belt must always be replaced
every time it is removed, even if it has not reached
the scheduled hours for replacement.
Remove
1. Make the machine safe. Refer to (PIL 01-03).
2. Remove the drive belt. Refer to (PIL 15-18).
3. Remove the tensioning screw.
4. Remove the screw that secures the tightening
pulley.
5. Remove the tightening pulley.
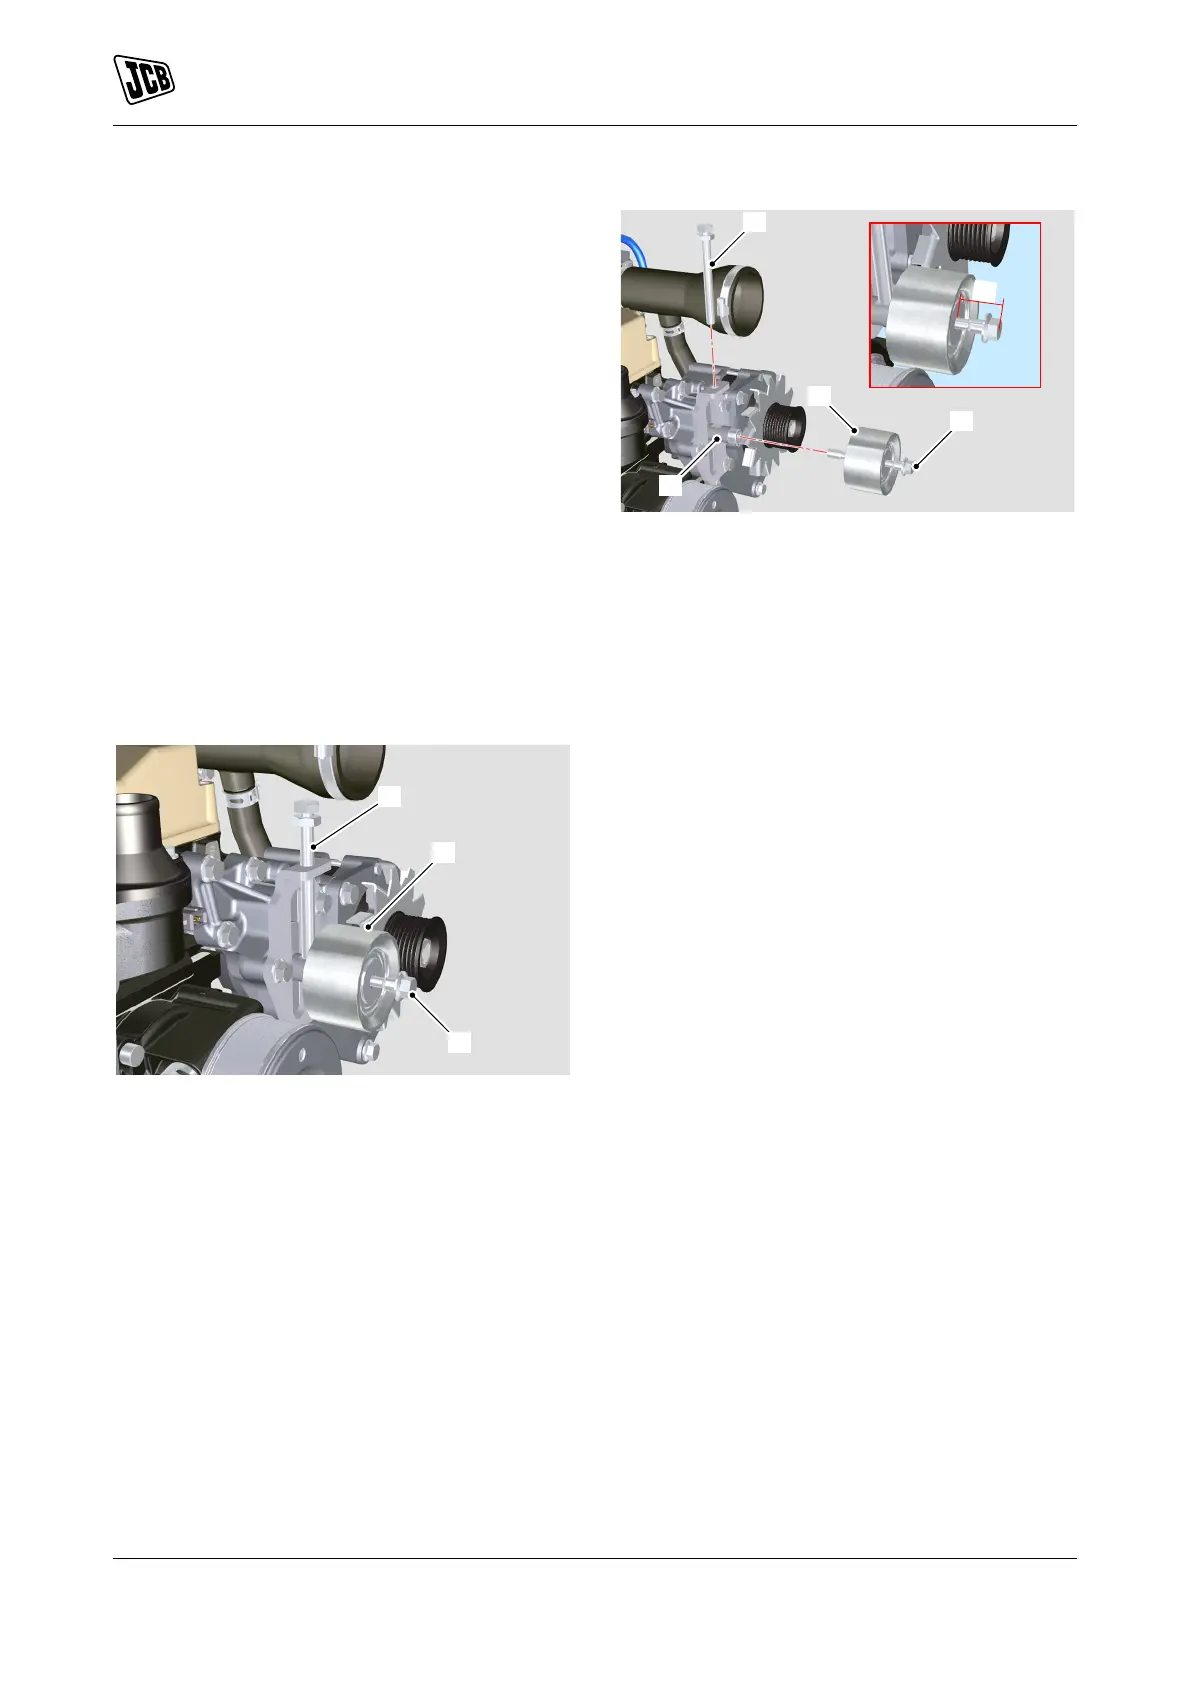
Figure 156.
A Tensioning screw
B Screw
C Tightening pulley
Install
1. Insert the screw in the tightening pulley.
2. Manually tighten the screw on to the pulley pin up
to the stop; Loosen the screw again by one turn.
3. The screw must be out by the specified distance
from the surface of the tightening pulley.
Distance: 32mm
4. Install the drive belt. Refer to (PIL 15-18).
5. Install the tightening screw on to the plate, up to
the stop on the pulley pin.
6. Tension the drive belt.
Figure 157.
A Tensioning screw
B Screw
C Tightening pulley
D Pulley pin
E 32mm

 Loading...