65R-1, 67C-1, 85Z-1, 86C-1, 90Z-1, 100C-1 13
Operation
Working with the Excavator Arm
88 9831/2900-1 88
Digging
General
WARNING Do not use pedals which are not locked in position as foot rests.
Notice: When carrying out deep digging it is advisable to have the super structure swung in line with the
chassis. It is possible that part of the dig end may contact the machine. Take extra care when digging to
avoid damaging the machine.
Notice: Do not excavate on hard or rocky ground with the boom positioned diagonally across the
undercarriage. The resulting rocking motion could cause damage to the track gearbox sprockets and tracks.
Notice: Do not use the side of the excavation to stop the bucket when slewing back into position for the
next dig. Similarly, do not use the side of the bucket to push soil into the excavation. Both these practices
will damage the machine.
It is possible when excavating, to use either full machine slew when discharging a loaded bucket, or if conditions
dictate, swinging the excavator end only to the required dumping area.
1. To start the dig, reach out with the boom and dipper and position the bucket.
2. Slowly crowd the bucket at the same time bring the dipper in. Make sure the bucket stays at the same angle
to the ground while it travels. If necessary, at the same time apply a downward pressure on the boom, to
increase the digging force on the bucket.
Figure 71.
3. When the bucket is full, crowd it fully and at the same time move the dipper out a small distance. This will
keep soil from building up under the machine.
Figure 72.
4. Slew the machine or swing the bucket to the dump area.
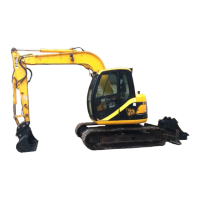
1 2 3
Enter Menu Mode Set Aux Flow Operate Machine
Adjust maximum high flow
auxiliary using the momentary
rocker switch in position 2.
Adjust maximum high flow
auxiliary using the momentary
rocker switch in position 1.
Auxiliary flows are now set to
the desired settings and are
now ready to be used.
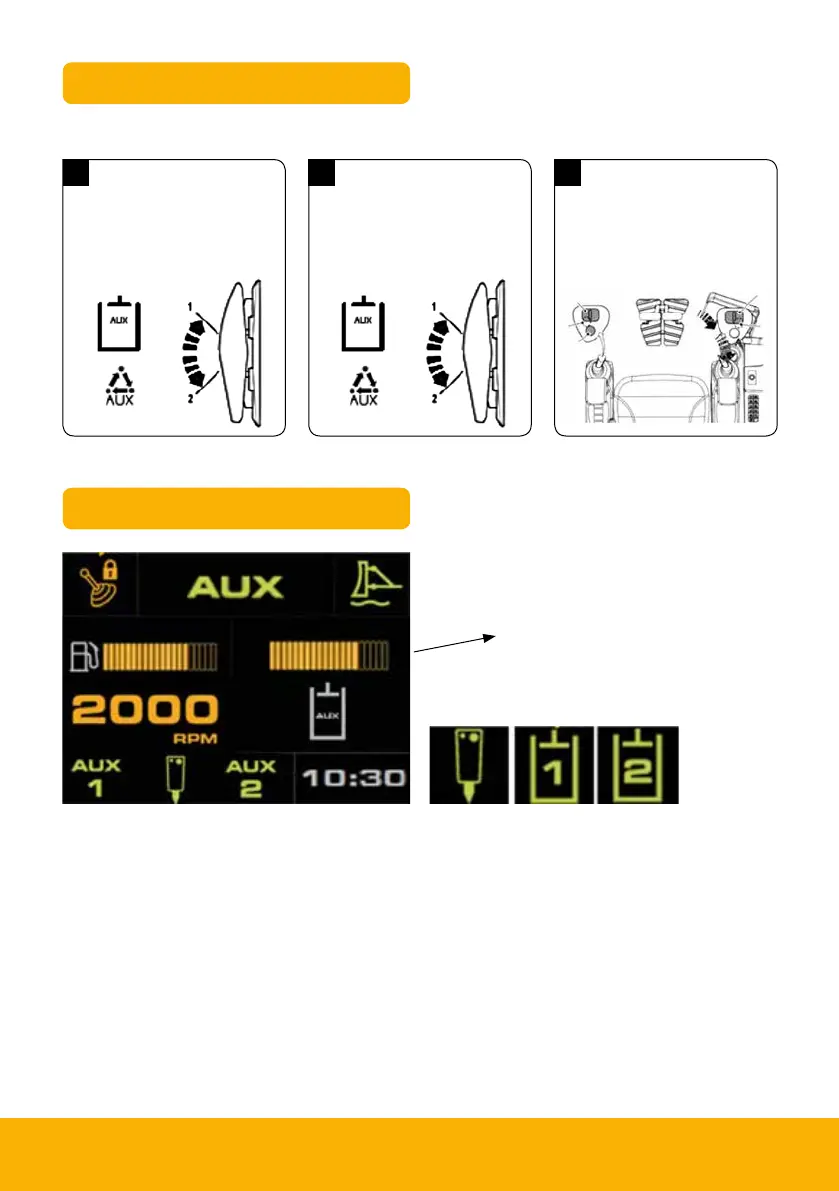
Setting Auxiliary Flows
Setting Auxiliary Flows
Flow is in bar format
from 10 -100
Hammer = Single Acting Aux 1
(1) = Double acting aux 1
(2) = Double acting aux 1
Aux 1 =
High Flow
Aux 2 =
Low Flow
 Loading...