Installation and Operation
T
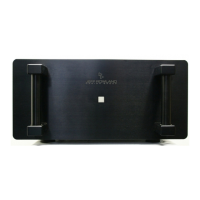
he Preamplifier is normally installed directly on top of the companion
Power Supply. Be sure to install the supplied compliant isolation interface
supports between each unit and underneath the Power Supply to avoid
damage to chassis components and provide maximum mechanical isola-
tion and decoupling from the supporting structure.
First, connect the supplied DC Power Cable (
1) between the Preamplifier
and Power Supply, as illustrated above. Then connect the AC mains to the
Power Supply using the supplied AC Power Cable. If desired, the
Preamplifier can be located up to twenty (20) inches (one half (0.5) meter)
above or below the power supply. The use of a longer DC power cable
offering greater separation distance is not recommended.
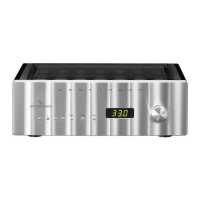
Upon initially connecting AC power, it may be necessary to press and hold
down the MODE button (
2) for five (5) seconds to initially boot-up or
reset the charge management system located within the Power Supply. In
a few seconds, the AC mode lamp will light and the Preamplifier INPUT 1
And RECORD 1 lamps will illuminate.
The Coherence Preamplifier is designed to be powered from the AC mains
which automatically initiates battery charging as necessary and is indicated
by the illumination of the AC mode lamp. However, the Preamplifier is still
powered by the internal batteries. AC mains power is disconnected from
the power supply internally whenever the BATT mode is selected using
the MODE push button. Under this operating condition, the preamplifier
operates exclusively from the internal batteries. Up to fifteen (15) hours of
operation in this mode is possible depending upon the initial state of
charge of the internal batteries.
If the Preamplifier is not used for an extended period of time and/or a
source of AC power will not be available, AC power should be removed
and the MODE push button should be pressed and held down for
approximately five seconds. A slight click will be heard. No lamps should
be illuminated. This feature allows the preamplifier to be stored or
shipped without discharging the internal batteries.
If the FULL charge lamp is illuminated, the battery capacity will range
between 50-100% of full charge. This lamp will not illuminate shortly after
the BATT mode is selected.
If the LOW charge lamp is illuminated, the battery is significantly
discharged and will automatically switch back to AC mode to commence
charging. If AC mains power is not available under these conditions, then
the Power Supply will automatically switch off, thus preventing the
batteries from becoming overly discharged.
The Power Supply is intended to operate connected to active AC mains at
all times. The charge management system only permits operation at the
voltage indicated on the rear panel. If an incorrect AC line voltage is used,
all of the Power Supply front panel lamps will flash on and off simulta-
neously approximately four times per second.
The Preamplifier is equipped with an internal pink noise generator. This
noise is intended for cable, component and loudspeaker break-in. The
noise generated is out of phase between left and right channels. A distinct
acoustic null should become apparent at a midway point between the two
speakers when utilizing this function.
To initiate the internal pink noise generator, press the upper section of the
MUTE rocker switch (
3) and then the lower section of the BYPASS rocker
switch (
4). The Preamplifier will automatically route pink noise throughout
the Preamplifier circuitry for break-in purposes. The volume control can be
used to adjust the volume of pink noise at the output jacks as desired. To
resume normal operation, simply select any LISTEN input (
5).
The Coherence Preamplifier utilizes circuit technologies which require a
much longer “break-in” period than other preamplifier designs. It is
recommended that a period of at least eight (8) days (200 hours) of
continuous operation be allowed before full sonic performance potential
can be expected.
Installation and Operation